Category Archives: Wire Work

Flying in Circles-Bead Soup Reveal


A prior post discussed bead soup and displayed photos of the lovely mixture of beads and findings that I received from Laura Demoya,  http://www.thebeadtherapist.blogspot.com/

Each of us involved in the bead soup event were given a specific date to reveal what we designed with the soup that we received. Today is my day.

clip_image004

When I received the bead soup, I was intrigued by the little purple ceramic bird shown. It made me think about the little critters that pass by my window as I work. This bird was made by Pajego Art House http://www.etsy.com/shop/PajegoArtHouse?ref=seller_info and was intended as a clasp. I decided to use it as a main embellishment in the necklace rather than as it was intended. The round pendant in the center is from White Clover Kiln http://www.etsy.com/shop/WhiteCloverKiln?ref=shop_sugg .

Before telling you more about the necklace, I’d like you to know more about the birds outside my window. The large window in my studio provides a hazard for some of the birds here at the ranch. They fly under the front porch roof and crash their little heads into the window. As my cat has grown older and become a bit slower in catching the birds from her tree perch, she has learned that if she is patient and sits on the outside window sill, a bird may crash into the window and become stunned long enough for her to capture it. I’ve tried to tell her that this is cheating, but she just doesn’t get it. It often seems to me that the birds go round and round in uneven circles as they try to figure out whether or not they can fly right into my studio.

The aforementioned tale explains the conception of the shape of the copper wire armature as well as the name of the necklace. I freeform manipulated the wire to go around as the birds sometimes do in flight.

It seemed obvious to me that the ceramic bird should be wired onto the armature. Yet, this little bird had different ideas. Each time I secured it with wire, I then held up the piece and the little bird turned upside down. I tried various wire gauges, said both nice and then harsh words to the inanimate object, but to no avail. He still hung upside down. Then I spotted the ribbon Laura sent in the soup. After I wrapped this around the back of the bird several times, he finally stayed in place. (Notice this bird became a “he” bird when I started having trouble with it.)

clip_image006

The rest of this piece needs little explanation as it was simply embellished with the beads as I wired them into place. It was a very pleasant process after I finally secured that bird right side up. The handmade chain in the back also sports bead links and a handmade clasp. The wire armature and handmade chain were dipped in Liver of Sulphur and then went for a couple of hours ride in the tumbler. At the same time, I dipped and tumbled the light gauge wire that I used for attaching the embellishments.

This was enjoyable to make and Laura afforded me the opportunity to work with ceramic pieces from another designer as well as to use crystals which I seldom work with. I used the other beads and sterling silver clasp in the other necklace shown below. The amethyst drusy focal for this piece is from Magpie Gemstones (www.magpiegemstones.com) Thanks to Lori Anderson for her grand organization of the bead soup project and for letting me participate.

clip_image008

As for flying in circles . . . I fear I do a good bit of that inside my studio and I really should slow down and relax more before I end up just as confused as some of those poor outside fliers!

Numerous other designers are revealing their bad soup pieces today. You will find their addresses at the following http://lorianderson-beadsoupblogparty.blogspot.com/2012/06/participants-of-6th-bead-soup-blog.html .

Stars


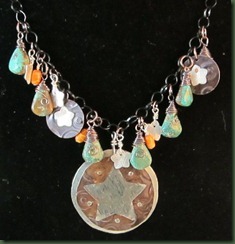
starry2

I made the pendant on the above necklace in preparation for the upcoming Cold Connections class that I’m teaching. It has a nickel silver back disk and I used a scrap book punch to cut the star hole out of a light gauge piece of copper which was dunked in liver of suphur. I riveted this to the silver. Then I got a little carried away with this star idea. I riveted a couple of other disks and wired more stars to the piece. I wanted a “Texas” Starry Starry Night. The beads are turquoise briolettes and spiney oyster barrels. The components hang from a purchased black chain.

Part of the difficulty with a piece like this is figuring out when to stop. I prepared more riveted stars and considered using more little silver components, but enough was enough! Two of those pieces are now earrings. I’m trying to learn that one consideration is designing a piece is the size of the person who will likely wear it. I wanted to wear this piece and since I’m only 5’1’’ I can’t have anything too big. This is about all the dangle my neck can handle!

This is the first time I’ve made a true “theme” piece. I supposed as a Texas necklace it might have included boots and an armadillo, but that’s just a bit too themey for me – don’t you think? Would Van Gogh be disgusted by the idea?

Why Didn’t It Work?–Variables

Have you ever been enthralled with a design in a book, magazine or online tutorial, rushed to make it and flopped? I have. I used to get disgusted and think “surely there’s something wrong with the pattern.” Yet, you know that’s probably just a personal excuse. It doesn’t help at all when a friend says she tried it and it turned out great.

When I read a tutorial, I tend to jump right in and attempt to make the piece whether I have the specified supplies or not. I’ve even failed at making something from a tutorial that I wrote. Here’s a case of that.

allb

I have a new bracelet tutorial in my etsy shop( https://www.etsy.com/listing/103694934/wire-and-beads-diamond-bracelet-tutorial) . I’ve made the bracelet time and time again and know it is correctly written. Alas, the other day, I tried it with a different size beads and flopped. I only changed one variable and, of course, it changed the dimensions on the circumference of the piece. Rather than using the 4 or 5 mm beads I suggest on the tutorial, I just grabbed a pretty gemstone and used it. Unfortunately, the pretty amethyst had a diameter of about 12mm. Using it on the bracelet caused the piece to stick out farther on my arm and made it too short. I needed to alter the bracelet wire length to accommodate for the larger beads. The bracelet below shows the correct bead size for the wire length.

diamond bracelet

This is only one example of how variables change an outcome. I might have used a different gauge of wire or different style hook and these, too, would have changed the end product.

Variables effect everything we do. Did you ever say something perfectly kind to a family member only to have that person bark back at you in an angry voice? It’s possible that the person just had an unpleasant encounter with someone else and you received the outgrowth of that situation. Perhaps that person has a headache . . . ? I’m sure it wasn’t YOUR fault.  I know it’s never MY fault . . . ha!

Driving up a hill at my normal quick speed takes a nasty change with the weather varies and the road surface is wet. I guess I should slow down.

The point here is to be aware that variable are ever in the way of perfection. Consider the variable before initiating an action. How might the variable change the outcome or product? Plan for this change.

The other more positive side of variables can result it happy happenstances. I can use a different gauge wire and sometimes the jewelry piece gets better or has a new pleasing look. In the aforementioned person to person encounter, recognizing the variable/current temperament of the person you speak to might allow you use different words or just steer clear of the person.

So, the question of “what did I do wrong” should come prior to initiating a project. Rephrasing it to ask ‘how will the change in this variable effect my outcome and how can I adjust for it?” might help us all get more pleasing results. I think I’m going to try the last question.

There’s no way to get rid of variables in jewelry making or in life. We should just expect them and know that outcomes are often altered when a variable changes.

I’m wishing you variables that result in good things.

Bracelets Galore

I’m beginning to think there are more people who like to make bracelets than there are people who like to wear them. (Let’s hope not!) I subscribe to a number of daily jewelry newsletters and you might not believe the number of bracelets that are featured each week. But then . . why not . . . bracelets are often quicker to make and require less materials . . . and, if I were to tell the truth, I’d have to admit I really like to make them too.

One of my beginner classes made bracelets the other evening and we were quite proud of ourselves. These were the traditional wire bracelets with bindings.

Bracelets1

The participants made the bracelet on the upper left corner of the photo.

Measurements for these bracelets seems to be the trickiest part. I’ve made a good number of them that didn’t quite fit my wrist correctly.

Last week, I set out to write a tutorial for the bracelet below. It looks easy doesn’t it?  Well, it was NOT easy to write.

blueb

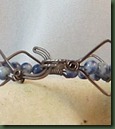
There are a number of variables in the bracelet that effect the length and you know how I hate to measure! Yet, I did measure very carefully and finally nailed this tutorial. It seems to be pretty foolproof now and the bracelet isn’t that hard to create once you know the measurements. I also fussed with the clasp on this one and finally chose my pirate’s hook that I use on the wave bracelets. This makes it easier to get on and off.

bhook

Now the trick is to quit making these for myself. I keep finding so many variations that it’s hard to move on to the next design project. Don’t be surprised if these pop up again . . . I’m resisting closure on them.

image

Quality Control vs. Perfectionism


squiggles

Some of you may have just glanced at the picture above and decided that I’ve gone too far. About all my spouse could say when I put it on was that it was still strange.

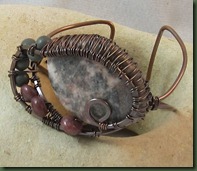
The wire armature of this piece sat on the work table for several weeks. I tried in various ways and even wired beads on  it once. I was trying to make it perfect. The first time, my wire bindings weren’t even. The second time I felt the bead placement was wrong. Finally, I looked at the piece and realized that I was trying to find the “perfect” way to embellishment it. Yet, I didn’t really know what perfect for this piece should look like.

Finally, instead of thinking about perfection, I started to think about good technique that might lead to good quality. Could I get the beads on the armature without the ugly wire ends showing? How might I balance the piece without letting the beads take over the design. Could I make good jump rings without rough edges?

You may not like the look of it, but the piece won’t fall apart or snag your clothes. Of course, this finished necklace is not perfect and I could still pick it apart, but at least I was able to accomplish those elements needed for quality.  Sometimes that’s the best I can do.

It’s Cursive

“Joined up writing” or “running writing”, aka cursive formed the basis of the idea behind the pieces shown here. I think of cursive as continuous movement and connection between alphabet letters to form words as opposed to printing wherein each letter is made separately. It works for words; so why not for wire?

I’ve always hesitated to cross wires in a piece because I like a hammered look and hammering crossed wires weakens them. With the bracelets below, I simply avoided hammering the crossing points and hammered around them. It was tricky, but turned out OK.

I enjoy making this style because it naturally flows from one end to the other and forms a sturdy bracelet. I instituted a clasp on the first bracelet shown, but felt it was not needed on the second one since is was narrower.

cursive bracelet      cursive bracelet2

This necklace evolved after I took one of the cursive bracelets to a boutique and the owner kept wanting to make it into a choker. It doesn’t have any crossed wires and technically shouldn’t be labeled cursive. I was largely concerned with filling the space of the piece with swirls that fit together. The trick on this piece was to go back and bind those curves in place so they wouldn’t change shape. This turned out to be a very comfortable, yet unique, necklace. I can usually tell if it is TOO unique the first time I wear the piece. I had this on the other night and individuals kept looking at it, but not turning away. If they turn away, I assume it’s not pleasing. (But they could just be nice people . . . ?)

cursive necklace

Next, I would like to experiment with a necklace wherein the wire forms a V in the from as opposed to this arc shape. I’ll let you know if that hatches.

Variations on a Theme


Dimensional Cuff Bracelet Tutorial       oval bracelet

If you are a frequent reader of this blog, you know that I make many analogies between jewelry design and music. This is yet another. Variations on a theme bring to mind classical music in which many of the great composers embellished their own basic motives to create numerous variations. Some contemporary musicians have also taken short snippets from classical music, varied these and employed them in new music.

Variations are also a big part of training in creative thinking wherein we ask participants to think flexibly and change an original idea. Sometimes the ideas that follow are better than the first and sometimes this exercise simply serves to reassure the thinker that they had the best idea in the first place.

The same is often true in jewelry design. I try many different versions of a “theme” or design to see whether it might be improved. Sometimes I initiate this process out of sheer boredom when I’m tired of the same design, yet it is still popular with customers. The following is an example of this.

You will likely recognize the bracelet on the left above that is a design I’ve been making for at least five years. I also sell the tutorial for it in my etsy shop and it has also been popular there. (Thank you customers!) https://www.etsy.com/listing/91729421/dimensional-cuff-bracelet-tutorial

When a boutique customer called to she needed more of the same, I realized it was probably time for another variation on this design. I’ve made it with square and rectangular faces in the past, but wanted something new. After experimentation with shapes, I created the bracelet shown on the above right – a variation on the theme. I plan to make this one again using more colorful gemstones that will show up better against the weaving.

Another popular bracelet, the wave, that initiated so long ago that I can’t locate a photo, also needed revamping. I changed the initial bracelet shape to triangles as shown below.

wave tri

Finally, still considering the wave bracelet theme, I made a new “cursive” bracelet that proved to be a bit tricky. This one required plenty of wraps to help the 14 gauge wire hold its shape. I think this one holds further possibilities.

cursive bracelet

This was an interesting and somewhat challenging exercise and I continue to think “what if” regarding variation possibilities. But for now, I think I’ll just go play some classical music on the piano with a score that someone else wrote.

Pass It On . . . and On . . . and On

It’s not a surprise to anyone who knows me that I like to teach. I tend to grab most any “teachable moment” whether you want me to or not. With adults, I try to curb my appetite for devouring those moments, but little children need to beware!

I’ve truly enjoyed the two jewelry classes that I taught last week, one in Wimberley, TX and the other in San Marcos. I worked with seven women as they learned to make a wrap bracelet in Wimberley and then four more who worked on wrapping cabachons. I enjoyed hearing from the first group about who some of them planned to pass their bracelet to as a gift. I regret not getting a photo of that group, but note the happy intensity on the faces of the second.

cabs girls

It’s common for someone to ask a designer ideas come from. I have no doubt that many of mine come during preparation for teaching. I think that is why it takes me so long to get ready to teach a class. There’s something about this pre-planning that gets my creative juices flowing. I used to fight this urge, trying to stay on task, but now I just go with it. I do, however, have to resist my propensity to want to teach the new idea instead of that which was designated for the class. I just keep wanting to pass it on.

As an example, a couple of gals came over for a little assistance in starting their journey into soldering with a torch. They hardly got off the ranch before I was cutting and planning the piece below. Yes, I know it’s a bit bird-like, but it wasn’t planned that way – oh well, it’s definitely different!

bird

I’ve also done a new soldered design that someone on Facebook suggested is Bohemian. The legs on this piece are soldered to the bottom half of the arc and then wire wrapped. I was tickled that the very first sale of this went to my good friend who often calls and says “is the Dreamcatcher Designs shop open?”  (Of course you know I don’t have a shop!) Sometimes she just runs out to the ranch and gets what she needs. This piece was gifted from her to a co-friend of ours and I’m pleased for her to have it. Do you think you can wear “Bohemian” at the Lutheran Church?

           sue

As you read, many things, both concrete and ideational, were passed on last week. From teacher to student, student to teach and friend to friend. I think life was very productive.

A Season to Remember

It often seems that Easter is the “lessor” of the two main Christian seasons. This is largely because merchants spend months reminding us that Christmas is coming and we’d better get out and make those great sales. There is less “hoopla” surrounding Easter; yet it’s just as important in Christian heritage.

I like Easter! It reminds me of standing in my little short white choir robe with the big bow at the neck waiting in the wings of the sanctuary for our turn to advance down the isle and sing. I can still smell the starch in that bow and feel the pinch on my toes in my new Easter shoes. My Mom usually led the children’s group and then waited for us to arrange our wiggly selves while she adjusted her music at the piano. We were advised to smile and sing or vice versa and I could never quite do both at once. I just remember be glad to get that itchy robe off!

We usually ate deviled eggs and ham for our Easter dinner. When I got a bit older, I made cake with icing, green colored coconut and jelly bean decorations. Much later, I became the one at the piano for my own little choir.

Now, I enjoy singing with my grandson and making crosses for the Easter season. I know these aren’t just for Easter, but it is a fitting time to create them and remember their meaning. I’ve been preparing crosses for a class I’m teaching in San Antonio. You’ve seen these photos before.

scroll cross

I wanted to try some other styles and have a couple of new designs.

crosses

The first is simply multiple pieces of wire wrapped to hold together. I found this to be tricky, but liked the result. The cross on the right is made from the same soldered base cross design as the filigree crosses, but features weaving and the use of bead embellishment without the filigree piece. It has a small copper disc on the back, like the filigree crosses, which covers the wrapping that secures the beads.

I’m hoping to spend more time “near the cross” in the weeks before Easter and will show you if anything else “hatches” on the design table.

Imitating Nature

How many times have you read that an artist gets inspiration from nature? If you aren’t “into” art, you’re laughing and saying “NEVER!” Yet if art and the process of making it does interest you, you’re probably thinking you’ve read or heard this many times. Whether it’s painting, sewing, making jewelry or most any other art form, the influence of nature is apparent.

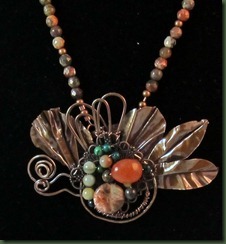
One of my favorite boutique customers requested some new collage style necklaces on leather. I had fun making this type for her last Fall and it was time to add a Spring twist to things. Nature led the way for the two below.

The first piece features a dragonfly and a couple of lilies. My spouse assured me the lilies were upside down, but I hung them anyway. (Maybe they are lilies that didn’t get enough water and are hanging their heads down . . . ) I put these on a simple small S type link and then attached the leather through jump rings.

liliesThe second necklace features a smaller dragonfly, a couple of bead dangles and a pea pod. The chain allows them to have a nice little swing.   This piece has an interesting swirl bail at the top – one I don’t imagine I know how to make again. I think I have to be watching TV while I do it unconsciously!  My friend, Shannon, of Vixens Natural Jewelry showed me how to made the pea pods. I also used her design to make some earrings.  You will most certainly see the influence of nature in her work. You can check out her shop at    http://www.facebook.com/#!/TreeandMoonJewelry?sk=app_169505045786

   pea pod necklace

pea pod earringsI made a third necklace, but it hasn’t quite taken off yet. I created a little wire bird and hung her with a bird’s nest and a cage. I was calling it freedom. Unfortunately, the cage seemed out of place; so that one is back on the workbench for further consideration.  Perhaps it will fly before long.

It’s a great day in Central Texas to be out with nature; so I think I’ll get out of the studio for a while and go study outside. Do you think I can call that work?