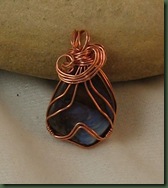
Category Archives: soldering

A Tale of Two Prongs

The last two jewelry making classes that I’ve taught involved working on various types of prong settings. Although I don’t have any more of these scheduled, I’m still intrigued by the unique possibilities that soldered prongs present for jewelry construction.

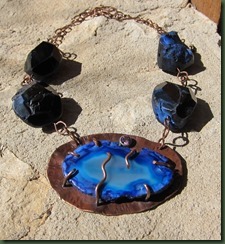
I think the blue agate piece below might be called “snakes” except that might not be a very appealing title for a customer. I wanted to add a tube setting to this piece and used a 6mm lab grown amethyst. It seems to help bring out the color in the agate.

blue1

There’s always considerable problem solving in jewelry construction even when you’ve made the best of plans. I share my mistakes as a pat on the back for those of you who don’t make them (anyone out there???) as well as encouragement for the rest of us. My mantra seems to be “where there’s a will, there’s a way”. After the entire pendant was complete – soldered, filed, sanded, formed, patinated, etc. – I carefully set the stone and positioned the prongs over it. So far so good. Then I placed the amethyst in the tube bezel and used my new bezel setter to secure it . . . beautiful. But then . . . plop. . . out came the stone. Not to be dismayed, I tried again and again and then . . . I realized that I had soldered the tube bezel onto the back plate upside down! I knew I should start again, remove the agate and go back to the torch station.; but I didn’t. I recently read that a renowned jewelry maker/teacher uses glue in certain situations. THIS was my situation. I got that little E-6000 tube out of the drawer, glued that little stone in the tube bezel and if I hadn’t fessed up, you might never have known.

blue2

The second prong setting is a green agate. I cut a piece of 22g copper sheet to create the partial bezel and then used a two-legged prong setting at the top. In essence, the bezel simply keep the stone from sliding out the bottom. The prong provides tension from the top and holds the piece against the back plate. I also used a little bit of that E-6000 on the back of the stone so I would feel better. The bezel is a bit of copper tubing soldered on the front and I embellished the pieces by wiring some small glass beads to the prong. By the way, twice I filed and sanded the back of the piece too closely where the prongs come through and had to re-solder them. Oh well, it gave me good practice!

green1   green2

Did I learn anything? I found that self deprecation when something doesn’t go right doesn’t help me in making jewelry. When a prong failed to solder properly, I just said “oh great, now I get to go back down the stairs to the torch room.” (More exercise and more practice can’t be all bad!) Now, if something doesn’t give me a problem, I’m suspicious. Could attitude be 9/10s of the work ethic?

For my soldering students, keep smiling and torch on.
Revisiting a Friend

Recently, I rediscovered an old friend – a metal necklace that was popular before I moved on to other things. One of my boutique customers suggested that she could use another of the disc necklaces shown below and I revisited the design for her. Of course, I couldn’t just make it like the original and enjoyed exploring different texturing techniques for the discs.

disc2

I couldn’t just stop at “same old, same old;” so I explored alternative shapes and finally chose the rectangular shape, also in graduated sizes. I layered smaller rectangles on top of the first group and then balled some sterling silver for embellishment. I like the way this piece lays on the neck when worn.

metal1

Finally, I went a bit overboard with the mixed metals and started dapping and dimpling various circles before also layering them. These are soldered onto a piece of copper tubing that I annealed and hammered. I found this piece much more difficult to make than the first two necklaces. It was next to impossible to clean the layered/soldered/dapped discs and in soldering one part of the necklace, a silver disc decided to partially melt. Hmm . . . Then I had to go back and melt part of another one in order for this artistic flaw to appear planned. Shush – don’t tell anyone!

circles

I want to experiment with some other shapes as well, but am aware that shapes with severe angles, such as diamonds, may not conform as well in multiples. Currently, I considering some free-form shaped ovals and hoping they won’t just look like funny little ghosts. Do you have any shape ideas?

You just never know what might hatch in this studio.

Joining


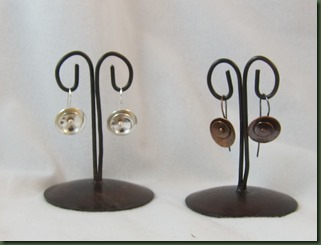
earrings2

I’m not a joiner. I don’t do clubs and only belong to one “society”. Yet, I think that once in a while we all need to join. I join my family for lots of gatherings and even plan a “join” now and then. I also enjoy “joining” with friends who share a common interest or endeavor.

I think it’s the rules that usually come with clubs and societies that bother me. I also find that as these groups plan events there are often conflicting opinions of how to do or run things leading to hurt feelings and sour faces. I guess that’s why I enjoy the “Faux” bead group that I meet with monthly (no dues, no officers, no minutes, no bylaws . . . get the picture?) This enables to group to be dynamic and continually bending towards the needs of those who are participating at the time. I wrote a brief description of this group  http://www.magpiegemstones.com/san_marcos_faux_bead_society.html  

earrings1

I guess I’m thinking about “joining” because I’ve been working on joins with my jewelry designs this week. Perhaps it’s a stretch, but I keep running into parallels between the two types of “joining”. Just as groups have rules and procedures, soldering has them too and when I don’t follow them, the join usually doesn’t work. I guess there really is a need for them. This week, it seems that each time I tried to skip things in the soldering process, I failed and had to return to the rules.

I did, however, realize that at times, when I’m trying to create something new and different, I must come up with my own rules and procedures. Often what I’m doing doesn’t exactly follow the guidelines for soldering and I just have to figure it out. In other words, this process is also dynamic and that’s what makes it intriguing.

My thought is that both types of “joining” require flexibility and problem solving. Just as I have to step away from the soldering at times in order to get a fresh perspective, I think I often need to step away from groups that cause consternation. But then, if I enjoy the metalsmith “join” perhaps I should try a bit more of joining with a group. What do you think? . . . (no, I think I’ll just keep soldering – ha!)

Sharing Hearts

It isn’t even February, yet, I’m making heart shaped pendants. It just seems like the thing to do! I prepared the two in the photo because I wanted to experiment with making bails for an upcoming meetup of designers.

hearts

The bail for the heart on the left is made from a small piece of copper sheet soldered on the back. The one on the right utilizes a bail made from wire, also soldered on the back. My grandson told me that this heart has heartworms! Hmm, I really didn’t see it that way, but I’m not three years old. I used my new leather sand bag as a base for creating the doming effect on both pieces. I dimpled them with dimple pliers. By the way, thanks to a talented friend, I was able to saw the heart shape from the middle of each piece. Thanks Adele!

Following is another photo of a heart pendant made for the same meetup. I torch enameled the copper rectangle and riveted the heart, cut out of the center of a piece shown above, to the metal. I used a tube rivet which gives it some dimension. The back shows the small piece of tube I soldered to the metal for a bail.

heartfront  tube bezel

The photo below doesn’t seem to fit with this blog entry . . . yet, it is the essence of “heart”. It was commissioned by one adult sister for another in remembrance of their girlhood when they watched the cardinals together. I’ve shared this previously online, but wanted to repeat. Wouldn’t you say the giving sister was “sharing heart”?

cardinal complete

As Valentine’s Day approaches, I hope that commercialism doesn’t remove the heart from the giving. It often seems that men, in particular, are harassed by the advertisements to a point where they feel they must spend a good deal of money for their sweeties. I hope the men I know will understand that this woman just wants a little “heart” in one form or another.

Fishing for Ideas

If you’ve ever worked with preschoolers, I’ll bet you’ve enjoyed magnet fishing. You put a paper clip on the ends of paper fish and a magnet on the end of a homemade, kid-sized fishing pole and then “attract” fish. My grandson likes to put his fish in a bucket and use it as a fishing pond. We’ve been playing this for over a year and it doesn’t seem to get old.

G fishin

Many times, I end up “fishin” too, but it’s usually not in a bucket. It’s usually in my head when I’m fishing for ideas. I may be looking for something new and different to add to a design or for some way to solve a problem. This week it was the latter.

I’ve been stuck on making birds lately and have explored how to do it with embossing and torch enameling.

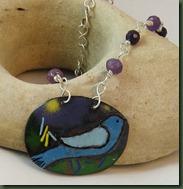
torch bird

After making a couple of these, I realized that the two don’t mix real well. For embossing, we need a light gauge metal and for torch enamel a heavier metal. When I use the gauge I need for embossing and then enamel the piece, it curves a bit toward the back. Yesterday, while fishing for ideas, I tried riveting another piece of metal to the embossed one and then enameling. It was NOT a good idea. Much of the heat was lost between the layers and I completed a very rough and ugly bird. No, you cannot see it because it’s in the trash. So, I guess I’m going to need to get my idea fishing pole out and try again.

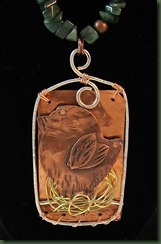
I did, however, have one bird that turned out well. He/she is a sample piece that combines elements from several of the classes I teach, soldering, riveting, wire wrapping, forging, etc. Although you can’t tell from the photo, I used tube rivets to help the bird stand about 1/4 inch away from the back plate. The bird is mixed metal including copper sheet, 1/10 silver wire and brass wire for the nest. Today’s issue is how to make it smaller.

birdie

I asked my spouse if he thought I needed eggs in the bird’s nest, but he didn’t think so. We decided that bird was just too young to mate. After all it did just hatch at Dreamcatcher Designs.

Here’s hoping you catch whatever you are fishing for.

Pass It On . . . and On . . . and On

It’s not a surprise to anyone who knows me that I like to teach. I tend to grab most any “teachable moment” whether you want me to or not. With adults, I try to curb my appetite for devouring those moments, but little children need to beware!

I’ve truly enjoyed the two jewelry classes that I taught last week, one in Wimberley, TX and the other in San Marcos. I worked with seven women as they learned to make a wrap bracelet in Wimberley and then four more who worked on wrapping cabachons. I enjoyed hearing from the first group about who some of them planned to pass their bracelet to as a gift. I regret not getting a photo of that group, but note the happy intensity on the faces of the second.

cabs girls

It’s common for someone to ask a designer ideas come from. I have no doubt that many of mine come during preparation for teaching. I think that is why it takes me so long to get ready to teach a class. There’s something about this pre-planning that gets my creative juices flowing. I used to fight this urge, trying to stay on task, but now I just go with it. I do, however, have to resist my propensity to want to teach the new idea instead of that which was designated for the class. I just keep wanting to pass it on.

As an example, a couple of gals came over for a little assistance in starting their journey into soldering with a torch. They hardly got off the ranch before I was cutting and planning the piece below. Yes, I know it’s a bit bird-like, but it wasn’t planned that way – oh well, it’s definitely different!

bird

I’ve also done a new soldered design that someone on Facebook suggested is Bohemian. The legs on this piece are soldered to the bottom half of the arc and then wire wrapped. I was tickled that the very first sale of this went to my good friend who often calls and says “is the Dreamcatcher Designs shop open?”  (Of course you know I don’t have a shop!) Sometimes she just runs out to the ranch and gets what she needs. This piece was gifted from her to a co-friend of ours and I’m pleased for her to have it. Do you think you can wear “Bohemian” at the Lutheran Church?

           sue

As you read, many things, both concrete and ideational, were passed on last week. From teacher to student, student to teach and friend to friend. I think life was very productive.

‘Twas Two Days Before Christmas . . .

. . . and all through the town . . .

Today I happily set out with a small group of errands to run, none of which would be life or season threatening if not accomplished. It’s a very cold day here in Central Texas and I was sure that shoppers would don the Christmas spirit along with their jackets today.

People were actually quite cheery at my first stop; but then I was just finishing up a previously ordered large purchase and they were feeling good about it. The “spirit” of people at my next stop wasn’t quite the same. There were lots of shoppers at Penney’s and they were NOT all smiling. I felt sorry for the little children there who were either being pushed in a store cart or ushered by hand around the building. I was hopeful of finding a smiling child and eventually spotted two. Their dad had them in a double stroller and was tilting it as he tried to convince the little guys that they were flying. I hope the mom, who was shopping nearby, appreciated the delightful squeals of her children.

I also saw a large fellow standing very still as he looked at the women’s slippers hanging on the wall. He just stood there; so I just watched. Finally he removed a carefully folded list from his coat pocket. He put it back and continued to just stand there. Perhaps I should have offered to help, but, knowing that advise sometimes adds more confusion, I just moved on.

Many of the people in the store just looked confused. It’s that time of the season when you can no longer put off choosing what to get for Aunt Margaret or Uncle Harry. I noted that some people look downright angry when they are forced into last minute decisions.

A pair of women, having trouble making a choice, eventually grabbed a garment and determined they could take the one they already purchased back. I think there will be many returns after Christmas and I’m really glad that doesn’t usually happen with the jewelry I sell.

I traveled on to Walmart and kept watching for smiling Christmas shoppers. Several times I observed older couples and thought one or the other of them was smiling. Then I realized that when you’ve lost several teeth, your lips take on a different shape that can look like a smile. (Actually, some looked like frowns.) I hope when my teeth fall out I’m left smiling.

Although I had planned some other stops, I came home right after Walmart. I had collected all the smile data I needed for the day and concluded that the facial expressions I sought just weren’t very abundant. At home, I put the Christmas music on, gave the animals extra treats and put on my own smile. I plan to keep it on my face for many days. This is more important than what I’m giving people. My family may not remember what I gave them for Christmas, but they will probably remember my disposition!

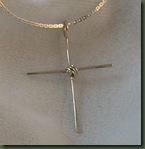
One of the gifts I made best depicts the source of my feelings for the season.

peggy I just need to realize how happiness comes from that which touches my heart and let the cross remind me of the source of the true Christmas spirit. I hope this also puts a smile on your face.

Laughter and Productivity

Most of us know that laughter is an excellent way to prepare for creative thinking. The research certainly backs this up and I can attest to it. When I worked with the Creativity Division of the National Association for Gifted Children, it seemed the other divisions tried to avoid our proximity during our meetings. We were probably the loudest and most fun group in the building. Most years, the division meetings were all held at the same time and in various parts of the same large room. The Creativity Division could clear out the entire room when we met. While many probably thought we were just goof offs, we were one of the most productive divisions in the association. Our spontaneous eruptions usually led to a new idea that proved beneficial.

Lately, I’ve seemed to be in need of some of the Division’s spontaneity. At this point in December, I’m feeling a bit spent and my productivity has waned. It’s obvious to me that creativity and productivity are inextricably linked for me. If I’m not producing, I’m not problem solving and therefore am not being creative.

Yesterday, I got a little help with this problem from a friend . . . my mother. When I arrived at the nursing home to visit her, she informed me that it was about time I got there. She had on one earring and was trying to get the other stud on. I couldn’t help but wonder how long she had been at it. We laughed when she was finally “fixed”.

Then I asked her what she wanted for Christmas. Without missing a beat she said, “my TWO FRONT TEETH” and flashed me a big toothless grin. Indeed, her two front teeth are missing and she does need a couple! Again, we laughed and laughed. I think it was her spontaneity as well as her answer that got me. We went shopping together and then grabbed some lunch, but I just kept thinking about her Christmas wish.

This little episode reminded me of last year when we asked her where she was when she and my father got married. Again, without missing a beat, she said, “Out of My MIND!” The woman, who will be 91 in January, is quite clever.

When I got home yesterday, I continued to chuckle and decided to try a bit or jewelry work. That’s when things began to flow nicely and the ideas became present again. Was it just time to design or did the laughter really help. I vote that it was the latter.

I mainly worked with cabochons yesterday, but was pleased with a couple of the new wrappings and the bezel I created.  The first stone is a boulder opal and all the rest are turquoise (yes, even the brown one). See what you think.

boulder                     brown turq

turqsI’m hoping to hang on to this productive thinking and continue to get some good work completed. I’m a believer that for me, at least, laughter leads to productivity and creative thinking.

I guess that the moral of this entry is . . . find something to laugh about and if you can’t find anything, go visit my mother!

Cross

It’s that time of the year when many people begin to gear up for the holidays. For designers, that often means art/craft show after show after show. We speculate by buying materials and creating our products and then hope that we’ve designed things that people will want. It often seems like design roulette. The time and monetary investment in the products can weigh us down, but could it also make us cross?

I hope the season is remaining pleasant for you as it is for me. This year, instead of being cross, I chose to make a cross. One cross led to another and I am beginning to think I should just start a cross store. See what you think. Below are just a very few of those I’ve made.

crosses lots

The plain wire crosses are the easiest to make being composed of two pieces of 14 gauge wire soldered and then wire wrapped in the middle. These are then patinated and textured to provide the look of wood.

The flower-like wire crosses are a little more challenging. I eyeball the shape and occasionally create one that’s not as symmetrical as I would like. Yes, I know that I could use a jig and make them perfect, but that wouldn’t be me. Although you can’t see it very well in this photo the fold formed leaf at the top shares a jump ring with one of this style crosses.

The embellished cross required some problem solving before hatching. I saw a pendant in a magazine that was made by attaching beads to a filigree with wire. I tried this and liked the look except for the back shown below.

filigree backThis was one big mess! As I pondered how to cover the mess, I, of course, thought about making it into a cross. First I soldered a wire cross onto a sheet metal disc.

cross back 

Rather than overlapping the wires for the cross, I cut the side pieces and placed them beside the vertical wire. This made the cross a bit flatter. Finally, I wired the decorative filigree to the wire of the cross and finished the piece.


 cross done


I made a smaller cross, not pictured, by whittling down the filigree piece. This removed the lovely outer curves and I didn’t like it as well.

Finally, I created a scroll type cross using double wires rather than single.

scroll cross


Customers at my last show seemed to enjoy selecting a cross and then choosing either chain or leather to go with it. They also had a choice of selecting a sterling silver cross. I’ve made these in various sizes.

silver


Now it seems that every time I contemplate a new design, I can see the product made as a cross. Yet, I guess this is better than being CROSS! (I think I just heard a loud “Amen” from the other room.)

A Touch of Silver

I’m trying to get braver about the wire and metals I’m using. While copper is my mainstay, a few of my artist friends seem to be pulling me more into silver. I’m not easy to pull! In fact, if you asked them, I feel certain the word “stubborn” would be used to describe my lack of action. Lately, however, a few of the boutiques I serve have asked “can you do that in silver?” My quick response to the owners is usually, “I can try.” The silver has turned out to be a reasonably easy alternative for the designs and the pain of what I paid for the wire and sheet metal is eased when the silver jewelry sells relatively quickly.

I’ve tried to approach the use of silver as I learned to do in my Creative Problem Solving workshops by first stating a question. In what ways might I use sterling silver wire and sheet metal to create pleasing designs that are still affordable? There are a number of criteria inherent in that question including using as little material as possible while still producing a good design. The criteria create nice parameters within which to work. If I develop an idea that doesn’t fit the criteria, then I stop and revise it or throw it out. So far things are working reasonably well within this plan.

The pieces in the photos below show several new silver pieces that all required a little soldering. All of these were small enough that the cost was low and they stayed within the parameters for my problem solving. The earrings might have stayed in place without solder, but I wanted the waves in each direction to remain touching. They were bit tricky to solder.

silverear  

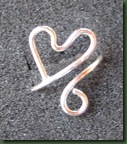
Rings seemed an appropriate project since they don’t require much wire. The original ring with the heart was designed by my friend at Sherry’s Jewels http://Sherrys-Jewels.com. I made a variation that is adjustable and added a little solder to connect the loose end of the heart to the band.

heart


The next ring design, shown with two variations is composed of four wires, each of which I soldered into a circle before placing them together. Each wire is about 1/2 inch shorter in length than the wire outside it. I then fitted each circle of wire inside the other and soldered in appropriate places. This one is adjustable as well. The one on the right is an overlapping version while both ends of the rings are meant to show on the left one.

rings

I used some left over wire to make the wire ring for the leaf necklace. The ring was soldered and then shaped and textured. The leaf is made from the foldforming technique mentioned in a previous post.

leaf


I consider this type necklace a collage since the dangles are an eclectic collection or things. This one also features a copper wire dragonfly and hangs from leather.

I have found that silver wire handles a little differently than copper and due to its lower melting point I have to be more careful with the torch. Yet, I think practice will work these things out and soon I’ll be braver about the size and cost of what I’m making.

Speaking of silver . . . I regret to inform you that I found a tiny bit in my hair the other day. I’m fortunate to not yet have to color away any gray and found that little silver on the side snipped right away with the scissors. If you see me out and about one day and note a small bald spot on my head, you’ll understand what happened.