Category Archives: Torch Work

Do You Vary?

I do!

Vary  “. . . To make or cause changes in the characteristics or attributes of; modify or alter “ www.answers.com/topic/vary

A few months ago, I told you that I was fortunate to have one of my bracelet designs on the cover of Step by Step Wire Jewelry magazine.

cover

This week, I’m guiding some of my friends as they make this bracelet at our Faux meetup. I always practice before I teach/lead and this time I decided to “VARY” the bracelet. This is one of my favorite things to do with designs as I employ various creative thinking techniques to change things without completely losing the character of the original designs.  Below is my practice piece which is varied through magnification (enlarging) and combining (adding the beads to the metal strip in unique positions).

brac1

I torch enameled and then sealed a piece of 26g copper sheet before cutting the shape for the bracelet. Then I wove 26g wire over 14g wire and through holes in the metal on both sides. I added the turquoise rounds within the weaving to vary the technique.

This change has initiated more consideration of other possibilities and ways to vary this design.

Yes, I do vary - - - because the opposite would be to “conform” and that’s just not my style!

A Tale of Two Prongs

The last two jewelry making classes that I’ve taught involved working on various types of prong settings. Although I don’t have any more of these scheduled, I’m still intrigued by the unique possibilities that soldered prongs present for jewelry construction.

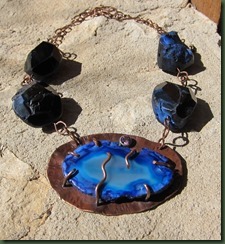
I think the blue agate piece below might be called “snakes” except that might not be a very appealing title for a customer. I wanted to add a tube setting to this piece and used a 6mm lab grown amethyst. It seems to help bring out the color in the agate.

blue1

There’s always considerable problem solving in jewelry construction even when you’ve made the best of plans. I share my mistakes as a pat on the back for those of you who don’t make them (anyone out there???) as well as encouragement for the rest of us. My mantra seems to be “where there’s a will, there’s a way”. After the entire pendant was complete – soldered, filed, sanded, formed, patinated, etc. – I carefully set the stone and positioned the prongs over it. So far so good. Then I placed the amethyst in the tube bezel and used my new bezel setter to secure it . . . beautiful. But then . . . plop. . . out came the stone. Not to be dismayed, I tried again and again and then . . . I realized that I had soldered the tube bezel onto the back plate upside down! I knew I should start again, remove the agate and go back to the torch station.; but I didn’t. I recently read that a renowned jewelry maker/teacher uses glue in certain situations. THIS was my situation. I got that little E-6000 tube out of the drawer, glued that little stone in the tube bezel and if I hadn’t fessed up, you might never have known.

blue2

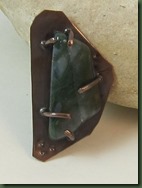
The second prong setting is a green agate. I cut a piece of 22g copper sheet to create the partial bezel and then used a two-legged prong setting at the top. In essence, the bezel simply keep the stone from sliding out the bottom. The prong provides tension from the top and holds the piece against the back plate. I also used a little bit of that E-6000 on the back of the stone so I would feel better. The bezel is a bit of copper tubing soldered on the front and I embellished the pieces by wiring some small glass beads to the prong. By the way, twice I filed and sanded the back of the piece too closely where the prongs come through and had to re-solder them. Oh well, it gave me good practice!

green1   green2

Did I learn anything? I found that self deprecation when something doesn’t go right doesn’t help me in making jewelry. When a prong failed to solder properly, I just said “oh great, now I get to go back down the stairs to the torch room.” (More exercise and more practice can’t be all bad!) Now, if something doesn’t give me a problem, I’m suspicious. Could attitude be 9/10s of the work ethic?

For my soldering students, keep smiling and torch on.

More Fluttering

While the last entry about memories that flit by was quite figural, today I’m thinking of fluttering in a different way. There are things that flutter too.

I’m ready for the fluttering of Spring when the birds and butterflies show their colors and the weather is warmer. I want to see them out my studio window and feel this would help me get in a better humor for creating the Spring jewelry designs. Yet, one has to get started; so I did.

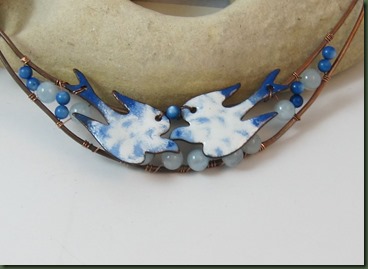
The first photo shows two doves that I torch enameled with multiple layers of blues and white. The bottoms of the doves rest on round beads giving them to illusion of being in flight. The copper wire armature joins with a handmade chain to go around the neck.

doves

I also torch enameled this second piece. It is cloisonné and I used sterling silver wire to mimic the markings of the butterfly wings. Then I wet packed various colors of enamel. It takes many layers and firings to build the enamel up to the top of the sterling wire and the wet packed enamel must dry each time before firing. I had to learn to be patient on this one.  Once complete, I smoothed the surface with an alumdun stone and then added a clear layer of enamel.

butterfly

I’m just hoping that soon these flutterings aren’t just in my mind and on my work bench. I want to see Spring here at the ranch in the very near future.

Prongs

I’m preparing to teach my newly designed Hot Metal Mania class in a couple of weeks. I’m very excited to be able to include prong settings in the curriculum using both sterling silver and copper settings.

prongs

I originally set out to just do the type of prong setting that has a back plate, like those below. (The first piece really does hang straight, I just rushed with the photo.)


prongs3

prong setting

These require carefully fitting wire prongs snuggly into holes in the back plate and soldering them in place. I made quite a mess of the first few I tried, but persevered and finally figured it out. This has all manner of possibilities for embellishment.

Since I want my students to work some with sterling silver, I figured out a reasonably simple and fairly inexpensive way to make prong settings that have open backs such as those below.

pr2prongs 6

prongs7

You can see the open back in the photo below.

pr3

I went ahead and wrote a tutorial with photos on this one for my students and also put it in my etsy store. This type prong setting really emphasizes the beauty of the stone.

My current challenge is to QUIT making prong settings and move to the next design. I’m just enjoying these so much that I hate to stop. But then . . . surely I need a bit more practice; don’t you think?

Just Do the Next Thing . . .

As I likely have mentioned before, my great grandmother, Dee Dee Lewis, supported not only herself (post husband) but also my grandmother (post husband) and her two children. Yes, we are a family of lingering women. When someone would get in a muddle and become anxious about what they should do, Dee Dee always said “just do the next thing.” It didn’t really think that was very helpful and often couldn’t even figure out what the next thing was. However, lately, that little phrase has been sounding in my brain and I’ve follow the tenet behind it. I’m no busier than the next person, but sometimes I need a little help from my elders.

I enjoyed the past holidays and actually took some time away from designing to sit quietly and do some crocheting and sewing. It was a welcome respite and gave these hands time to recover from the hurried wire and metal work pre-Christmas.

Then it was suddenly January and there was a list of things that needed ASAP attention. First, I needed products for a silent auction donation to the San Marcos River Foundation. I wanted them to have a choice and they selected the blue tree below and some copper earrings from the three things I offered.

blue tree     Raindrop necklace

 tree-tourmaline

The next thing . . . I needed product examples for the three January-February classes I was teaching. Luckily, I had most of the wrapped rocks and cabachons below already done; yet I did need to practice.
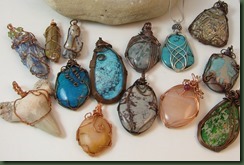
Cabs 2014

Then . . . the next thing . . . I needed to create new products for the Hot Metal Mania class coming in February. These took a while as I tried to differentiate the level of skill needed for the products.

Hot Metal

When I completed enough of the Hot products to at least get information out to students, I decided to take a day off, but then the phone rang. Someone that I convinced to be the program chair for one of my groups needed a project/leader for February. She wanted something in metal. I got her into this . . . so I said yes and arose fromf my chair and back to the bench.
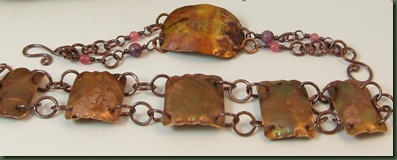
bracelets1  

bracelet 3

Feeling pleased to have the former completed and tired of following Dee Dee’s advise, I took a some time to try a new scroll design. I thought I was making a bird, but I do believe it turned out to be a hen. She is soldered and the wing flower is torch enameled
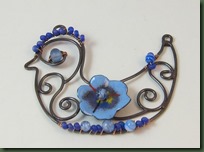
chicken


Today, I realize that “the next thing” is preparing the products for the Torch Enameling class which is in two weeks. I guess you know what I’ll be working on today.  OK, great grandmother, I think you were right! At least I’m having fun.

More Fall

That’s what I’m wishing for – More Fall. Actually, I would take any Fall at all since we are having 100 degree plus days here in central Texas. I’m sure Fall is coming, but I’m a bit premature with my daily wish.

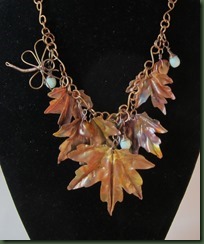
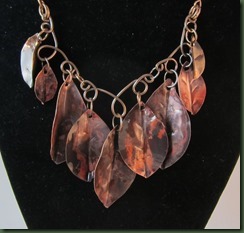
Nevertheless, it is Fall in the studio. Some of you have previously seen the leaves I’ve posted elsewhere. These are for a class that I’m preparing.

chain necklace

These copper leaves were torch painted with a little butane torch. Their friend, the dragonfly, is from a wire tutorial I just finished for my etsy shop. It was requested by the people who wanted the leaf workshop.

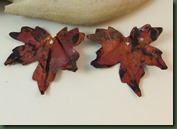
Here’s a little different type leaf. I turned these red by annealing them with the torch and then throwing them in Crisco cooking oil. I also tried some in sesame oil and the red is about the same.

red leaf

Here’s a comparison of the cooking oil vs. the sesame oil. The sesame dipped leaf is on the left. The difference in color is slight.

red leaf comparison

Finally, this set of leaves was also torch painted and I made a brass chain. I like the difference in color. Torch painting always provides surprises.

leaf brass

The only time consuming part of this project is cutting out each leaf. It makes my hands unhappy!

Let’s just hope my leaves are a harbinger of Fall (the real one with the cooler temperatures). I’m ready for clothes with leaves and shoes with toes!

Experimentation

This part of the summer when the boutiques I serve are closing out summer merchandise prior to bringing in Fall clothing, I have time to experiment with new ideas for upcoming jewelry designs.

I have to get into a different mindset for experimenting and remind myself that there’s no pressure for anything to “turn out”. I don’t have to produce anything; I just need to play.

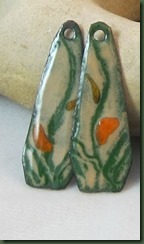
Play this year has come mainly in the form of torch enameling. It started when I taught the Torch Enamel II workshop a few weeks ago. I had a super set of participants and we had such fun. Teaching always propels me forward as I challenge myself to make difficult processes easy for students. I worked on champleve and sgraffito and have carried some of that into the experiments I’m doing now. Below are a couple of things that seem to be working well.
sawn earrings   torch ear 

I’ve also explored “holiness” in several forms and found it to be fun when incorporated with the torch enameling. I just kept singing “Holy, Holy, Holy . . . “ and things kept hatching. Hmmm . . . I wonder what would happened if I sang a different song . . . ? Any suggestions???

   azurite

  enamel and earringsear1

Today, I’m experimenting with different shapes and sawing. I’m conscious of the fact that it’s not production – it’s inquiry and learning. We’ll see what turns out. Wish me luck!

Color Your World

What colors your world? There is probably an obvious literal answer if you simply look outdoors. Here in the Texas Hill Country, we’re enjoying the Spring growth that follows the blooming Bluebonnets and other wildflowers. We’ve had a bit of rain and our pastures here at Dreamcatcher Ranch have greened nicely. You can see someone else who colors our world in the photo below.

blue G

It seems only fitting that I try to add more color to my metal work and “Spring” it up a bit at this time of the year. Of course, the torch enameling has helped with this, but there are other techniques. I’ve used various purchased patinas to help provide more color but largely stayed with Liver of Sulphur. Yesterday I varied my approach and was relatively pleased with the results.

colors I added some ammonia to the LOS solution before dipping the butterfly. It’s hard to identify in the photo, but it reveals more of an iridescent look. I created the circles on the butterfly using a technique created and taught to me by Carolyn Gebert. She demonstrated how to place the metal inside an embossing template and hammer it. I also used a torch enameled piece of metal inside the bezel. The circles were formed (or malformed) by hammering them on a sandbag. Then, I torch fired each piece. It’s always exciting to see what develops with this process and I have no idea how to exactly repeat what I achieve. I soldered a tube rivet onto the larger circle and used an amethyst crystal. The other two circles are adorned with small sterling silver balls. I think these three will become a necklace. I realize that the Spring colors outdoors will soon change as our usually harsh summer commences but perhaps knowing they are short lived helps us appreciate them even more. Cognizant of the fact that the colors on the metal can also dissipate in the atmosphere, I sealed all of these pieces with an automotive spray paint sealer which I’ve used before. You can’t preserve everything . . . but I try. I’m just glad that my world gets colored in many different ways and hope yours does too.

Creataholic

Anyone who knows me probably realizes that I’m a creataholic. I tend to make things all day, everyday. Yes, I still wash the clothes, cook, play with the dogs, yell at my husband (not really!), etc. but I really like to make things!

I spent so many years learning about and teaching about creative thinking that it’s really fun to get to actually “DO” creative thinking. No matter what I’m making, I find myself asking “how many different ways can I ……?” This phrase is generated following the ideas of Alex Osborne about fluency. One of my other favorite phrases from the formal Creative Problem Solving procedure (Trefinger) is “In what ways might I . . . ?”

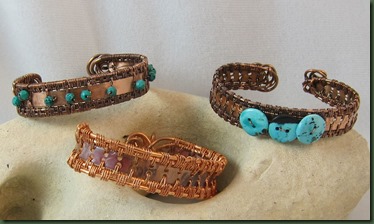
One of the tasks this week has been considering those two questioning phrases in terms of a new woven bracelet I’m developing. The form utilizes a simple weave wherein two outer pieces of wire are woven together with a copper strip about 1/2 inch wide. I’ve been punching holes in the copper strip so it could be part of the weave.

woven bracelets

The prototype bracelet is the one at the bottom of the photo. I torch painted the copper strip to get the red color and left the copper wire its natural color. It will, of course, oxidize later based on the environment. The other two are the first answers to the “how many ways” question. I embellished the one on the top right with some natural turquoise cut in button shapes with two holes. The bracelet on the top left has fewer holes and I cut them all in the center rather than on both sides of the copper strip. It has quite a different look from the other two when viewed close up. Both stone embellished bracelets were dipped in liver of sulphur to which I added a tablespoon of ammonia. It gives it a slightly different patina from plain liver of suphur.

Now the challenge will be in finding other ways to change this basic design without losing its simplicity. I may just have to conger up some basic creative thinking processes to help me continue to vary this design. Hmm . . . there’s something about fluency, flexibility, originality and elaboration . . . and then there were those Six Thinking Hats (DeBono) . . . (so many choices).

Joining


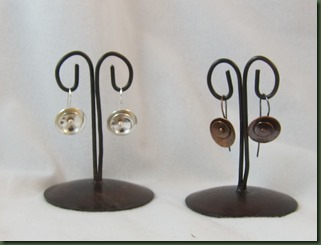
earrings2

I’m not a joiner. I don’t do clubs and only belong to one “society”. Yet, I think that once in a while we all need to join. I join my family for lots of gatherings and even plan a “join” now and then. I also enjoy “joining” with friends who share a common interest or endeavor.

I think it’s the rules that usually come with clubs and societies that bother me. I also find that as these groups plan events there are often conflicting opinions of how to do or run things leading to hurt feelings and sour faces. I guess that’s why I enjoy the “Faux” bead group that I meet with monthly (no dues, no officers, no minutes, no bylaws . . . get the picture?) This enables to group to be dynamic and continually bending towards the needs of those who are participating at the time. I wrote a brief description of this group  http://www.magpiegemstones.com/san_marcos_faux_bead_society.html  

earrings1

I guess I’m thinking about “joining” because I’ve been working on joins with my jewelry designs this week. Perhaps it’s a stretch, but I keep running into parallels between the two types of “joining”. Just as groups have rules and procedures, soldering has them too and when I don’t follow them, the join usually doesn’t work. I guess there really is a need for them. This week, it seems that each time I tried to skip things in the soldering process, I failed and had to return to the rules.

I did, however, realize that at times, when I’m trying to create something new and different, I must come up with my own rules and procedures. Often what I’m doing doesn’t exactly follow the guidelines for soldering and I just have to figure it out. In other words, this process is also dynamic and that’s what makes it intriguing.

My thought is that both types of “joining” require flexibility and problem solving. Just as I have to step away from the soldering at times in order to get a fresh perspective, I think I often need to step away from groups that cause consternation. But then, if I enjoy the metalsmith “join” perhaps I should try a bit more of joining with a group. What do you think? . . . (no, I think I’ll just keep soldering – ha!)