Category Archives: Bracelets

Do You Vary?

I do!

Vary  “. . . To make or cause changes in the characteristics or attributes of; modify or alter “ www.answers.com/topic/vary

A few months ago, I told you that I was fortunate to have one of my bracelet designs on the cover of Step by Step Wire Jewelry magazine.

cover

This week, I’m guiding some of my friends as they make this bracelet at our Faux meetup. I always practice before I teach/lead and this time I decided to “VARY” the bracelet. This is one of my favorite things to do with designs as I employ various creative thinking techniques to change things without completely losing the character of the original designs.  Below is my practice piece which is varied through magnification (enlarging) and combining (adding the beads to the metal strip in unique positions).

brac1

I torch enameled and then sealed a piece of 26g copper sheet before cutting the shape for the bracelet. Then I wove 26g wire over 14g wire and through holes in the metal on both sides. I added the turquoise rounds within the weaving to vary the technique.

This change has initiated more consideration of other possibilities and ways to vary this design.

Yes, I do vary - - - because the opposite would be to “conform” and that’s just not my style!

Just Do the Next Thing . . .

As I likely have mentioned before, my great grandmother, Dee Dee Lewis, supported not only herself (post husband) but also my grandmother (post husband) and her two children. Yes, we are a family of lingering women. When someone would get in a muddle and become anxious about what they should do, Dee Dee always said “just do the next thing.” It didn’t really think that was very helpful and often couldn’t even figure out what the next thing was. However, lately, that little phrase has been sounding in my brain and I’ve follow the tenet behind it. I’m no busier than the next person, but sometimes I need a little help from my elders.

I enjoyed the past holidays and actually took some time away from designing to sit quietly and do some crocheting and sewing. It was a welcome respite and gave these hands time to recover from the hurried wire and metal work pre-Christmas.

Then it was suddenly January and there was a list of things that needed ASAP attention. First, I needed products for a silent auction donation to the San Marcos River Foundation. I wanted them to have a choice and they selected the blue tree below and some copper earrings from the three things I offered.

blue tree     Raindrop necklace

 tree-tourmaline

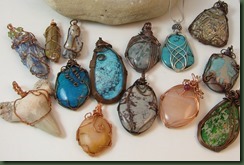
The next thing . . . I needed product examples for the three January-February classes I was teaching. Luckily, I had most of the wrapped rocks and cabachons below already done; yet I did need to practice.

Cabs 2014

Then . . . the next thing . . . I needed to create new products for the Hot Metal Mania class coming in February. These took a while as I tried to differentiate the level of skill needed for the products.

Hot Metal

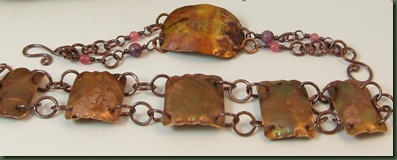
When I completed enough of the Hot products to at least get information out to students, I decided to take a day off, but then the phone rang. Someone that I convinced to be the program chair for one of my groups needed a project/leader for February. She wanted something in metal. I got her into this . . . so I said yes and arose fromf my chair and back to the bench.

bracelets1  

bracelet 3

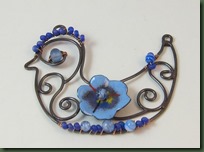
Feeling pleased to have the former completed and tired of following Dee Dee’s advise, I took a some time to try a new scroll design. I thought I was making a bird, but I do believe it turned out to be a hen. She is soldered and the wing flower is torch enameled

chicken


Today, I realize that “the next thing” is preparing the products for the Torch Enameling class which is in two weeks. I guess you know what I’ll be working on today.  OK, great grandmother, I think you were right! At least I’m having fun.

Visiting Old Friends

The title of this blog entry could be insulting and/or misleading but I mean no insult. The older I get, the more I balk at the “O” term in most any description. Most of my friends are younger than I am and even those who aren’t certainly can’t be called old. So, if you are one of the latter, please don’t get your dander up!

My spouse and I had a discussion the other day about when you were a senior citizen. Is it when you go on Medicare or Social Security? We couldn’t come to any consensus, but determined we weren’t there yet. I seem to recall a similar discussion about “middle age” many years ago. We never thought we were there either! I can, however, state that we are pleased not to be adolescent! I think I prefer wrinkles to acne.

I revisited some “old” friends in my jewelry designs and wanted to share a few new photos with you. If we were giving these an age, the wave bracelet on the right is definitely a senior citizen. I’ve been making these for about 4 years and it’s been fun to update them every once in a while. The one on the left is just a kid and will hopefully age nicely.

bracelet Lisa 1

This next group comes from a middle aged design. I think it is almost 3 years old. I can’t enumerate how many ways I’ve made this using different shapes and sizes on the top or focal of the bracelet. It remains one of the most popular of my designs and folks are still buying the tutorial for it in my etsy shop.

bracelet Lisa 2

Finally, the design below is just a teenager. It’s a few months old and I’m pleased that Step by Step Wire Jewelry magazine will publish this one with my tutorial in December. It, too, has many variations and will hopefully survive adolescence.

bracelet Lisa 3

I don’t mind if some of these designs are called “old”. They seldom get any wrinkles and if they do, I can repair those.  I’m just pleased to have them last and remain popular.

Ah, if only the same were true with people. I guess age is just relative to those around you. I think I’ll go visit Mamaw at the nursing home tomorrow and make myself feel younger. I think that just might work.

Creataholic

Anyone who knows me probably realizes that I’m a creataholic. I tend to make things all day, everyday. Yes, I still wash the clothes, cook, play with the dogs, yell at my husband (not really!), etc. but I really like to make things!

I spent so many years learning about and teaching about creative thinking that it’s really fun to get to actually “DO” creative thinking. No matter what I’m making, I find myself asking “how many different ways can I ……?” This phrase is generated following the ideas of Alex Osborne about fluency. One of my other favorite phrases from the formal Creative Problem Solving procedure (Trefinger) is “In what ways might I . . . ?”

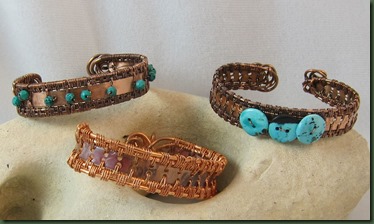
One of the tasks this week has been considering those two questioning phrases in terms of a new woven bracelet I’m developing. The form utilizes a simple weave wherein two outer pieces of wire are woven together with a copper strip about 1/2 inch wide. I’ve been punching holes in the copper strip so it could be part of the weave.

woven bracelets

The prototype bracelet is the one at the bottom of the photo. I torch painted the copper strip to get the red color and left the copper wire its natural color. It will, of course, oxidize later based on the environment. The other two are the first answers to the “how many ways” question. I embellished the one on the top right with some natural turquoise cut in button shapes with two holes. The bracelet on the top left has fewer holes and I cut them all in the center rather than on both sides of the copper strip. It has quite a different look from the other two when viewed close up. Both stone embellished bracelets were dipped in liver of sulphur to which I added a tablespoon of ammonia. It gives it a slightly different patina from plain liver of suphur.

Now the challenge will be in finding other ways to change this basic design without losing its simplicity. I may just have to conger up some basic creative thinking processes to help me continue to vary this design. Hmm . . . there’s something about fluency, flexibility, originality and elaboration . . . and then there were those Six Thinking Hats (DeBono) . . . (so many choices).

Everyday Tiaras

Playing with wire one evening, a seemingly familiar shape emerged in my hands. Who knows whether it came from my subconscious while thinking about my long ago high school years or from something else. My high school class just celebrated our 45th reunion in Medford, Oklahoma. Although I didn’t attend, the photos and notes from classmates brought back a flood of memories long buried, but still reachable. While I don’t remember too many high school dances, I do remember my last prom. I had been sick and out of school for three weeks, but managed to get it together and make it to the prom. After all, I already had a date! It was an eventful day of preparation during which my mother burned a hole with the iron in the chiffon overskirt of my long blue dress. The local dry goods store saved the day. There she purchased blue plastic flowers which she sewed on the dress to cover the hole. I remember that she was much more upset than I was.

I also remember that my hair wasn’t in very good shape, but we managed to adorn it with a pretty sparkling tiara. It seems to me that it looked much like the one in the photo below (from Tiara Town). It was probably much smaller

tiaras

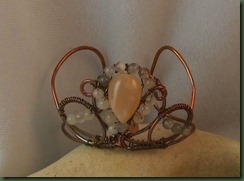
That shape stuck with me and I recognized a similarity in the wire shape I made the other night. It became the bracelet below.

tiara bracelet

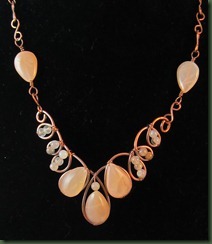
I also turned the shape upside down and made a necklace.  If you stand on your head and look at the necklace below, you should be able to see the tiara – or you could just believe me! This particular piece and the bracelet above are both made of moonstone from Magpie Gemstones. I made another similar necklace out of sterling silver wire with grey colored moonstone, but it found a home before I could take a photo.

tiara necklace

Today, I tried my hand at a smaller necklace, shown below, that has less loops. I really think I prefer the loopier one. All of these are finished with handmade chain and clasp.

tiara small

These necklaces are fairly easy to make and the bead placement helps secure the wire loops in place at the top.

I think there are a few more jewelry tiara designs in my future, but I don’t anticipate ever needing to wear one on my head again. I’m either afraid or relieved that those days are past – I wonder which . . .?

Waving

How do you wave at folks? Do you just raise one little pointer finger to acknowledge them are are you an all-out-use-your-whole-arm waver? The latter is the kind I see outside a certain San Marcos business. He’s waving with his entire body as he dances to the music emitted into his earphones. He’s been waving there for so long that they’ve even made a billboard about him. Did I mention he’s really skinny too? All that waving seems to pay off in one way or another.

I’ve been waving with my wire jewelry for years. I started with a simple wire wave bracelet and continued by making wave necklaces. Originally, these were made from recycled copper wire, but now I use new 14 gauge for the pieces. They've also gotten a bit shorter recently. You can see the bracelet contrast in the photo below. Obviously the shorter piece is not yet completed. If you want to make these yourself, I have a free tutorial for the bracelet published on the Magpie Gemstones’ (www.magpiegemstones.com) site: http://www.magpiegemstones.com/wave_bracelet.html

short wave

I’ve also tried waving with different shapes.

wave tri

Here are a couple of versions of the newer wave necklaces. The first features riveted copper charms (faith, hope and love).

wave necklace2

The second is embellished with amethyst stones and the wave is a bit more full.

wave3

I guess I’ll keep coming back to this standard in my jewelry line and continue to perfect my wave. How about you? What kind of waver are you?

The Royals

I’ve been calling the bracelets below “my royals”, but in writing about them, I thought that “royal” should have more connotations that simply referring to a king, queen or other sovereign. My search for the truth, however, kept ending on sites pertaining to the Kansas City Royals. This was not what I was looking for. The term is used in phrases such as “he’s a royal pain in the . . . “ where it means extremely bad. It can also be used to mean excellent as in “let’s give them a royal welcome.” I was also amused to learn that royal can indicate a stag with large antlers that have 12 or more points on them. I wonder what The Royals in England think about that definition.

Unfortunately my royals are not full of the crown jewels and they aren’t sparkly, but at the least, the one on the right is shaped like a crown. Ok . . . so I’m stretching it just a bit. Give me a break!

royals

The “princess” bracelet on the right of the above photo is made from a combination of two of my etsy tutorials, the dimensional bracelet and the woven bracelet. I wanted a new shape in the middle and this tiara form emerged. I put in the stones, but felt it still needed something; therefore I added the weaving. I think it could be done with bright crystals and more elaboration, but I’m just a simple gal.

Princess

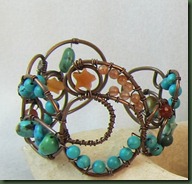
The “queen” bracelet below sports a star at the middle top and is adorned with lots of turquoise and some carnelian. It is the cursive style bracelet that just ended up with a little extra width and more dramatic swirls. I guess this one is fit for a Texas queen.

queen

My final assumption about “royal” is that the term can stand for extremes or outliers, whether they are good or bad. England’s Royals are outside the norm in status; The Kansas City Royals hope to be the same when they play ball, but may sometimes give their owners a “royal pain” and as for my bracelets . . . time and customers will tell.

More Leather Wrap Bracelet

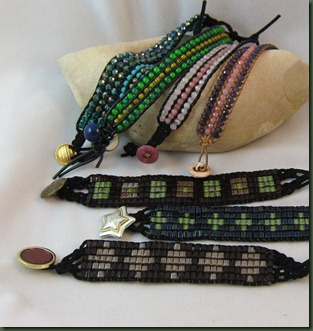
brace-5 row I thoroughly enjoy making the Chan Lu style bracelets that are so popular these days, but have ventured into something a bit different. The bracelets shown above also use leather and wrap, but only go around the wrist one time due to the width. The bracelets lounging upon the rock in the photo are all the three row style and those below are five rows. This style utilizes square knots (macramé) at the beginning and end of the bracelet. You can create a pattern or simply stick with one color. The tutorials for these bracelet come from Alisha of Beadifulnights.
The video is very well done and most beaders will find it easy to follow. I use a very soft 2mm ultra micro fiber cord that I purchase from Magpie Gemstones www.magpiegemstones.com I used the Greek leather cord for a couple of these and prefer the micro fiber cord due to the way it drapes. It comes in various colors and at this writing, you can get 10 yards for $5.95. I can definitely handle that! Give these a try if you like the look, but BEWARE! These are fun to make, quick to finish and the process is very addictive.

Why Didn’t It Work?–Variables

Have you ever been enthralled with a design in a book, magazine or online tutorial, rushed to make it and flopped? I have. I used to get disgusted and think “surely there’s something wrong with the pattern.” Yet, you know that’s probably just a personal excuse. It doesn’t help at all when a friend says she tried it and it turned out great.

When I read a tutorial, I tend to jump right in and attempt to make the piece whether I have the specified supplies or not. I’ve even failed at making something from a tutorial that I wrote. Here’s a case of that.

allb

I have a new bracelet tutorial in my etsy shop( https://www.etsy.com/listing/103694934/wire-and-beads-diamond-bracelet-tutorial) . I’ve made the bracelet time and time again and know it is correctly written. Alas, the other day, I tried it with a different size beads and flopped. I only changed one variable and, of course, it changed the dimensions on the circumference of the piece. Rather than using the 4 or 5 mm beads I suggest on the tutorial, I just grabbed a pretty gemstone and used it. Unfortunately, the pretty amethyst had a diameter of about 12mm. Using it on the bracelet caused the piece to stick out farther on my arm and made it too short. I needed to alter the bracelet wire length to accommodate for the larger beads. The bracelet below shows the correct bead size for the wire length.

diamond bracelet

This is only one example of how variables change an outcome. I might have used a different gauge of wire or different style hook and these, too, would have changed the end product.

Variables effect everything we do. Did you ever say something perfectly kind to a family member only to have that person bark back at you in an angry voice? It’s possible that the person just had an unpleasant encounter with someone else and you received the outgrowth of that situation. Perhaps that person has a headache . . . ? I’m sure it wasn’t YOUR fault.  I know it’s never MY fault . . . ha!

Driving up a hill at my normal quick speed takes a nasty change with the weather varies and the road surface is wet. I guess I should slow down.

The point here is to be aware that variable are ever in the way of perfection. Consider the variable before initiating an action. How might the variable change the outcome or product? Plan for this change.

The other more positive side of variables can result it happy happenstances. I can use a different gauge wire and sometimes the jewelry piece gets better or has a new pleasing look. In the aforementioned person to person encounter, recognizing the variable/current temperament of the person you speak to might allow you use different words or just steer clear of the person.

So, the question of “what did I do wrong” should come prior to initiating a project. Rephrasing it to ask ‘how will the change in this variable effect my outcome and how can I adjust for it?” might help us all get more pleasing results. I think I’m going to try the last question.

There’s no way to get rid of variables in jewelry making or in life. We should just expect them and know that outcomes are often altered when a variable changes.

I’m wishing you variables that result in good things.

Bracelets Galore

I’m beginning to think there are more people who like to make bracelets than there are people who like to wear them. (Let’s hope not!) I subscribe to a number of daily jewelry newsletters and you might not believe the number of bracelets that are featured each week. But then . . why not . . . bracelets are often quicker to make and require less materials . . . and, if I were to tell the truth, I’d have to admit I really like to make them too.

One of my beginner classes made bracelets the other evening and we were quite proud of ourselves. These were the traditional wire bracelets with bindings.

Bracelets1

The participants made the bracelet on the upper left corner of the photo.

Measurements for these bracelets seems to be the trickiest part. I’ve made a good number of them that didn’t quite fit my wrist correctly.

Last week, I set out to write a tutorial for the bracelet below. It looks easy doesn’t it?  Well, it was NOT easy to write.

blueb

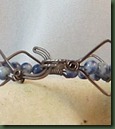
There are a number of variables in the bracelet that effect the length and you know how I hate to measure! Yet, I did measure very carefully and finally nailed this tutorial. It seems to be pretty foolproof now and the bracelet isn’t that hard to create once you know the measurements. I also fussed with the clasp on this one and finally chose my pirate’s hook that I use on the wave bracelets. This makes it easier to get on and off.

bhook

Now the trick is to quit making these for myself. I keep finding so many variations that it’s hard to move on to the next design project. Don’t be surprised if these pop up again . . . I’m resisting closure on them.

image