All posts by Karen

Multipling

Yes, the title is a made-up term that has nothing to do with math. Anyone with math phobia can continue to read this. The term could stand for multi-tasking or something else. Its meaning In this treatise follows the basis of multitasking; yet it means doing something that requires several steps of design planning to occur at the same time on multiple strands of beads. I think that makes this a double multiple task . . . ?

I was multipling for several days this week as I worked on a couple of articles/tutorials for Magpie Gemstones (www.magpiegemstones.com). The first has been published and the second will be out this coming week.

Creating with multiple strands has always been a challenge for me; but this week I remembered a piano pedagogy instructor from a long ago workshop in Dayton, Ohio. She said we should attack our weaknesses. Sometimes I’ve felt I should just avoid my weaknesses, which I prefer to call areas of challenge. This week, however, I heeded that instructor’s words and attacked.

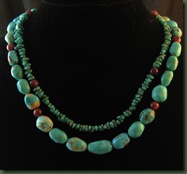
I read the available information online and watched a few videos. Then I commenced to work on my own pieces. When multipling, I had to consider the length of each strand in relation to the others, the bead placement in relation to the strand length and the placement of multiple strand spacers and connectors which somewhat alter strand length. Please don’t ask me how many times I restrung things before I got everything in sync. The two pieces immediately below are thoroughly discussed in Creating Multi-strand Necklaces: Part I http://www.magpiegemstones.com/mutlistrand1.html 

              brownblog turq6

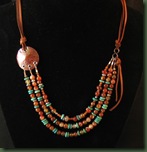
Part II of this discussion, soon to be published, discusses clasps, connectors and spacers for multi-strand pieces. The bib style necklace with leather and the three strand necklace below are featured in that article.

   image           bib


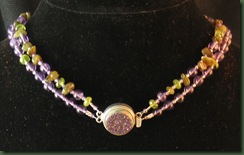
I was enthused enough about multi-strand pieces to go ahead and purchase a fancy clasp for one at the bead show I attended today. It was so pretty, that I decided to use it in the front of the choker style necklace. I don’t make much bling, but I liked this clasp. So, there I sat at the workbench again – multipling.

drusy

Now, I need to get back to singling rather than multipling and stop making up new words!
From Big to Small

I’ve always thought that when trying to learn something new you should work from big to small. Remember those first prereaders in Kindergarten? The one or two words on each page were quite large compared to the first grade readers and then chapter books and novels. The print got smaller and smaller as readers progressed in ability. (Of course, as we grow older, that print has to grow larger and larger due to failing eyesight issues. Of course, I can’t personally speak to that! Ha!)

In teaching piano, I found the big to small postulate to be the same. We started with a few large notes in songs and went on to hundreds of small notes and intricate passages. When my friend and I were trying to help little four year olds learn more efficiently, we developed musical notation with relatively large circles and ellipses that most little ones found easy to read. My engineer husband provided us with the appropriate drafting tools to write Keyboard Kapers, a book of original songs we used with the little ones. I wonder how many little pianists played songs about “my dog Blazer” when they were learning from us and the teachers with whom we worked. As the young pianists grew more proficient this notation gradually became the more common smaller notes we see in traditional music.

Having found success with big to large in the aforementioned reading formats, it seemed natural for me to apply this idea to learning to make jewelry. For example, when learning to make soldered bezels, I made large ones first and found they were easier than the tiny ones I’m trying to create now. I currently still have trouble and sometimes melt those little pieces of silver while encouraging my solder to hurry up and flow. Big IS easier!

Fortunately, a couple of my friends recently showed me how to use small premade bezels and snap sets for the tiny stones I wanted to work with. I purchased these from Rio Grande Jewelry Supply. I have always made large pendants, but decided I was ready to grow up to smaller pendants using this new bezel setting technique. My bravery extended as I also used more sterling silver that I usually do.

ruby2

These pendants were not intended to look like anything in particular. I just wanted a pleasing shape that would house a little jewel. The first and second pictures show pieces that have rubies set in snap sets.

ruby1


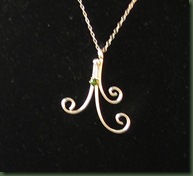
The next couple of pieces show peridot in snap sets. The first one IS NOT a bug!

periodot1


     periodit2


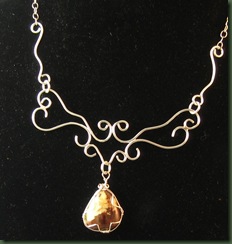
Finally, I became brave enough to try a larger piece composed of more components. It’s still relatively small compared to most of the copper work that I do. Someone already told me it doesn’t look like my style since it is more formal. See what you think.

scroll

The photo on the left was taken from an angle and makes the piece look somewhat “off” Yet, it is symmetrical – my picture taking just isn’t! I wrapped a stone to hang from the basic silver armature and can change this out to other stones with the jump ring attachment.

Big to small is still working for me with one exception. I quickly realized early in learning about wire working that manipulating heavy gauge “big” wire is more difficult for me than working with a lighter gauge “small” wire. When you’re working with wire and have to sound like a tennis player who makes a noise every time she serves, it’s probably time to get a light gauge wire!

Freedom to Play Around

Before I begin, let me assure you the above title is not a statement about marriage.

Do you play with wire? One of the most enjoyable parts of playing with wire is manipulating it in various directions just to see what it does. There’s something relaxing about the freedom of working WITHOUT a pattern or a set idea of how a piece will turn out.

Art is one of the few places where the guidelines for problem solving are so open. For example, we’ve recently had a problem here at the ranch and needed a prescribed outcome. There was absolutely No Freedom regarding how things should turn out. When your irrigation pivot won’t run and you have to problem-solve a solution, you want the outcome to be a pivot that runs! (0bviously!) In art, however, the outcome may be unexpected, yet appreciated.

I have worked with what I call “double wire” designs for several months. You may recall the necklaces shown on May 28 which were double wire designs. The Chaos Necklace series has pieces that also begin with the double wire idea.

Today, I wanted to show two of the newer pendant-type necklaces that have hatched as a result of playing with the double wire idea. Both of those shown below feature tourmaline that I purchased from Magpie Gemstones (www.magpiegemstones.com). I actually used just one strand of tourmaline to complete both of these pieces and have also used some of that strand for other things. It was a good buy!

tourmaline1

tourma2It’s interesting to see how different this style turns out when the wire starts in the same manner.

I’m not sure why I call is double wire, since all the pieces are made from a single piece that doubles back on itself. The challenge is how to make that single wire into a pleasing configuration. Give it a try and see what you can come up with.

wire                                        wire2

If you aren’t a wire worker, just play around with drawing the way the wire might go. By the way, if you come up with something exciting, send it my way!!!

Freedom to play around can be found through many venues. It might be the way you dunk the basketball or a new dance move. Perhaps you play around with a new configuration in arranging a shelf full of books or nick knacks. I think that freedom to play around is just as much an attitude as an action. Am I stuck doing things the same old way, or am I free to try something different? Am I free to let those around me try something new?

Lest one of you takes the above to heed and get’s fired, I should remind you that we need to choose appropriate routes to freedom. If your boss isn’t into it, take care. If you ARE the boss, why not give an inch? We could all stand to play around just a bit more.

Let’s Wrap

wrap ball

I’ve recently become intrigued with wrap style bracelets and the many variations thereof. They are quick and fairly easy to make and the cost of materials is usually quite nominal. I realize these have been around forever, but the resurgence of them within the broader market causes me to rethink their myriad of possibilities. For example, take a look on the Nordstrom’s website and search wrap bracelets. There you’ll find some rather expensive ones ($128 and up) that don’t look much different than those you see that I’ve made.

There are some good free online tutorials that show the process for wrap bracelets. For example, The following link takes you to the DIY tutorial for the bracelets pictured above: http://www.stumbleupon.com/su/1t8Exa/honestlywtf.com/diy/diy-wrap-bracelet/

These are made with leather, ball chain and waxed linen thread. They’re easy as pie.(not that making a pie from scratch is that easy . . . ) I started making them with the regular silver colored ball chain and then found a package of the colored chain at Hobby Lobby. My customers like the colored chain. I also made, but failed to get a picture before it left home, a bracelet with beads instead of the chain. I simply strung beads, crimping at both ends, and used them in the place of the chain. This is a bit trickier, but provides many color and texture choices. I also made one wherein I used colored cord from the fabric department from . . . you guessed it, Hobby Lobby, . . . in place of the chain.

The second tutorial is slightly more complicated, but still easy. I watched a video on the Auntie’s Beads site http://www.auntiesbeads.com/Wrap-Bracelets-Video_p_9111.html) and then made the turquoise and leather bracelet below. I used 6 lb. test Fireline (from the Walmart fishing department) to make my bracelet. This style provides many options for variation.

turq wrap

I made a bracelet that looks just about like the above, but used a different technique. I hand sewed the seed beads between the leather pieces, again using Fireline. The one below wraps around the wrist four times.

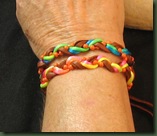
sewn wrap Finally, I “borrowed” the idea for the braided bracelet from the Nordstrom’s website. They show a braided bracelet made with two pieces of leather, using the ball chain as the third braiding element. I didn’t have round leather and used multicolored cord. There’s really nothing novel about the braided version, but I had not thought of using chain it it before. You can just barely see the orange ball chain in the picture below but it’s there. Now I’m wondering about a plethora of other things that could be braided with the leather or cord. Any ideas?

wrap braid This may not be the kind of wrapping some of you were thinking about from the title. But I just can’t do the other RAP. If you can, go right ahead without me, but I’m sticking to this kind of wrapping and that’s a wrap for today.

The Calico Cat & Lessons About Aging

My Mom’s Calico Cat has lived with us at Dreamcatcher Ranch for the past seven years. I believe Callie must be at least twelve or thirteen years old, but my Mom assures me that this pet is still “just a kitten”. She’s a scrappy little outside cat who has always been good at catching her own bird supper. Callie used to perch on the second floor window sill of our house which is very close to a wonderful tree. For a long time I thought she was lovin’ the shade, but she was just waiting for a juicy morsel to fly by or land next to her in the tree. It’s been some time since I’ve seen her on the ledge. Lately she’s been much more likely to sit like a statue in the grass, probably hoping something would happen by. I think she must be getting a bit too old to perch up high.

Yet, it seems she hasn’t lost her touch. She left tale tell (of is it tail tell?) bird feathers at the front door a couple of days ago as if to say “I’m not too old for this yet!” Today I watched her exercise the ultimate in cat problem solving. She again perched on a window sill. This time, however, it was just outside my studio on the first floor. She waited and waited until finally I heard a “whop” on the window. and then a “thud”.  As often occurs here, a bird flew right into the window and whacked itself on the head. Callie grabbed that dazed bird in her mouth and pranced off to eat her fill. I know what they say about old dogs and tricks, but I do believe that this old cat has learned a new trick or two. She reminded me that even as we age, with a bit of problem solving we can still do the things we enjoy.

The same day the Calico cat taught me a lesson, I did a jewelry show at Mother’s nursing home. I am always well entertained when I do these, but this day was special. For example, one of the Alzheimer’s patients was in the living room as I set up. It wasn’t long before she located someone to unhook her oxygen and push her near my display. She rolled her chair directly under the middle of my tables and for the better part of two hours she sat intently looking at the jewelry. She fixated on two necklaces in particular and surely must have ask at least forty times how much each of them cost. By about an hour into this, I didn’t even need to reply because other people in the room would yell out “it’s twenty dollars” or “it’s thirty dollars”. I got so tickled I had to turn away. Once I looked up and she was wearing one of my copper rings. When she and I tried to remove it, we couldn’t get it over her knuckles. Every time I tried to pull, she hollered. Finally, I had to get a nurse to remove it. I thought I had it out of reach, but within ten minutes it was on that finger again!

I worked with another nursing home resident as she selected several items. She has shopped with me before and buys things for her daughter. Although she picked out a more expensive bracelet, we managed to negotiated a price she could handle for all the pieces she wanted. During this negotiation I was bent over her wheel chair with my face close to hers. As she started to retrieve her money from her purse, her legs began to shake which is not unusual for her condition. I quickly told her about a little boy in my class who often had the shakes and showed her that I liked to put my hand right on top of his head. I did that for her and she immediately quit shaking. We just looked at each other in disbelief and didn’t tell a sole what had happened. Believe me, I’m no healer, but the patient and I were both happy.

Finally, another resident rolled into the room and said “are you the one?” I replied that I guessed I must be. So she went back to her room and brought me her broken necklace for repair. Since “I’m the one” I’d probably better get it fixed for her before I go back to the home.

The question you might query is about what these episodes have to do with anything. It may be a big stretch, but they all say to me that we mustn’t give up what we like just because we grow older. An old cat can still adapt and catch a bird. Women can enjoy and manage to purchase jewelry and you can find someone to help you if you just look for “the one”. I’m actually relieved to know all these things as my years march on. I plan to keep doing what I like to do, look at pretty things and believe that “the one” is just around the corner ready to help me if I need it.

Saving Time

I’m a firm believer in making my own findings for jewelry; but I’m behind on making chain and took advantage of the opportunity to purchase some over the weekend. Yes, the photos below show “store bought” chain.

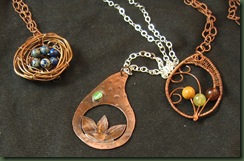
chainsTonight I feel lucky that I had that chain since these three pieces needed to be completed and time was ticking away. I’m doing a little art show tomorrow and wanted these to be ready since I wanted to take a few pieces with me that weren’t composed mainly of wire armatures.

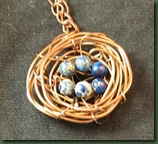
nest

The bird’s nest necklace was so easy and fun to make. You just wrap wire round and round a ROUND object and then weave lighter gauge wire in and out of the rounds securing the eggs (beads) with the ends of this wire. I also made a couple of rings like this. Hmm, I wonder what bird would lay this color eggs.


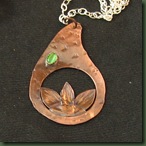
lotus


The metal lotus is similar to something I’ve previously created, but I wanted to try a more open look. This one presented a challenge in getting it to solder in a way that wasn’t super messy on the back. Should I tell you that it took two tries?


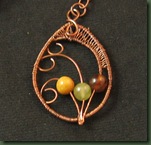
curvesThe third piece probably took the longest to make. It was quite tricky to get the three middle pieces of wire to all ball together in the torch. While you cannot see this very well, I can assure you it doesn’t look very ball-like. Yet, I wasn’t going to do it again! I think the wire weaving took the longest and I really do appreciate those of you who whip out these weaves with the greatest of ease. I’m making myself keep practicing and trying to learn to do this technique without gritting my teeth.
Am I glad that I bought that chain? Yes, today I am because it helped in a crunch. Yet, I realized considerable added cost by making these purchases and that has to go into my pricing. You would think that this should work out about the same as if I had charged for the time it takes to make my own chain. Alas, it’s much easier for me to charge for something I purchased than something I made. I MUST get over that! Is there therapy for pricing anguish?

Update

Today I put in the links for a few jewelry related articles that I have written. You will find them on the right below the etsy shop listing. There you will see 17 articles I’ve written thus far for Magpie Gemstones (www.magpiegemstones.com). (The next one on making headpins will be out next week) I also write a short blog entry for them each week. These articles have been fun to write and I’ve enjoyed the research process that I undertook for many of them. This online bead company tries to determine what their customers are interested in, determine needed information about issues in designing and making jewelry and then provide free online help. (I think I’m supposed to be some of the help . . . ) If you have interest in any of the topics, take a gander at the articles. Most of them are pretty short and contain pictures. Go ahead, take a read: I wrote them for you. (By the way, there are also many excellent articles which I didn’t write at their site.)

On another note, I have a skunk update. Today, the dog that got spraying by the skunk earlier in the week saw the critter again. Luckily the dog was in his fenced in yard and the skunk was outside it. I went to the window and the dog literally POINTED at the skunk. I POINTED at my spouse and he POINTED the gun at the skunk. Skunk GONE. I wonder how many friends it had . . . ? I guess we will find out.

Flora NOT Fauna


I’m making a real effort to focus on flora today and stay away from fauna. If you read the entry titled “Black and White” you know I encountered a skunk on a previous walk. Yesterday, it happened AGAIN! I was watching very closely as I went up the last hill and detected movement in the grass. Yep, there was black and white again. Yes, I did run down the hill AGAIN! 

Also, Bruno the dog just brought me the last of a snake that he or some other heeler consumed in the back yard. There was enough skin left to determine it was a coral. So, with raccoon footprints on my front wooden door, a skunk in my walking path and snakes in the back yard, I’m thinking about moving to town! You’d think I live in the boonies, but you can watch the video on the opening page of the website and see that is not the case (www.dreamcatcherranch.net) .

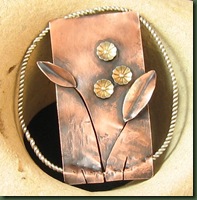
At any rate, all I can control “habitat wise” is the work in the studio and I hereby proclaim that it will be FLORA! (did I mention the ant and mouse traps I just set?) Flora doesn’t sneak up on you. Flora is graceful. I like flora! Yet, it has to have a little metal twist to it.

flora While I usually work until a piece is completed, this one spread over two days. Late yesterday, thinking I had all the soldering complete, I pulled this piece out of the pickle and a leaf fell off. With hungry fauna (dogs and spouse) waiting, I set this aside and started again this morning. It has now been resoldered, given a patina and run through the tumbler. I think it’s perfectly secure this time. Now I just need to figure out what type strand to hang this pendant from. Alas, the fun part is over. Yet, there’s more flora on the table . . .

I’m wishing you a good weekend free of black and white fauna and full of beautiful flora.

Black and White

Well, it happened again. Another morning walk affected my jewelry designs. Everything was perfectly fine until that last hill at the back of the property behind the house. By this point in the walk, I’m pretty weary and my legs are tired. Who knew that they could still help me run so fast. Trudging up that hill, I often meet the calico cat and this day’s encounter was also furry and just about her size, but it was black and white. If you were ever in the marching band or military, your body remembers how to do that about face where you place one foot out and turn completely around so you are facing the direction from which you came. It went something like this . . . black and white . . . skunk . . . about face . . . R U N !!!!! That black and white certainly turned me in a new direction.

Wondering if that was some sort of sign (probably just bad luck), I chose to try an about face (well almost) on the jewelry designs and momentarily attempt to focus on something other than wire armatures. I’ve made so many lately that I’m beginning to have nightmares about them! I think I could make handmade chains in my sleep.

If it’s not wire, then the designs around here must be metal. I’ve had components of the pieces shown here laying around on the work bench for a couple of weeks, but with this new direction, they had to be used.

bottlepend2

You’ll recognize those same old bottle caps. I have a love-hate relationship going on with them right now. This bottle cap is riveted to the back piece of copper that has been run through a ringer provided by a nice friend. It hangs from a leather chord. (yes, the back is supposed to hang slightly ajar)

The second piece is more complicated and I kept telling myself that simple is better as I added more and more components.  The telling didn’t work. I hope I didn’t overdo it. My home constructive critic wasn’t fond of it and had to be told to “pretend you like it” as I queried about the length of the piece.

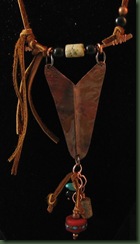
v

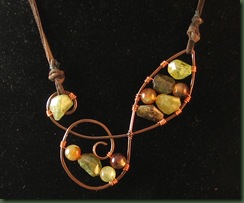
The copper V was foldformed and hangs from jump rings on a hammered piece of wire. It’s really not crooked, but the picture is. I wire wrapped the hammered wire and made a loop in the center of each wrap for attaching the leather chord. You can see that it is asymmetrical with leather dangles on one side and black and copper beads on the other. This one hangs down pretty long.

Taking a slightly different direction isn’t too painful and is often needed to free the mind for whatever comes next. Sometimes making those wire armatures becomes too comfortable and I have to move out of that zone. Last night I purposely made a very intricate wire wrapped pendant that took about three hours to complete. It required a techniques that I’m not very good at. As I grumbled about it, my critic asked why I was doing it. I replied that I thought it was important to do something uncomfortable part of the time in preparation for whatever comes next.  What do you think?

By the way, if you are wondering about that black and white, my downward hill run was successful and I did not get sprayed. Whew!

Loopy Loo

Notice that the title does NOT include any person’s name. I would not want to be accused of calling anyone “loopy” nor would I choose to be called that although those of you who know me might say it occasionally fits my personality.

I finally wrote the tutorial for the Loopy Loo Bracelet design. You see this pictured in sterling silver below and I’ve been making this bracelet a while. At the insistence of a good friend I finally decided to share it and offer the tutorial on my etsy shop as you see in the listings on the right.

clip_image002  While writing the tutorial, I realized that I had not fully explored the potential of this design. I used the SCAMPER creative thinking tool previously mentioned in another entry and tried new things with the loops. I “minified” the design using lighter gauge wire and a smaller cylinder for the loops. This resulted in both a smaller more delicate bracelet plus a new necklace armature. Although the one in the photo is medium sized, I also like the tiny loops I put in an earlier necklace in the second picture. Hmm . . . I seem to be stuck on purple!

loop necklace

necklace loop

Thinking again about SCAMPER induced possibilities, I “modified” the simagehape of the loops a couple of different ways. The first turned out to be a pendant where I flattened the circle of loops to frame a bead.

  I also turned them a bit differently and made earrings.

loop earrings I made these from 20 gauge wire and feel they would be better in a heavier gauge. They aren’t holding their shape as securely as I would like. I do, however, think they are a good design and I’m going to redo them.


Who knows what this Loopy Loo design will bring next? I’m pleased to be working with it again and hope to exhaust its possibilities before moving on. Any ideas????