Category Archives: Wire Work

Set

If we brainstormed meanings and contexts for the word “set” the list would be fairly long. I guess early encounters of the term was when we learned about “ready, set, go”. Later, in school we learned about things that come in sets and about the specific mathematical use of the term.

The term also has multiple connotations in the context of jewelry design including how to “set” a stone and my most familiar phrase, “where did I set my glasses down?” When I first started making jewelry, it seemed my customers wanted things in sets. I never strung a necklace without also making matching earrings and often included a matching bracelet as well. Then later the trend of matching changed and I quit making sets. Many customers wanted a more eclectic style that didn’t include those perfect matches.

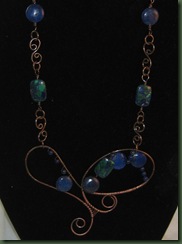
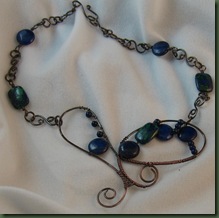
Now, I’m back to including earrings from the same stones used in a necklace mainly because I don’t want to have to hunt the stones when a customer requests a match. This week, I decided to go back to the early days and make a true set that included a necklace, earrings and a bracelet to match. I made the bracelet first and then used the same weaving and stones on the necklace. I couldn’t decide which necklace picture was best so below you find both. The stones are lapis and azurite from Magpie Gemstones (www.magpiegemstones.com).


lap            lap2

    lap brace

I hurried to finish the above set before a show I did at a community center yesterday. I just knew someone would want the whole thing. Wrong! The necklace, with earrings, was the first piece that sold at the show, but the bracelet remained behind – so much for sets! Today, someone else selected the bracelet.

The question now is whether or not to make another full set. I guess I’ll try it again since even though the pieces didn’t all go home with the same customer, they did all go home. Isn’t that what really counts?

Right now, I think I’ll just “set” my body down and rest while I contemplate what stones to use in my next set.
Off the Design Table . . .

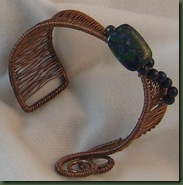
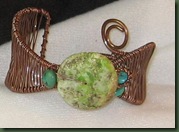
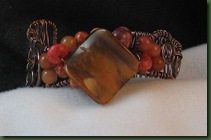
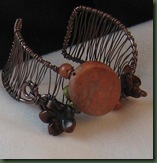
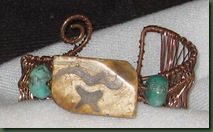
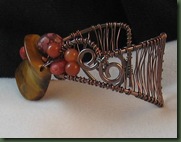
AND on to someone’s wrist. I’ve been working for several weeks to get the new bracelet design where I want it. The dimensional bracelets, for which I have a tutorial on etsy, have continued to be popular, but I think it’s really important to stay ahead of the market. I’m continually wondering what the next bracelet design should be. Since those dimensional bracelets are so comfortable and fit most anyone, I thought I should stick with another cuff type bracelet.

front2                tiger

As I played with a new design, I employed the SCAMPER (from Bob Eberle) creative thinking technique in which each letter stands for a different way to make a modification. Using the ‘C” verb,  combine, I wanted to put the wire cuff and some wire weaving together. The “R” verb, reverse, led me to move the swirls in the middle of the dimensional bracelet to another point on the cuff. This also helped me decide to pull in the top middle rather than expanding it as I’ve always done before. I played with the other Scamper verbs and feel they helped contribute to the final product.

front                    tibet

I’m still contemplating which of the various versions I like the best. The weaving was probably too difficult for my current technique on the two shown below. This will need practice. Yet, I was able to do a smoother job on the first bracelet shown at the top, indicating the promise of a smooth weave. I’m hopeful that I will continue to improve my skills.

side                   side2

It’s interesting that these bracelets are so comfortable. I’ve been letting various people try them on and they usually comment “this feels good.” I think that means I should stick with it.

My favorite part of the design process is the development of an idea and I’m truly thankful for the many creative thinking techniques I keep tucked in my back pocket. Now I’m at that tedious stage where I simply must keep practicing without much more modifying. Let’s just hope that my technique is on a fast learning curve!

I also hope these new bracelets will be coming to a wrist near you.

Cross

It’s that time of the year when many people begin to gear up for the holidays. For designers, that often means art/craft show after show after show. We speculate by buying materials and creating our products and then hope that we’ve designed things that people will want. It often seems like design roulette. The time and monetary investment in the products can weigh us down, but could it also make us cross?

I hope the season is remaining pleasant for you as it is for me. This year, instead of being cross, I chose to make a cross. One cross led to another and I am beginning to think I should just start a cross store. See what you think. Below are just a very few of those I’ve made.

crosses lots

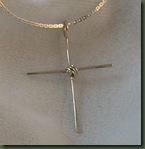
The plain wire crosses are the easiest to make being composed of two pieces of 14 gauge wire soldered and then wire wrapped in the middle. These are then patinated and textured to provide the look of wood.

The flower-like wire crosses are a little more challenging. I eyeball the shape and occasionally create one that’s not as symmetrical as I would like. Yes, I know that I could use a jig and make them perfect, but that wouldn’t be me. Although you can’t see it very well in this photo the fold formed leaf at the top shares a jump ring with one of this style crosses.

The embellished cross required some problem solving before hatching. I saw a pendant in a magazine that was made by attaching beads to a filigree with wire. I tried this and liked the look except for the back shown below.

filigree backThis was one big mess! As I pondered how to cover the mess, I, of course, thought about making it into a cross. First I soldered a wire cross onto a sheet metal disc.

cross back 

Rather than overlapping the wires for the cross, I cut the side pieces and placed them beside the vertical wire. This made the cross a bit flatter. Finally, I wired the decorative filigree to the wire of the cross and finished the piece.


 cross done


I made a smaller cross, not pictured, by whittling down the filigree piece. This removed the lovely outer curves and I didn’t like it as well.

Finally, I created a scroll type cross using double wires rather than single.

scroll cross


Customers at my last show seemed to enjoy selecting a cross and then choosing either chain or leather to go with it. They also had a choice of selecting a sterling silver cross. I’ve made these in various sizes.

silver


Now it seems that every time I contemplate a new design, I can see the product made as a cross. Yet, I guess this is better than being CROSS! (I think I just heard a loud “Amen” from the other room.)

Spangled Bangles

Do you spangle?

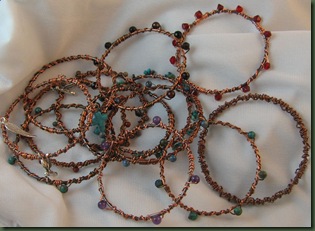
I’ve been enjoying making bangle bracelets the last couple of weeks. They are certainly the easiest bracelet that I’ve made in quite some time and with slight variations in diameter they fit most folks.

banglesThose in the above photo are formed with a basic 12 gauge copper wire armature that I soldered together and then hammered into shape. With a liver of sulphur bath and only a couple of hours of tumbling, they are ready to be spangled.

I thought I knew about “spangles”, but did look up the term just to be sure. A spangle is a small shiny/sparkling spot or object. It might be a sequin, a piece of metal or a bead, etc. If you spangle something, the dictionary suggests that you are sprinkling it with spangles. Hmm . . . it didn’t take any deep thinking to figure out that one, did it?

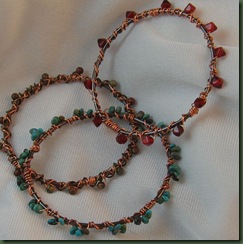
I wrap the base of my bangles with different sizes of copper or artistic wire and decorate them with small beads or charms.  Most of these are adorned with gemstones, but the red one shown below features glass beads. The turquoise spangled bangles seem to be the most appreciated.

brace


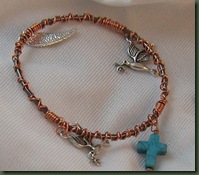
I tried putting just a few charms on one of the bangle and like the look. I haven’t yet given it a trial wear and don’t know if it will be comfortable. I made small loops in the wrapping wire and attached the charms as I wrapped.


charms


It remains to be seen whether these spangled bangles will be popular with customers and friends. I do, however, know that people like spangles of one kind and another. Whether these are on jewelry, garments or in the form of smiles on friendly faces, we can all use a spangle now and then. How will you create yours?

Agitation Helps

Many of us work hard to keep from becoming agitated. With me, agitation usually leads to anger and you know what that can lead to . . . don’t you? Therefore, I usually think of agitation as negative. Yet, the other day I read on a label for a new patina that agitation helps the process. Since I’m the type person who deliberately makes huge analogical leaps and repeats phrases out of context, I naturally had to continue thinking about how “agitation helps.”

If I go back to the original context of “agitation helps”, I can say that moving the solution around a bit while patinating the metal was supposed to help. What gets “moved around” when I become agitated? I think it’s usually my routine or the way I believe things should be that gets moved and this makes me agitated. Unfortunately, this context really does make agitation a negative; but is it really?

It seems to me that agitation often brings action and change. I remember years of working with volunteer forces in Louisiana trying to muster services for academically gifted youth. Our group often hunted for members when educational services were at their peak, yet when the legislature threatened to cut our funding or the schools committed some sin, our ranks swelled with eager voices. In other words, folks needed to be agitated about something in order to act. In this case isn’t the state of being complacent the opposite of being agitated? You can feel the silence when things are going well and be bowled over when people become agitated.

At this point, I might certainly break in to some political speech, but I’m not a politician, I’m a jewelry designer so how in the world can I make this big stretch? Actually, that big stretch happens almost every day when I want to be creative. I feel like I need to become agitated enough to change that with which I’m complacent and develop something new. What are the design problems that agitate me enough that I have to create something different? (I know that they say if it isn’t broken don’t mess with it. Yet, not everything unique and new comes because something was broken.) Following is an example.

Several entries ago I posted photos of a new wire weaving that I used for both necklaces and bracelet. Here’s a small photo reminder: weave


I liked the weaving and those designs, but was a bit agitated because I more or less copied the bracelet from a magazine and then made a necklace. Shouldn’t I be doing my own thing? What would be my own thing based upon this foundational design? How about . . .

weave new

The photo with the stone obviously shows abbreviated weaving on the sides. I thought I was being real smart by lessening the number of weaves, but found it very difficult to widen the distance between the main wires and keep a consistent weave. I actually did a better job on the first attempt as opposed to the smaller second try shown below.

blueMy fourth attempt is progressing more easily than the others (no, you can’t see my third attempt!) if you don’t consider the fact that I got two of the main wires crossed in the middle. That’s why they are wrapped together and will soon be hidden behind a stone (psst, don’t tell anyone).

wire  I’m a little agitated about getting those wires crossed in the middle of this armature, but am now wondering about the possibility of intentionally crossing some wires . . . that bears consideration.


So, whether this entry leaves you agitated or complacent, I hope it at least provides food for thought the next time you get agitated. In fact, the next time you get agitated, I hope you do something creative! That’s my plan and I’m sticking to it.

A Touch of Silver

I’m trying to get braver about the wire and metals I’m using. While copper is my mainstay, a few of my artist friends seem to be pulling me more into silver. I’m not easy to pull! In fact, if you asked them, I feel certain the word “stubborn” would be used to describe my lack of action. Lately, however, a few of the boutiques I serve have asked “can you do that in silver?” My quick response to the owners is usually, “I can try.” The silver has turned out to be a reasonably easy alternative for the designs and the pain of what I paid for the wire and sheet metal is eased when the silver jewelry sells relatively quickly.

I’ve tried to approach the use of silver as I learned to do in my Creative Problem Solving workshops by first stating a question. In what ways might I use sterling silver wire and sheet metal to create pleasing designs that are still affordable? There are a number of criteria inherent in that question including using as little material as possible while still producing a good design. The criteria create nice parameters within which to work. If I develop an idea that doesn’t fit the criteria, then I stop and revise it or throw it out. So far things are working reasonably well within this plan.

The pieces in the photos below show several new silver pieces that all required a little soldering. All of these were small enough that the cost was low and they stayed within the parameters for my problem solving. The earrings might have stayed in place without solder, but I wanted the waves in each direction to remain touching. They were bit tricky to solder.

silverear  

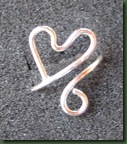
Rings seemed an appropriate project since they don’t require much wire. The original ring with the heart was designed by my friend at Sherry’s Jewels http://Sherrys-Jewels.com. I made a variation that is adjustable and added a little solder to connect the loose end of the heart to the band.

heart


The next ring design, shown with two variations is composed of four wires, each of which I soldered into a circle before placing them together. Each wire is about 1/2 inch shorter in length than the wire outside it. I then fitted each circle of wire inside the other and soldered in appropriate places. This one is adjustable as well. The one on the right is an overlapping version while both ends of the rings are meant to show on the left one.

rings

I used some left over wire to make the wire ring for the leaf necklace. The ring was soldered and then shaped and textured. The leaf is made from the foldforming technique mentioned in a previous post.

leaf


I consider this type necklace a collage since the dangles are an eclectic collection or things. This one also features a copper wire dragonfly and hangs from leather.

I have found that silver wire handles a little differently than copper and due to its lower melting point I have to be more careful with the torch. Yet, I think practice will work these things out and soon I’ll be braver about the size and cost of what I’m making.

Speaking of silver . . . I regret to inform you that I found a tiny bit in my hair the other day. I’m fortunate to not yet have to color away any gray and found that little silver on the side snipped right away with the scissors. If you see me out and about one day and note a small bald spot on my head, you’ll understand what happened.

Time to Weave

I would like to believe that the verb “weave” implies compatibility. Woven garments and rugs come together with complimentary colors and fibers whose blend creates something of beauty. Tapestries and other wall hangings do the same as the threads weave together in harmony.

Families, communities and cultures are also woven and consist of unique individual “threads” that come together to produce the whole. I’d like to believe that the majority of these result in compatibility, but know this isn’t always the case. I do, however, appreciate the idea of being woven into a family where I can retain my individuality yet mesh with my loved ones to create the personality of the group. (We do have personality!)

I think it is interesting how our personalities and mannerisms may vary slightly when we are woven with different groups of people. Just as the other threads of a woven art piece can affect the look of the individual fiber, people influence one another. Some human tapestries bring out my better side while others do the opposite.

Many years ago we lived in Alexandria, Louisiana. There was a weaver in my housing edition and I could see her loom in a big window when I went on walks by her residence. I often thought it might be relaxing to learn this skill. It seemed the ultimate art form resulting from knowing just what fibers and colors should be brought together; yet I never felt this was my artistic calling.

I also admire those jewelry artists who do a beautiful uniform job of wire weaving. I find it to be a difficult technique to master, but refuse to give up. This week I noticed a bracelet design in one of the bead magazines at the bookstore. (Yes, we are lucky enough to still have a bookstore!) The bracelet featured a weave I hadn’t yet tried; so I read the directions and went home to make it. It’s true that I’m often refuse to buy the entire magazine for just one thing I like. Shame on me!

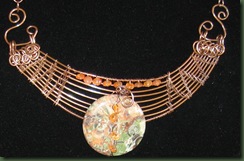
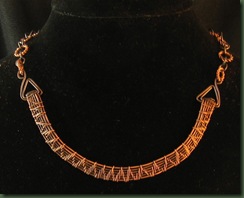
The picture immediately below shows the first piece I tried. It was going to be a bracelet, but I couldn’t ever quite get the clasp right, so it ended as a necklace. I used 6 copper wires as the basis for the weave. They wanted to curve and I let them.

weave

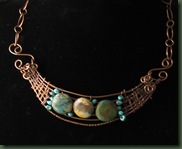
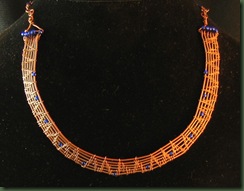
I wanted to see if I might include beads in between the weaves and tried adding small blue seed beads on the second necklace. I would have liked using larger beads, but found they created too much distortion in the shape. You may note some of this even with the tiny seed beads.

weave2

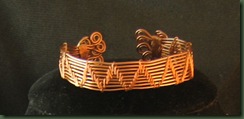
After practicing on two necklaces I decided to try another bracelet and used nine base wires in this. Again I worried with the clasp for several evenings and eventually found that with nine wires, the bracelet really didn’t require a clasp. You can see from the photo that I simply swirled the wire ends.

weavebrace


weavebraback

There are many other methods for finishing these, but this seemed appropriate at the time.

There is a certain rhythm to weaving. I thought the repetition would be tiresome, but find it somewhat relaxing in its tedium. Wire weaving, however, lacks some of the personality of weaving with fiber. I’ve yet to discover any surprise regarding how the wire will come together; perhaps I’m too new to the adventure. I think, however, that my next weaving will include some colored hemp along with the wire in order to play with a broader spectrum of possibilities.

While I continue to practice this wire weaving, I likely continue considering what I bring to the tapestries in my life and will hope to add something positive to each. By doing so, perhaps I can influence another “fiber” to do the same.

What have you woven today?

From Big to Small

I’ve always thought that when trying to learn something new you should work from big to small. Remember those first prereaders in Kindergarten? The one or two words on each page were quite large compared to the first grade readers and then chapter books and novels. The print got smaller and smaller as readers progressed in ability. (Of course, as we grow older, that print has to grow larger and larger due to failing eyesight issues. Of course, I can’t personally speak to that! Ha!)

In teaching piano, I found the big to small postulate to be the same. We started with a few large notes in songs and went on to hundreds of small notes and intricate passages. When my friend and I were trying to help little four year olds learn more efficiently, we developed musical notation with relatively large circles and ellipses that most little ones found easy to read. My engineer husband provided us with the appropriate drafting tools to write Keyboard Kapers, a book of original songs we used with the little ones. I wonder how many little pianists played songs about “my dog Blazer” when they were learning from us and the teachers with whom we worked. As the young pianists grew more proficient this notation gradually became the more common smaller notes we see in traditional music.

Having found success with big to large in the aforementioned reading formats, it seemed natural for me to apply this idea to learning to make jewelry. For example, when learning to make soldered bezels, I made large ones first and found they were easier than the tiny ones I’m trying to create now. I currently still have trouble and sometimes melt those little pieces of silver while encouraging my solder to hurry up and flow. Big IS easier!

Fortunately, a couple of my friends recently showed me how to use small premade bezels and snap sets for the tiny stones I wanted to work with. I purchased these from Rio Grande Jewelry Supply. I have always made large pendants, but decided I was ready to grow up to smaller pendants using this new bezel setting technique. My bravery extended as I also used more sterling silver that I usually do.

ruby2

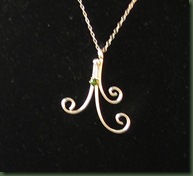
These pendants were not intended to look like anything in particular. I just wanted a pleasing shape that would house a little jewel. The first and second pictures show pieces that have rubies set in snap sets.

ruby1


The next couple of pieces show peridot in snap sets. The first one IS NOT a bug!

periodot1


     periodit2


Finally, I became brave enough to try a larger piece composed of more components. It’s still relatively small compared to most of the copper work that I do. Someone already told me it doesn’t look like my style since it is more formal. See what you think.

scroll

The photo on the left was taken from an angle and makes the piece look somewhat “off” Yet, it is symmetrical – my picture taking just isn’t! I wrapped a stone to hang from the basic silver armature and can change this out to other stones with the jump ring attachment.

Big to small is still working for me with one exception. I quickly realized early in learning about wire working that manipulating heavy gauge “big” wire is more difficult for me than working with a lighter gauge “small” wire. When you’re working with wire and have to sound like a tennis player who makes a noise every time she serves, it’s probably time to get a light gauge wire!

Freedom to Play Around

Before I begin, let me assure you the above title is not a statement about marriage.

Do you play with wire? One of the most enjoyable parts of playing with wire is manipulating it in various directions just to see what it does. There’s something relaxing about the freedom of working WITHOUT a pattern or a set idea of how a piece will turn out.

Art is one of the few places where the guidelines for problem solving are so open. For example, we’ve recently had a problem here at the ranch and needed a prescribed outcome. There was absolutely No Freedom regarding how things should turn out. When your irrigation pivot won’t run and you have to problem-solve a solution, you want the outcome to be a pivot that runs! (0bviously!) In art, however, the outcome may be unexpected, yet appreciated.

I have worked with what I call “double wire” designs for several months. You may recall the necklaces shown on May 28 which were double wire designs. The Chaos Necklace series has pieces that also begin with the double wire idea.

Today, I wanted to show two of the newer pendant-type necklaces that have hatched as a result of playing with the double wire idea. Both of those shown below feature tourmaline that I purchased from Magpie Gemstones (www.magpiegemstones.com). I actually used just one strand of tourmaline to complete both of these pieces and have also used some of that strand for other things. It was a good buy!

tourmaline1

tourma2It’s interesting to see how different this style turns out when the wire starts in the same manner.

I’m not sure why I call is double wire, since all the pieces are made from a single piece that doubles back on itself. The challenge is how to make that single wire into a pleasing configuration. Give it a try and see what you can come up with.

wire                                        wire2

If you aren’t a wire worker, just play around with drawing the way the wire might go. By the way, if you come up with something exciting, send it my way!!!

Freedom to play around can be found through many venues. It might be the way you dunk the basketball or a new dance move. Perhaps you play around with a new configuration in arranging a shelf full of books or nick knacks. I think that freedom to play around is just as much an attitude as an action. Am I stuck doing things the same old way, or am I free to try something different? Am I free to let those around me try something new?

Lest one of you takes the above to heed and get’s fired, I should remind you that we need to choose appropriate routes to freedom. If your boss isn’t into it, take care. If you ARE the boss, why not give an inch? We could all stand to play around just a bit more.

Saving Time

I’m a firm believer in making my own findings for jewelry; but I’m behind on making chain and took advantage of the opportunity to purchase some over the weekend. Yes, the photos below show “store bought” chain.

chainsTonight I feel lucky that I had that chain since these three pieces needed to be completed and time was ticking away. I’m doing a little art show tomorrow and wanted these to be ready since I wanted to take a few pieces with me that weren’t composed mainly of wire armatures.

nest

The bird’s nest necklace was so easy and fun to make. You just wrap wire round and round a ROUND object and then weave lighter gauge wire in and out of the rounds securing the eggs (beads) with the ends of this wire. I also made a couple of rings like this. Hmm, I wonder what bird would lay this color eggs.


lotus


The metal lotus is similar to something I’ve previously created, but I wanted to try a more open look. This one presented a challenge in getting it to solder in a way that wasn’t super messy on the back. Should I tell you that it took two tries?


curvesThe third piece probably took the longest to make. It was quite tricky to get the three middle pieces of wire to all ball together in the torch. While you cannot see this very well, I can assure you it doesn’t look very ball-like. Yet, I wasn’t going to do it again! I think the wire weaving took the longest and I really do appreciate those of you who whip out these weaves with the greatest of ease. I’m making myself keep practicing and trying to learn to do this technique without gritting my teeth.

Am I glad that I bought that chain? Yes, today I am because it helped in a crunch. Yet, I realized considerable added cost by making these purchases and that has to go into my pricing. You would think that this should work out about the same as if I had charged for the time it takes to make my own chain. Alas, it’s much easier for me to charge for something I purchased than something I made. I MUST get over that! Is there therapy for pricing anguish?