Category Archives: Pendants

Freedom to Play Around

Before I begin, let me assure you the above title is not a statement about marriage.

Do you play with wire? One of the most enjoyable parts of playing with wire is manipulating it in various directions just to see what it does. There’s something relaxing about the freedom of working WITHOUT a pattern or a set idea of how a piece will turn out.

Art is one of the few places where the guidelines for problem solving are so open. For example, we’ve recently had a problem here at the ranch and needed a prescribed outcome. There was absolutely No Freedom regarding how things should turn out. When your irrigation pivot won’t run and you have to problem-solve a solution, you want the outcome to be a pivot that runs! (0bviously!) In art, however, the outcome may be unexpected, yet appreciated.

I have worked with what I call “double wire” designs for several months. You may recall the necklaces shown on May 28 which were double wire designs. The Chaos Necklace series has pieces that also begin with the double wire idea.

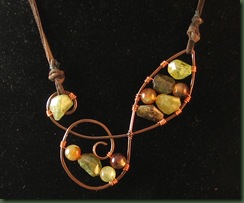
Today, I wanted to show two of the newer pendant-type necklaces that have hatched as a result of playing with the double wire idea. Both of those shown below feature tourmaline that I purchased from Magpie Gemstones (www.magpiegemstones.com). I actually used just one strand of tourmaline to complete both of these pieces and have also used some of that strand for other things. It was a good buy!

tourmaline1

tourma2It’s interesting to see how different this style turns out when the wire starts in the same manner.

I’m not sure why I call is double wire, since all the pieces are made from a single piece that doubles back on itself. The challenge is how to make that single wire into a pleasing configuration. Give it a try and see what you can come up with.

wire                                        wire2

If you aren’t a wire worker, just play around with drawing the way the wire might go. By the way, if you come up with something exciting, send it my way!!!

Freedom to play around can be found through many venues. It might be the way you dunk the basketball or a new dance move. Perhaps you play around with a new configuration in arranging a shelf full of books or nick knacks. I think that freedom to play around is just as much an attitude as an action. Am I stuck doing things the same old way, or am I free to try something different? Am I free to let those around me try something new?

Lest one of you takes the above to heed and get’s fired, I should remind you that we need to choose appropriate routes to freedom. If your boss isn’t into it, take care. If you ARE the boss, why not give an inch? We could all stand to play around just a bit more.
Saving Time

I’m a firm believer in making my own findings for jewelry; but I’m behind on making chain and took advantage of the opportunity to purchase some over the weekend. Yes, the photos below show “store bought” chain.

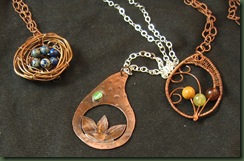
chainsTonight I feel lucky that I had that chain since these three pieces needed to be completed and time was ticking away. I’m doing a little art show tomorrow and wanted these to be ready since I wanted to take a few pieces with me that weren’t composed mainly of wire armatures.

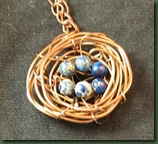
nest

The bird’s nest necklace was so easy and fun to make. You just wrap wire round and round a ROUND object and then weave lighter gauge wire in and out of the rounds securing the eggs (beads) with the ends of this wire. I also made a couple of rings like this. Hmm, I wonder what bird would lay this color eggs.


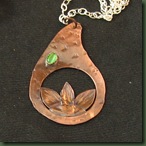
lotus


The metal lotus is similar to something I’ve previously created, but I wanted to try a more open look. This one presented a challenge in getting it to solder in a way that wasn’t super messy on the back. Should I tell you that it took two tries?


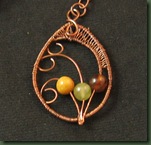
curvesThe third piece probably took the longest to make. It was quite tricky to get the three middle pieces of wire to all ball together in the torch. While you cannot see this very well, I can assure you it doesn’t look very ball-like. Yet, I wasn’t going to do it again! I think the wire weaving took the longest and I really do appreciate those of you who whip out these weaves with the greatest of ease. I’m making myself keep practicing and trying to learn to do this technique without gritting my teeth.
Am I glad that I bought that chain? Yes, today I am because it helped in a crunch. Yet, I realized considerable added cost by making these purchases and that has to go into my pricing. You would think that this should work out about the same as if I had charged for the time it takes to make my own chain. Alas, it’s much easier for me to charge for something I purchased than something I made. I MUST get over that! Is there therapy for pricing anguish?

Flora NOT Fauna


I’m making a real effort to focus on flora today and stay away from fauna. If you read the entry titled “Black and White” you know I encountered a skunk on a previous walk. Yesterday, it happened AGAIN! I was watching very closely as I went up the last hill and detected movement in the grass. Yep, there was black and white again. Yes, I did run down the hill AGAIN! 

Also, Bruno the dog just brought me the last of a snake that he or some other heeler consumed in the back yard. There was enough skin left to determine it was a coral. So, with raccoon footprints on my front wooden door, a skunk in my walking path and snakes in the back yard, I’m thinking about moving to town! You’d think I live in the boonies, but you can watch the video on the opening page of the website and see that is not the case (www.dreamcatcherranch.net) .

At any rate, all I can control “habitat wise” is the work in the studio and I hereby proclaim that it will be FLORA! (did I mention the ant and mouse traps I just set?) Flora doesn’t sneak up on you. Flora is graceful. I like flora! Yet, it has to have a little metal twist to it.

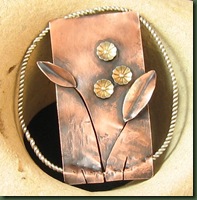
flora While I usually work until a piece is completed, this one spread over two days. Late yesterday, thinking I had all the soldering complete, I pulled this piece out of the pickle and a leaf fell off. With hungry fauna (dogs and spouse) waiting, I set this aside and started again this morning. It has now been resoldered, given a patina and run through the tumbler. I think it’s perfectly secure this time. Now I just need to figure out what type strand to hang this pendant from. Alas, the fun part is over. Yet, there’s more flora on the table . . .

I’m wishing you a good weekend free of black and white fauna and full of beautiful flora.

Black and White

Well, it happened again. Another morning walk affected my jewelry designs. Everything was perfectly fine until that last hill at the back of the property behind the house. By this point in the walk, I’m pretty weary and my legs are tired. Who knew that they could still help me run so fast. Trudging up that hill, I often meet the calico cat and this day’s encounter was also furry and just about her size, but it was black and white. If you were ever in the marching band or military, your body remembers how to do that about face where you place one foot out and turn completely around so you are facing the direction from which you came. It went something like this . . . black and white . . . skunk . . . about face . . . R U N !!!!! That black and white certainly turned me in a new direction.

Wondering if that was some sort of sign (probably just bad luck), I chose to try an about face (well almost) on the jewelry designs and momentarily attempt to focus on something other than wire armatures. I’ve made so many lately that I’m beginning to have nightmares about them! I think I could make handmade chains in my sleep.

If it’s not wire, then the designs around here must be metal. I’ve had components of the pieces shown here laying around on the work bench for a couple of weeks, but with this new direction, they had to be used.

bottlepend2

You’ll recognize those same old bottle caps. I have a love-hate relationship going on with them right now. This bottle cap is riveted to the back piece of copper that has been run through a ringer provided by a nice friend. It hangs from a leather chord. (yes, the back is supposed to hang slightly ajar)

The second piece is more complicated and I kept telling myself that simple is better as I added more and more components.  The telling didn’t work. I hope I didn’t overdo it. My home constructive critic wasn’t fond of it and had to be told to “pretend you like it” as I queried about the length of the piece.

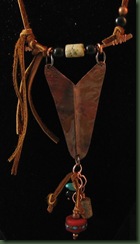
v

The copper V was foldformed and hangs from jump rings on a hammered piece of wire. It’s really not crooked, but the picture is. I wire wrapped the hammered wire and made a loop in the center of each wrap for attaching the leather chord. You can see that it is asymmetrical with leather dangles on one side and black and copper beads on the other. This one hangs down pretty long.

Taking a slightly different direction isn’t too painful and is often needed to free the mind for whatever comes next. Sometimes making those wire armatures becomes too comfortable and I have to move out of that zone. Last night I purposely made a very intricate wire wrapped pendant that took about three hours to complete. It required a techniques that I’m not very good at. As I grumbled about it, my critic asked why I was doing it. I replied that I thought it was important to do something uncomfortable part of the time in preparation for whatever comes next.  What do you think?

By the way, if you are wondering about that black and white, my downward hill run was successful and I did not get sprayed. Whew!

Loopy Loo

Notice that the title does NOT include any person’s name. I would not want to be accused of calling anyone “loopy” nor would I choose to be called that although those of you who know me might say it occasionally fits my personality.

I finally wrote the tutorial for the Loopy Loo Bracelet design. You see this pictured in sterling silver below and I’ve been making this bracelet a while. At the insistence of a good friend I finally decided to share it and offer the tutorial on my etsy shop as you see in the listings on the right.

clip_image002  While writing the tutorial, I realized that I had not fully explored the potential of this design. I used the SCAMPER creative thinking tool previously mentioned in another entry and tried new things with the loops. I “minified” the design using lighter gauge wire and a smaller cylinder for the loops. This resulted in both a smaller more delicate bracelet plus a new necklace armature. Although the one in the photo is medium sized, I also like the tiny loops I put in an earlier necklace in the second picture. Hmm . . . I seem to be stuck on purple!

loop necklace

necklace loop

Thinking again about SCAMPER induced possibilities, I “modified” the simagehape of the loops a couple of different ways. The first turned out to be a pendant where I flattened the circle of loops to frame a bead.

  I also turned them a bit differently and made earrings.

loop earrings I made these from 20 gauge wire and feel they would be better in a heavier gauge. They aren’t holding their shape as securely as I would like. I do, however, think they are a good design and I’m going to redo them.


Who knows what this Loopy Loo design will bring next? I’m pleased to be working with it again and hope to exhaust its possibilities before moving on. Any ideas????

Heavy Metal

The creative mind is a funny thing (not funny “ha, ha”, but funny “unexpected”). My day started with an early morning walk. Early for this artist is 9 AM when it’s already good and hot in South Texas. The moment I went out the front door, I spied my mother’s cat, Callie, who has lived with us for ten years. She’s a beautiful little calico who was lounging, full body, in the bird bath which was empty due to our drought. Can you picture her beautiful black, white and yellow body against the white concrete of the bath?

As I started down the hill, I was accosted by the loud sound of one of the hawks that is homing here at the ranch this summer. We’re not talking about a sweet little bird chirp here. We’re talking about a loud “caw, caw, caw” in a screeching tone as the hawk circled my head. I wasn’t sure whether I should run back to the house or hide under a tree. Eventually the hawk went on and I proceeded down the hill.

At the bottom of the hill and on down the road between pastures the wind brought a cool mist from the irrigation machine that was watering the land. It had that marvelous clean smell to it and reminded me of fresh rain. It was cooling for a while, but soon thereafter, my own mist was dripping off my brow as I trudged on in the heat.

The sights and sounds of the ranch engulfed me as I continued walking, encountering little birds, startled calves and lizards swishing through the grass. Just as I was thinking how pleasant it all was, I got to the top of the hill and there stood four of the bulls. They really are beauties in this own right, but the final sound I heard on my walk was the splat, splat as the business of those guys hit the ground. What a bummer!

Long ago, Dr. Sidney Parnes, taught me that one of the best ways to get creative ideas is to engage the senses. From him, I learned to bring fragrant tea or other natural aromas into the creative thinking process. I remember a tactile experience I provided for graduate students who, with eyes tightly shut, gently held a large strawberry in the very middle of one palm while touching it with one finger of the other hand. It sounds crazy, but they did some great descriptive writing following this experience.

With this in mind, I sat at the workbench and let the results of the morning walk wash over me. I thought I might produce something organic and natural looking, but I did not! I ended up with heavy metal jewelry. The pieces below started as foldformed metal and ended with chain. Even though I tried to put pretty beads on the pieces, they just didn’t work. How could the sights and sounds of nature drive me to this?

foldform pendant


The piece on the left is a pendant hanging from leather. It started as a rectangular piece of metal and just kept changing. I used a ceramic bead on the leather.


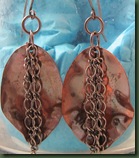
The earrings below were planned as leaves, but that chain just kept getting on them and I finally gave in. They have a nice little swish to them and I’m pleased that they aren’t noisy little fellows.


metal ear


So here’s the question. How can a morning walk end up as heavy metal jewelry? The answer lies in the nature of creative thought which often erupts from experiences. In this case the experiences were sensory. Those sensory experiences can open the artist to possibilities that were previously blocked. The idea/art produced may have no seeming relation to the experience; yet they are connected. I think it’s important to remember that when ideas cease to flow or your muse has gone home, there are many things you can do to find your way back home. The trick is to be open when creativity knocks on your noggin. A closed mind bears no art! 

You see . . . creativity really is a funny thing!

It’s a Wrap

An expert friend kindly helped me learn a few variations on the wire wraps I use for cabochons. Below are a few that I’ve completed. The first shows a nice moonstone cabachon purchased from Magpie Gemstones (www.magpiegemstones.com) You might like to know that this great online bead vendor is offering a $200 shopping spree to some lucky person. You can get the details at the following link: http://www.magpiegemstones.com/spree.html  Check it out.

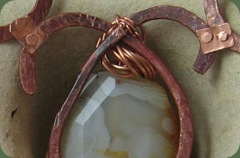
   moonstone Below is what I believe is a jasper cabachon. I’ve had it a long time and am debating what it is. You can see the wrap better in the second photo. This piece is in my etsy shop http://www.etsy.com/listing/74560684/copper-wire-wrapped-cabachon?ref=pr_shop

  jasper4                  green

I also got this great turquoise cab shown below from the aforementioned vendor. I looked at it on the workbench for several months before deciding what to do with it. Then I wrapped it several different times. This piece is currently in my etsy shop. ( http://www.etsy.com/listing/74554455/turquoise-cabachon-necklace)

turq1

The piece below features a titanium plated drusy agate, also from Magpie Gemstones. I wrapped it with sterling silver since it was designed as an anniversary pendant. I’m happy to report that the recipient thought her husband made a good selection.

titanium

I completed numerous other wraps, but they were not fit for viewing. As with any new skill, they require practice, practice, practice. I’ve been doing a wrap or two every day before initiating the day’s design production work. I find that when one of my skills is lacking, I lose a great deal of technique if I don’t work on it a bit each day. My other skills that are more refined don’t require this. Here’s hoping I can get cab wrapping to that stage fairly soon.

I’ve done some design research on wraps by looking at the work of others online. I see many beautiful pieces wrapped intricately with tiny wire. Although I like these, they’re not my style. I want to keep a more organic look. I think we each have to find and stick to our own niche.

I find that it’s a big conundrum to determine what to do with a wrapped cab when it’s finished. Should I put it on a neck wire, handmade chain, leather cord or something else? I’m beginning to wonder if I should plan that final look before starting the wrapping. That bears consideration. Let’s just hope that as my wraps improve, that last decision will become easier to make.

Foldforming

The term in today’s title may not be familiar to you. As I think about possible meanings, I realize there could be several connotations if we consider a literal interpretation of foldforming. Here are a few of the definitions taken from Karen’s dictionary of unknown terms:

1. the folds formed by a garment from being pressed into a suitcase;

2. folds that appear on a face mainly in the later years of life (more commonly known as lines);

3. the formed folding of the human body resulting from an imbalance between calories consumed and calories burned;  .  .  .

We could keep going with those incorrect definitions, but the truth is that foldforming refers to procedures used on metal to create a variety of forms. I’ve been interested in this for several years and finally purchased Charles Lewton-Brain’s book Foldforming. I appreciate the author’s commentary regarding how foldforming can help a practitioner better understand the manner in which metal adapts to folding, hammering, annealing, etc. I’m attempting to work through the book slowly and learn technique as opposed to rushing ahead to just make something new. This particular book is good for my exercise since the author’s goal is teaching technique and I don’t feel that his emphasis is on how to make specific pieces of jewelry. Perhaps due to this, the book hasn’t always gotten the best practitioner reviews.

foldform1The procedures in foldforming largely involve folding the metal, hammering the fold and then annealing it with a torch. Then the fold is usually opened creating a line or ridge in the metal. You can see three different line folds in the above pendant.

The second pendant sports a line fold in the center, but I positioned the ridge of the fold in the back. Hammering the edges of the metal produced its expansion and the rippled effect shown in the photo.

lilypad2Several people have commented that this one looks like a lily pad. I guess I need to go out and search for a little frog bead for the center.

Thus far my foldforming pieces have not received rave reviews. Rather than becoming discouraged, I have admonished myself to remember that I’m learning technique at this point. I believe that it may take a while to make this my own, but don’t dismay – I’ll get there!

By the way, if you are doing any foldforming, here’s hoping it’s all in metal!

Cold Connections

If you are not a jewelry designer you may not recognize the term in the title. Thinking outside of the design realm, I can think of a few “cold” connections I’ve had with people. You know, those encounters that leave you feeling unwelcomed and flat. These are the opposite of those warm welcomes you get from real friends.

Cold connections in jewelry making refer to the way we put things together, often in layers without using heat. I’ve been experimenting with the type of cold connections called riveting. Yes, my spouse is calling me Karen the Riveter, but luckily, I doubt you will be seeing my picture on any soon-to-be famous posters like Rosy the Riveter.

I would call a plain wire rivet the foundation for this technique. Constructing this requires creating holes in the pieces to be layered and inserting a piece of wire through the holes. You then flatten each end of the wire creating a small head that holds things together. This is done on both the top and bottom of your piece. This is easier said than done and it has taken considerable practice to make this type rivet work. Below is a photo of a necklace using a plain wire rivet. The rivets connect the large S’s to the focal.

rivet hingeI riveted a small piece of sheet metal to each wire component  It’s easier to see from the back of this piece.

rivet hinge back

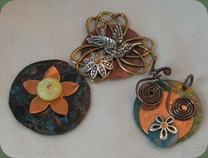
The pendants/charms below show more riveting I just finished.

rivet charms

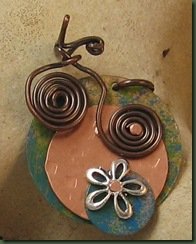
I used the same plain wire method for E.T.’s bicycle and flower. The other two pieces are riveted with wire on which I balled the ends with my torch. I know that I said “no heat”, but I was just making a big head pin, not connecting!


I really like using the balled wire since this means you only have to flare the backside of the rivet. It’s much easier. The problem that I’ve experienced is in balling the 14 gauge wire required to go in my 1/16 inch holes. This gauge of wire does not melt and ball balled wirevery quickly and I’ve ended up creating a little oven type structure to aid the process. This structure, composed of old charcoal blocks and solderite has two walls and a bottom. Using the tweezers, I hold the wire in this little structure while I torch and this helps reflect the heat back toward the wire instead of out into space. It still takes a good length of time, but I think it’s worth it.

blue beads


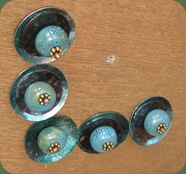
The last photo shows my first attempt at riveting ceramic beads . . . without breaking them. If you look closely, you can see that each part has 4 layers. From the top down, these are a brass daisy spacer, the bead, a dark copper disc and a teal colored copper disc to which I applied alcohol ink. This will become a necklace, but I’m still playing with how to connect or hang the pieces. They will have a propensity to flip and I’m trying to preplan and avoid that problem in the finished necklace. At the moment, I’m just feeling good about the riveting and not ready for the next challenge. You may notice that some of the wire balls became a bit flat as I worked on the bottom of the rivet. I’ve got to go back and fix that.

There are all sorts of other types of rivets including nail heads, tubes and decorative manufactured rivets. I have tried to nail down the basic technique before doing much with the others.

I hope rivets won’t leave you feeling cold. They really are a great connection!

The Wheels on the Bike Go Round and Round. . .

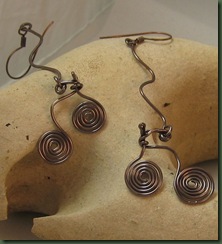
. . .round and round, round and round, the wheels on the b . . . oops, I guess that song was really about a bus! Well, today, it’s about bikes! I’ve been playing with little wire bikes that some friends and I accidentally created while manipulating wire one day. Each bike is made from a single piece of wire.

bikeear2

The earrings were easy to do since the three dimensional shape (the handle bars) doesn’t create any problems on them. These are really free swingers and hang pretty long. I’m thinking of doing them in colored artistic wire as a “fun” summer look.

bik ndckThe bike links caused considerable consternation at the design table. You can see that they do not want to lie flat and one of them prefers to be in the “ready to go round and round” position.

bikeetFinally, no bike series would be complete without the bike that E.T. rode. After all, didn’t it help save him and get him home? This little riveted charm above was planned to show his upward flight when the bike left the ground in the movie. This will either be a small pendant or a charm on a chaos necklace. I’ll try to post the finished piece when it is complete.

I’m still playing with the bike shape; so stay tuned for an update and other ways to use the bikes. Please add your own suggestions in the comments section. I’d enjoy hearing your ideas.