Category Archives: Pendants

Imitating Nature

How many times have you read that an artist gets inspiration from nature? If you aren’t “into” art, you’re laughing and saying “NEVER!” Yet if art and the process of making it does interest you, you’re probably thinking you’ve read or heard this many times. Whether it’s painting, sewing, making jewelry or most any other art form, the influence of nature is apparent.

One of my favorite boutique customers requested some new collage style necklaces on leather. I had fun making this type for her last Fall and it was time to add a Spring twist to things. Nature led the way for the two below.

The first piece features a dragonfly and a couple of lilies. My spouse assured me the lilies were upside down, but I hung them anyway. (Maybe they are lilies that didn’t get enough water and are hanging their heads down . . . ) I put these on a simple small S type link and then attached the leather through jump rings.

liliesThe second necklace features a smaller dragonfly, a couple of bead dangles and a pea pod. The chain allows them to have a nice little swing.   This piece has an interesting swirl bail at the top – one I don’t imagine I know how to make again. I think I have to be watching TV while I do it unconsciously!  My friend, Shannon, of Vixens Natural Jewelry showed me how to made the pea pods. I also used her design to make some earrings.  You will most certainly see the influence of nature in her work. You can check out her shop at    http://www.facebook.com/#!/TreeandMoonJewelry?sk=app_169505045786

   pea pod necklace

pea pod earringsI made a third necklace, but it hasn’t quite taken off yet. I created a little wire bird and hung her with a bird’s nest and a cage. I was calling it freedom. Unfortunately, the cage seemed out of place; so that one is back on the workbench for further consideration.  Perhaps it will fly before long.

It’s a great day in Central Texas to be out with nature; so I think I’ll get out of the studio for a while and go study outside. Do you think I can call that work?

Spring Colors ???

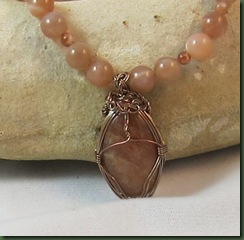
I set out to create some “springier” colored pieces, but I can’t quite seem to get there since it is so cold outside here in Central Texas right now. It looks like I ended up with more cross over colors and that’s probably OK. The first two photos show the apricot moonstone strands and cab  (www.magpiegemstones.com). I wish you could see the sparkle in the tiny beads that tells me I’m going to need more of them!The problem for me in purchasing beads is I often buy too many of those I can’t determine how to use and too few of those that work really well. I doubt I’ll ever get that quite right.

apricot     aprictor close

As I mentioned in a previous entry, I’ve been playing with wire trees just a bit more and wanted to create a scene in the piece below. (Yes, my family and friends are probably saying I’ve created a “scene” before, but I’m not talking about that kind!) I created a small wire bird for it, but the winged creature was too big proportionally for the tree. Oh well, it was a nice thought – cute bird.

tree scene 

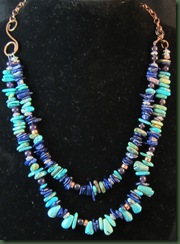
Finally, the double strand piece below made with turquoise, lapis and amethyst sports a new finding, shown on the right side of the photo. I’m trying to develop some new types of multi strand links and separators. I made this piece to see if one of them which takes a necklace from two strands to one would work. Thus far, I’m happy with it, but the truth is in continued wearing. It did great on its initial wear around the house last night. You can see that this piece makes its way around the neck with a chain. (I wouldn’t want to make a piece without some kind of metal on it!)

turq and lapis multiSo when will the bright Spring colors show up in the designs here at Dreamcatcher? I may just have to wait for inspiration from the redbud tree in the front yard since it’s usually one of the first harbingers of Spring. I don’t think it will be much longer and I’m sure those readers in the North are wishing even more than I that the season would make a happy change. Until then, we’ll just be pleased to see the sun and know that more warm weather will soon follow.

Color It Tangerine

If you follow the color trend predictions, you already know that Pantone, the industry color trendsetter, lists Tangerine Tango as the color of the year. I found it splashed all over the front page of the Life & Style section of the Austin, TX newspaper yesterday. If you are looking for a soothing, quiet color, this is NOT it. It is a bold and bright reddish orange that is definitely eye catching when presented dominantly in a design.

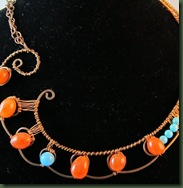
I looked at my cluttered bead table and realized that I have a few things I could call tangerine if I removed the word orange from my current vocabulary. Doesn’t Tangerine Tango sound much more expensive than orange? While in Hawaii last week, I obtained a piece of calcite that I think borders on the topic color.

calcite Calcite is a primary mineral in cave formations and produces those stalactites and stalagmites we learned about in school. It’s usually white or colorless but can be light yellow, orange, blue, pink, red, brown, green, black or gray.

Another Tangerine Tango piece was laying in the demolition box. This is where I keep the things that didn’t work out. I put them there when I’m too lazy to take them apart and then I can grab a bead here and there when I need it.

orangeAlthough the blue beads in this piece are not natural, you can see that turquoise would be a good complimentary color with this orange.

I’m hoping that Tangerine Tango won’t take over summer garments and accessories the way pink did several years ago. I remember everything that year was pink and by the next year it was totally gone. Yet, perhaps a little tango with this tangerine might be a good dance to try in a few designs. It really is pretty nice.

‘Tis the Season For . . .

. . . RED! It’s interesting to watch groups of people and note the predominance of things that are red this time of year. Red sweatshirts, red blouses, red skirts and red Santa hats seem to be in vogue. It also seems a good time for red noses as winter ebbs and flows in the center of Texas. Amid the red I keep hearing “cough, cough, s n e e z e!” Yes - ‘tis that time of year too.

Red jewelry also seems to be popular right now. I’ve sold all the coral necklaces I made and have noticed an abundance of red bling on the necks and wrists of shoppers.

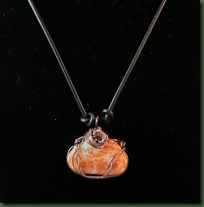
I tried to wear red bling. Several weeks ago I made a red garnet pendant and hung it from black seed beads. It just didn’t work. One reason was that it was not the right length. This became apparent when I wore it to a wire workers meetup and people kept saying “pull your necklace up” or “pull your shirt down.” These gals are very helpful and obviously I needed to do something about that red necklace.

Last night I took it apart and reworked the little jewel. This is not my favorite part of designing, but every once in a while you just have to give in and admit you didn’t get it right the first time.

I changed the strands from which the pendant hangs to a type of figure eight double strand. In the dark last night it looked great. In the light this morning IT DIDN’T! Although all the beads are garnet, they didn’t all look the same color. Therefore, midday brought another necklace revision wherein I added some of the strand beads to the pendant. I’m almost afraid to look at it again, but am hoping I have it right this time.

garnet necklaceRight now I’m thinking that it’s too bad you can’t give unmatched beads a dip in something, like you do with metal in liver of sulphur, to make them end up the same color. If there are any chemists out there – go for it! (OK – I’m sure all you gemologists just cringed – sorry.)

When I struggle with a piece like this I try to figure out what, if anything, I learned from the project. This piece taught me to pay more attention to how I finish something, to try on a piece as I work on it, to look at things more often in good light and to accept that good resistance to closure may go on for weeks. “Yet, red necklace, I’m definitely finished with you now.”

Happy Red to all of you!

Forming with Folds

Those of us who love to learn new things sometimes move to new avenues for this too soon. Either the initial fun wears off, something new calls our name, or time for the learning simply runs out. Often for me, I move on to something new before completely exploring the myriad of possibilities for creative development in the existing arena. This may have been the case with fold forming, a technique  developed by Charles Lewton-Brain. “Mr. Fold Form's” book, Foldforming, contains a wealth of information on how to construct various shapes from metal; yet, it doesn’t show as many completed pieces of jewelry as I would like to see.

Frequent and long time readers may recall that fold forming was the new technique I chose to develop last December and January during the winter lull between completion of the Fall products and the development of the Spring designs. Unfortunately, I may have moved too quickly from fold forming last year and back into rapid production for my customers. Also, I “closed” on the technique partly because I couldn’t figure out new things to do with it. I chose not to face the somewhat discouraging struggle that forces one into creative generation. I currently have renewed interest in fold forming due to a couple of happenings. Two of my lucky friends took a recent workshop with Kim St. Jean at the Texas Beadfest and their discussion of the class helped add to my refinement of the technique. Also, I gave a demonstration on the technique at a recent gathering of wire workers. Therefore, I had to practice.

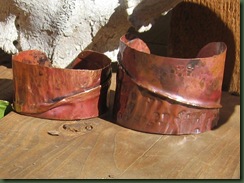
The trick for me with fold forming has been trying to make something besides a leaf that would comfortably work as a piece of jewelry. First, I practiced some different ways to hammer on a few leaves and learned how to better ruffle the edges. Then I created a couple of copper cuff bracelets. I like using a long diagonal fold to start the bracelet design and following this with appropriate texture. I quickly learned that it’s important to begin with a longer and wider piece of metal than the size of the anticipated product. I folded the metal first and then cut the final bracelet shape. When I annealed the metal bracelets with a torch during the fold forming process, beautiful colors appeared on the pieces.

brace cuff

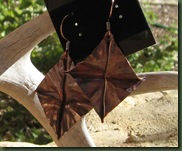
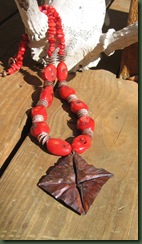
I’ve also been experimenting with a star shape shown in Newton-Brain’s book. First I made several pairs of earrings and then I created a larger star and used it as a pendant on a strand of coral. I gave the pendant a liver of suphur bath, tumbled it and then used the torch on it again. It adopted a very rich color.

star                   star2

coral Now the struggle is to try to develop some ideas of my own for fold formed shapes. Hopefully, I’ll have the time this year to stick with fold forming until I’ve either developed some new ideas or convinced myself that I CAN’T come up with anything new. Wish me luck.

The One-Handed Beader

This weekend I encountered a new need for problem-solving. This time it had little to do with the design work and more to do with “hand” work. But, let me start at the beginning.

We have outside pets, but rotate them, one at a time, into the house for their own special treatment. My Mother’s cat comes into the studio so that she can eat and then goes back out. The ranch is so inundated with ants that she can only get about two bites of her food on the porch before it is covered in the little varmints. After dark, when the ants are gone, the raccoons come up and take her food. They are brave little critters because even when I stand with the cat outside while she eats, the raccoons still come. I’m dismayed that they aren’t frightened by my mean look and scary voice. I’ve failed as a raccoon scarecrow! That’s why the cat comes in for food in the morning or mid afternoon.

Our dog Bruno comes in after supper each evening for his bit of TLC. This gives the two female heelers a respite from him. I think they need it. For example, tonight as the oldest one walked past Bruno he just reached his paw out and whacked her. He and I had a talk about this, but I fear I have about as much influence on him as I do the raccoons.

Saturday night while Bruno was inside, he followed me into my studio. That’s when the trouble began. I forgot that I had not put the cat back outside. You can probably imagine the surprise of all three of us when we realized the cat and dog were within a foot of each other. Before I knew it, Bruno had the cat in his mouth and she was whacking him on the head with her claws. When I extracted the cat from the dog’s mouth, she, of course, ate my hand and scratched my arms as I yelled for help. My spouse dragged the dog away as I tried to catch the cat again. Did you know a cat can actually scale the wall of a house? I finally caught the cat and put her outside. As my husband held the dog, he kept making biting sounds as he cracked his teeth together. He really wanted to eat that cat!

Luckily, neither the dog or the cat sustained any injuries. The cat had wet fur, but no abrasions and the dog was left with one cat claw stuck in his forehead right between his eyes. Unfortunately, I wasn’t so lucky. I was pretty badly scratched up and had one deep wound on my left hand. I tried to ignore it, but by Sunday it was extremely swollen and today, Monday, my nurse friends sent me to the doctor. We’re anticipating that the antibiotics will help. Currently the swelling is half way to my elbow.

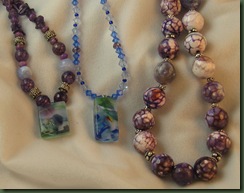
So, that’s how I became a one-handed beader. It’s been very perplexing to try and figure out what I can do with one hand. Yet, undaunted by my plight, I got started stringing and found that I can do that with one good hand. The picture below shows what I accomplished last night. It’s pretty slow, but better than being completely idle.

allThe two necklaces on the left feature glass pendants made by my friend at Light Work Glass (lightworkglass.etsy.com) You can see the pretty colors in the close up below.

pendantsI was fortunate to have these on hand since there is no way I can wrap a cab for a while and one-handed hammering of a metal pendant didn’t work either.

I guess, like Aesop, I can say there is a lesson to this sad tale. First, keep the dog away from the cat and second, even a one-handed beader can get things done. I hope no one else has to learn this the rough way.

Cross

It’s that time of the year when many people begin to gear up for the holidays. For designers, that often means art/craft show after show after show. We speculate by buying materials and creating our products and then hope that we’ve designed things that people will want. It often seems like design roulette. The time and monetary investment in the products can weigh us down, but could it also make us cross?

I hope the season is remaining pleasant for you as it is for me. This year, instead of being cross, I chose to make a cross. One cross led to another and I am beginning to think I should just start a cross store. See what you think. Below are just a very few of those I’ve made.

crosses lots

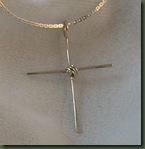
The plain wire crosses are the easiest to make being composed of two pieces of 14 gauge wire soldered and then wire wrapped in the middle. These are then patinated and textured to provide the look of wood.

The flower-like wire crosses are a little more challenging. I eyeball the shape and occasionally create one that’s not as symmetrical as I would like. Yes, I know that I could use a jig and make them perfect, but that wouldn’t be me. Although you can’t see it very well in this photo the fold formed leaf at the top shares a jump ring with one of this style crosses.

The embellished cross required some problem solving before hatching. I saw a pendant in a magazine that was made by attaching beads to a filigree with wire. I tried this and liked the look except for the back shown below.

filigree backThis was one big mess! As I pondered how to cover the mess, I, of course, thought about making it into a cross. First I soldered a wire cross onto a sheet metal disc.

cross back 

Rather than overlapping the wires for the cross, I cut the side pieces and placed them beside the vertical wire. This made the cross a bit flatter. Finally, I wired the decorative filigree to the wire of the cross and finished the piece.


 cross done


I made a smaller cross, not pictured, by whittling down the filigree piece. This removed the lovely outer curves and I didn’t like it as well.

Finally, I created a scroll type cross using double wires rather than single.

scroll cross


Customers at my last show seemed to enjoy selecting a cross and then choosing either chain or leather to go with it. They also had a choice of selecting a sterling silver cross. I’ve made these in various sizes.

silver


Now it seems that every time I contemplate a new design, I can see the product made as a cross. Yet, I guess this is better than being CROSS! (I think I just heard a loud “Amen” from the other room.)

Squared

One definition of squared is to set things straight. You can readily see from the new jewelry pieces below that even if I use square beads, I just can’t allow a design to be totally straight. After all, do any of us really want to be called “square?” I don’t want my jewelry to be called square either!

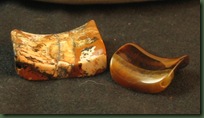
I’ve often thought that square gemstones were difficult to work with, but lately many of them have a nice little extra flair that’s too good to let go. These interesting stones have a slight curve in the middle that eliminates the flat surface usually found on square and rectangular beads. The stones below are jasper on the left and tigereye on the right. The stones in all the photos herein come from www.magpiegemstones.com.

stones

The bracelets shown below may look familiar since they are made just like the dimensional bracelets that I’ve made for several years. I have previously done oval faces on them, but the square fits nicely on the wrist. If you have purchased the Dimensional Bracelet tutorial (,http://www.etsy.com/listing/77795508/dimensional-wire-cuff-bracelet-tutorial?utm_source=custometsywidgetword&utm_medium=api&utm_campaign=api) why not try it with a square stone?

square brace2


square brace

I didn’t get good color in the photo below, but this necklace matches the bracelet above right.

squiggles


You may have realized that the stones in the first photo are smaller than those in the jewelry shown. I have used the smaller jasper in a bracelet as well, but customers seem to prefer a big square if they’re going to get squared at all. I guess you may as well go all out! Originally, I tried making square wire embellishments atop the square stones, but found the curvilinear specimens more pleasing. They are also easier to create since the sides don’t have to be uniform as in a square. I wonder if this ease affects what I like . . . that bears consideration.

When I looked up the term squared, I thought some of the other definitions might ignite a design idea or two. For example, think about squaring a number and how that might create a design. (2 squared becomes 4 squared and that squared is 16 – you already knew that didn’t you?) I wonder how those numbers could create a design.

Another definition suggested the terms meant putting things at right angles. That too might provide the basis for a design (or have I gone to far). I’ll bet those of you with math anxiety already tuned out!

Whether you want to go mathematical or not, I think you, too, might enjoy designing with these newer square beads: but don’t go too square! People might talk behind your back.

I Know Who Moved My Cheese


I’m preparing for a few art/craft shows in the Fall and thought I would get a jump on making some small, inexpensive items that could be stocking stuffers. Last year, I made a healthy number of wire bookmarks. There were wire cats. dogs and rabbits. This year I had visions of other wire animals hanging from the shepherd’s hook bookmarks. I was happily working on these when I happened to glance across and see my husband who was reading. Then it hit me. Someone moved my cheese!

If you are not familiar with this phrase, it is derived from the title of the 1998 book by Kenneth Blanchard  Who Moved My Cheese? (http://www.amazon.com/s/ref=nb_sb_noss?url=search-alias%3Dstripbooks&field-keywords=Who+moved+my+cheese) Companies and educational groups bought this book by the dozens and used it to make employees cognizant of the fact that times are changing and we need to be prepared to learn new skills and to problem solve. Many of us who were “encouraged” to read the book felt we could have gotten the idea with a simple memo, but hopefully it made a difference to others. The full-day workshops on the topic were a bit much.

My “cheese” realization” came when I noted that my husband was engrossed in a book on his IPAD II and no longer needed a bookmark. With the onslaught of electronic readers, I had to rethink the number of bookmarks I might need this year. Many of my friends and customers who are readers no longer need bookmarks.

It was fortuitous that I realized I might not need so many bookmarks this year before I made a hoard of them. I garnered my bookmark energy and set out to find something else small that I could offer at the art shows. I’m currently working on a few very small pendants/charms that could go on a chain, bracelet or a BOOKMARK.  (Surely, that cheese didn’t all move away.) Unfortunately, these little things take a bit longer to make, but I’m sure I will get faster as I make more and more.

tags The charms with a religious theme might work well combined on a bracelet or simply as a single charm attached to a beaded bracelet. Surely something will hatch before long.

In the meantime, I’ll be making just a few new bookmarks and trying to pay close attention to any other cheese that has been moved since last season. Of course, it would certainly be exciting if I had a clue what customers want ahead of time. But where would be the fun in that??? I’ve just got to follow the cheese, but in the meantime it’s important just to realize that it moved.

From Big to Small

I’ve always thought that when trying to learn something new you should work from big to small. Remember those first prereaders in Kindergarten? The one or two words on each page were quite large compared to the first grade readers and then chapter books and novels. The print got smaller and smaller as readers progressed in ability. (Of course, as we grow older, that print has to grow larger and larger due to failing eyesight issues. Of course, I can’t personally speak to that! Ha!)

In teaching piano, I found the big to small postulate to be the same. We started with a few large notes in songs and went on to hundreds of small notes and intricate passages. When my friend and I were trying to help little four year olds learn more efficiently, we developed musical notation with relatively large circles and ellipses that most little ones found easy to read. My engineer husband provided us with the appropriate drafting tools to write Keyboard Kapers, a book of original songs we used with the little ones. I wonder how many little pianists played songs about “my dog Blazer” when they were learning from us and the teachers with whom we worked. As the young pianists grew more proficient this notation gradually became the more common smaller notes we see in traditional music.

Having found success with big to large in the aforementioned reading formats, it seemed natural for me to apply this idea to learning to make jewelry. For example, when learning to make soldered bezels, I made large ones first and found they were easier than the tiny ones I’m trying to create now. I currently still have trouble and sometimes melt those little pieces of silver while encouraging my solder to hurry up and flow. Big IS easier!

Fortunately, a couple of my friends recently showed me how to use small premade bezels and snap sets for the tiny stones I wanted to work with. I purchased these from Rio Grande Jewelry Supply. I have always made large pendants, but decided I was ready to grow up to smaller pendants using this new bezel setting technique. My bravery extended as I also used more sterling silver that I usually do.

ruby2

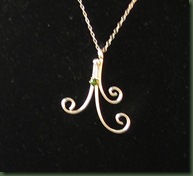
These pendants were not intended to look like anything in particular. I just wanted a pleasing shape that would house a little jewel. The first and second pictures show pieces that have rubies set in snap sets.

ruby1


The next couple of pieces show peridot in snap sets. The first one IS NOT a bug!

periodot1


     periodit2


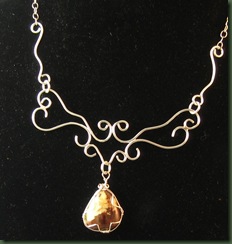
Finally, I became brave enough to try a larger piece composed of more components. It’s still relatively small compared to most of the copper work that I do. Someone already told me it doesn’t look like my style since it is more formal. See what you think.

scroll

The photo on the left was taken from an angle and makes the piece look somewhat “off” Yet, it is symmetrical – my picture taking just isn’t! I wrapped a stone to hang from the basic silver armature and can change this out to other stones with the jump ring attachment.

Big to small is still working for me with one exception. I quickly realized early in learning about wire working that manipulating heavy gauge “big” wire is more difficult for me than working with a lighter gauge “small” wire. When you’re working with wire and have to sound like a tennis player who makes a noise every time she serves, it’s probably time to get a light gauge wire!