Category Archives: Necklaces

Multipling

Yes, the title is a made-up term that has nothing to do with math. Anyone with math phobia can continue to read this. The term could stand for multi-tasking or something else. Its meaning In this treatise follows the basis of multitasking; yet it means doing something that requires several steps of design planning to occur at the same time on multiple strands of beads. I think that makes this a double multiple task . . . ?

I was multipling for several days this week as I worked on a couple of articles/tutorials for Magpie Gemstones (www.magpiegemstones.com). The first has been published and the second will be out this coming week.

Creating with multiple strands has always been a challenge for me; but this week I remembered a piano pedagogy instructor from a long ago workshop in Dayton, Ohio. She said we should attack our weaknesses. Sometimes I’ve felt I should just avoid my weaknesses, which I prefer to call areas of challenge. This week, however, I heeded that instructor’s words and attacked.

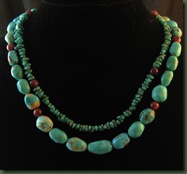
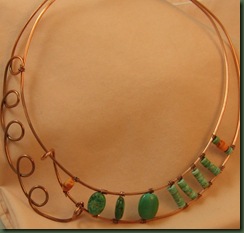
I read the available information online and watched a few videos. Then I commenced to work on my own pieces. When multipling, I had to consider the length of each strand in relation to the others, the bead placement in relation to the strand length and the placement of multiple strand spacers and connectors which somewhat alter strand length. Please don’t ask me how many times I restrung things before I got everything in sync. The two pieces immediately below are thoroughly discussed in Creating Multi-strand Necklaces: Part I http://www.magpiegemstones.com/mutlistrand1.html 

              brownblog turq6

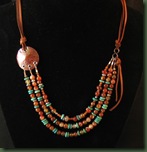
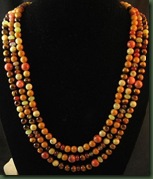
Part II of this discussion, soon to be published, discusses clasps, connectors and spacers for multi-strand pieces. The bib style necklace with leather and the three strand necklace below are featured in that article.

   image           bib


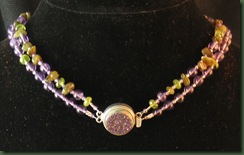
I was enthused enough about multi-strand pieces to go ahead and purchase a fancy clasp for one at the bead show I attended today. It was so pretty, that I decided to use it in the front of the choker style necklace. I don’t make much bling, but I liked this clasp. So, there I sat at the workbench again – multipling.

drusy

Now, I need to get back to singling rather than multipling and stop making up new words!
From Big to Small

I’ve always thought that when trying to learn something new you should work from big to small. Remember those first prereaders in Kindergarten? The one or two words on each page were quite large compared to the first grade readers and then chapter books and novels. The print got smaller and smaller as readers progressed in ability. (Of course, as we grow older, that print has to grow larger and larger due to failing eyesight issues. Of course, I can’t personally speak to that! Ha!)

In teaching piano, I found the big to small postulate to be the same. We started with a few large notes in songs and went on to hundreds of small notes and intricate passages. When my friend and I were trying to help little four year olds learn more efficiently, we developed musical notation with relatively large circles and ellipses that most little ones found easy to read. My engineer husband provided us with the appropriate drafting tools to write Keyboard Kapers, a book of original songs we used with the little ones. I wonder how many little pianists played songs about “my dog Blazer” when they were learning from us and the teachers with whom we worked. As the young pianists grew more proficient this notation gradually became the more common smaller notes we see in traditional music.

Having found success with big to large in the aforementioned reading formats, it seemed natural for me to apply this idea to learning to make jewelry. For example, when learning to make soldered bezels, I made large ones first and found they were easier than the tiny ones I’m trying to create now. I currently still have trouble and sometimes melt those little pieces of silver while encouraging my solder to hurry up and flow. Big IS easier!

Fortunately, a couple of my friends recently showed me how to use small premade bezels and snap sets for the tiny stones I wanted to work with. I purchased these from Rio Grande Jewelry Supply. I have always made large pendants, but decided I was ready to grow up to smaller pendants using this new bezel setting technique. My bravery extended as I also used more sterling silver that I usually do.

ruby2

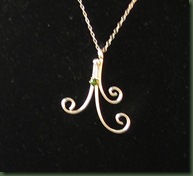
These pendants were not intended to look like anything in particular. I just wanted a pleasing shape that would house a little jewel. The first and second pictures show pieces that have rubies set in snap sets.

ruby1


The next couple of pieces show peridot in snap sets. The first one IS NOT a bug!

periodot1


     periodit2


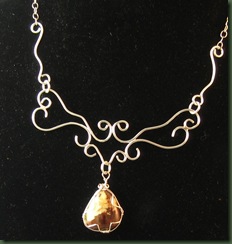
Finally, I became brave enough to try a larger piece composed of more components. It’s still relatively small compared to most of the copper work that I do. Someone already told me it doesn’t look like my style since it is more formal. See what you think.

scroll

The photo on the left was taken from an angle and makes the piece look somewhat “off” Yet, it is symmetrical – my picture taking just isn’t! I wrapped a stone to hang from the basic silver armature and can change this out to other stones with the jump ring attachment.

Big to small is still working for me with one exception. I quickly realized early in learning about wire working that manipulating heavy gauge “big” wire is more difficult for me than working with a lighter gauge “small” wire. When you’re working with wire and have to sound like a tennis player who makes a noise every time she serves, it’s probably time to get a light gauge wire!

Freedom to Play Around

Before I begin, let me assure you the above title is not a statement about marriage.

Do you play with wire? One of the most enjoyable parts of playing with wire is manipulating it in various directions just to see what it does. There’s something relaxing about the freedom of working WITHOUT a pattern or a set idea of how a piece will turn out.

Art is one of the few places where the guidelines for problem solving are so open. For example, we’ve recently had a problem here at the ranch and needed a prescribed outcome. There was absolutely No Freedom regarding how things should turn out. When your irrigation pivot won’t run and you have to problem-solve a solution, you want the outcome to be a pivot that runs! (0bviously!) In art, however, the outcome may be unexpected, yet appreciated.

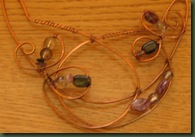
I have worked with what I call “double wire” designs for several months. You may recall the necklaces shown on May 28 which were double wire designs. The Chaos Necklace series has pieces that also begin with the double wire idea.

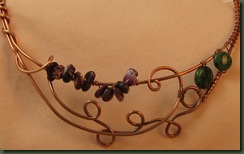
Today, I wanted to show two of the newer pendant-type necklaces that have hatched as a result of playing with the double wire idea. Both of those shown below feature tourmaline that I purchased from Magpie Gemstones (www.magpiegemstones.com). I actually used just one strand of tourmaline to complete both of these pieces and have also used some of that strand for other things. It was a good buy!

tourmaline1

tourma2It’s interesting to see how different this style turns out when the wire starts in the same manner.

I’m not sure why I call is double wire, since all the pieces are made from a single piece that doubles back on itself. The challenge is how to make that single wire into a pleasing configuration. Give it a try and see what you can come up with.

wire                                        wire2

If you aren’t a wire worker, just play around with drawing the way the wire might go. By the way, if you come up with something exciting, send it my way!!!

Freedom to play around can be found through many venues. It might be the way you dunk the basketball or a new dance move. Perhaps you play around with a new configuration in arranging a shelf full of books or nick knacks. I think that freedom to play around is just as much an attitude as an action. Am I stuck doing things the same old way, or am I free to try something different? Am I free to let those around me try something new?

Lest one of you takes the above to heed and get’s fired, I should remind you that we need to choose appropriate routes to freedom. If your boss isn’t into it, take care. If you ARE the boss, why not give an inch? We could all stand to play around just a bit more.

Saving Time

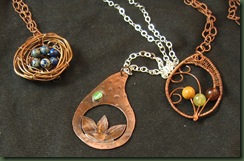
I’m a firm believer in making my own findings for jewelry; but I’m behind on making chain and took advantage of the opportunity to purchase some over the weekend. Yes, the photos below show “store bought” chain.

chainsTonight I feel lucky that I had that chain since these three pieces needed to be completed and time was ticking away. I’m doing a little art show tomorrow and wanted these to be ready since I wanted to take a few pieces with me that weren’t composed mainly of wire armatures.

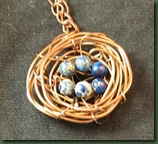
nest

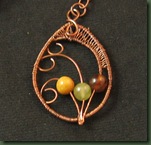
The bird’s nest necklace was so easy and fun to make. You just wrap wire round and round a ROUND object and then weave lighter gauge wire in and out of the rounds securing the eggs (beads) with the ends of this wire. I also made a couple of rings like this. Hmm, I wonder what bird would lay this color eggs.


lotus


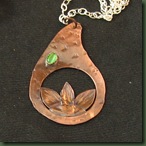
The metal lotus is similar to something I’ve previously created, but I wanted to try a more open look. This one presented a challenge in getting it to solder in a way that wasn’t super messy on the back. Should I tell you that it took two tries?


curvesThe third piece probably took the longest to make. It was quite tricky to get the three middle pieces of wire to all ball together in the torch. While you cannot see this very well, I can assure you it doesn’t look very ball-like. Yet, I wasn’t going to do it again! I think the wire weaving took the longest and I really do appreciate those of you who whip out these weaves with the greatest of ease. I’m making myself keep practicing and trying to learn to do this technique without gritting my teeth.
Am I glad that I bought that chain? Yes, today I am because it helped in a crunch. Yet, I realized considerable added cost by making these purchases and that has to go into my pricing. You would think that this should work out about the same as if I had charged for the time it takes to make my own chain. Alas, it’s much easier for me to charge for something I purchased than something I made. I MUST get over that! Is there therapy for pricing anguish?

Black and White

Well, it happened again. Another morning walk affected my jewelry designs. Everything was perfectly fine until that last hill at the back of the property behind the house. By this point in the walk, I’m pretty weary and my legs are tired. Who knew that they could still help me run so fast. Trudging up that hill, I often meet the calico cat and this day’s encounter was also furry and just about her size, but it was black and white. If you were ever in the marching band or military, your body remembers how to do that about face where you place one foot out and turn completely around so you are facing the direction from which you came. It went something like this . . . black and white . . . skunk . . . about face . . . R U N !!!!! That black and white certainly turned me in a new direction.

Wondering if that was some sort of sign (probably just bad luck), I chose to try an about face (well almost) on the jewelry designs and momentarily attempt to focus on something other than wire armatures. I’ve made so many lately that I’m beginning to have nightmares about them! I think I could make handmade chains in my sleep.

If it’s not wire, then the designs around here must be metal. I’ve had components of the pieces shown here laying around on the work bench for a couple of weeks, but with this new direction, they had to be used.

bottlepend2

You’ll recognize those same old bottle caps. I have a love-hate relationship going on with them right now. This bottle cap is riveted to the back piece of copper that has been run through a ringer provided by a nice friend. It hangs from a leather chord. (yes, the back is supposed to hang slightly ajar)

The second piece is more complicated and I kept telling myself that simple is better as I added more and more components.  The telling didn’t work. I hope I didn’t overdo it. My home constructive critic wasn’t fond of it and had to be told to “pretend you like it” as I queried about the length of the piece.

v

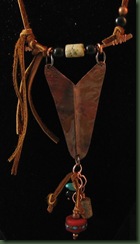
The copper V was foldformed and hangs from jump rings on a hammered piece of wire. It’s really not crooked, but the picture is. I wire wrapped the hammered wire and made a loop in the center of each wrap for attaching the leather chord. You can see that it is asymmetrical with leather dangles on one side and black and copper beads on the other. This one hangs down pretty long.

Taking a slightly different direction isn’t too painful and is often needed to free the mind for whatever comes next. Sometimes making those wire armatures becomes too comfortable and I have to move out of that zone. Last night I purposely made a very intricate wire wrapped pendant that took about three hours to complete. It required a techniques that I’m not very good at. As I grumbled about it, my critic asked why I was doing it. I replied that I thought it was important to do something uncomfortable part of the time in preparation for whatever comes next.  What do you think?

By the way, if you are wondering about that black and white, my downward hill run was successful and I did not get sprayed. Whew!

Loopy Loo

Notice that the title does NOT include any person’s name. I would not want to be accused of calling anyone “loopy” nor would I choose to be called that although those of you who know me might say it occasionally fits my personality.

I finally wrote the tutorial for the Loopy Loo Bracelet design. You see this pictured in sterling silver below and I’ve been making this bracelet a while. At the insistence of a good friend I finally decided to share it and offer the tutorial on my etsy shop as you see in the listings on the right.

clip_image002  While writing the tutorial, I realized that I had not fully explored the potential of this design. I used the SCAMPER creative thinking tool previously mentioned in another entry and tried new things with the loops. I “minified” the design using lighter gauge wire and a smaller cylinder for the loops. This resulted in both a smaller more delicate bracelet plus a new necklace armature. Although the one in the photo is medium sized, I also like the tiny loops I put in an earlier necklace in the second picture. Hmm . . . I seem to be stuck on purple!

loop necklace

necklace loop

Thinking again about SCAMPER induced possibilities, I “modified” the simagehape of the loops a couple of different ways. The first turned out to be a pendant where I flattened the circle of loops to frame a bead.

  I also turned them a bit differently and made earrings.

loop earrings I made these from 20 gauge wire and feel they would be better in a heavier gauge. They aren’t holding their shape as securely as I would like. I do, however, think they are a good design and I’m going to redo them.


Who knows what this Loopy Loo design will bring next? I’m pleased to be working with it again and hope to exhaust its possibilities before moving on. Any ideas????

Heavy Metal

The creative mind is a funny thing (not funny “ha, ha”, but funny “unexpected”). My day started with an early morning walk. Early for this artist is 9 AM when it’s already good and hot in South Texas. The moment I went out the front door, I spied my mother’s cat, Callie, who has lived with us for ten years. She’s a beautiful little calico who was lounging, full body, in the bird bath which was empty due to our drought. Can you picture her beautiful black, white and yellow body against the white concrete of the bath?

As I started down the hill, I was accosted by the loud sound of one of the hawks that is homing here at the ranch this summer. We’re not talking about a sweet little bird chirp here. We’re talking about a loud “caw, caw, caw” in a screeching tone as the hawk circled my head. I wasn’t sure whether I should run back to the house or hide under a tree. Eventually the hawk went on and I proceeded down the hill.

At the bottom of the hill and on down the road between pastures the wind brought a cool mist from the irrigation machine that was watering the land. It had that marvelous clean smell to it and reminded me of fresh rain. It was cooling for a while, but soon thereafter, my own mist was dripping off my brow as I trudged on in the heat.

The sights and sounds of the ranch engulfed me as I continued walking, encountering little birds, startled calves and lizards swishing through the grass. Just as I was thinking how pleasant it all was, I got to the top of the hill and there stood four of the bulls. They really are beauties in this own right, but the final sound I heard on my walk was the splat, splat as the business of those guys hit the ground. What a bummer!

Long ago, Dr. Sidney Parnes, taught me that one of the best ways to get creative ideas is to engage the senses. From him, I learned to bring fragrant tea or other natural aromas into the creative thinking process. I remember a tactile experience I provided for graduate students who, with eyes tightly shut, gently held a large strawberry in the very middle of one palm while touching it with one finger of the other hand. It sounds crazy, but they did some great descriptive writing following this experience.

With this in mind, I sat at the workbench and let the results of the morning walk wash over me. I thought I might produce something organic and natural looking, but I did not! I ended up with heavy metal jewelry. The pieces below started as foldformed metal and ended with chain. Even though I tried to put pretty beads on the pieces, they just didn’t work. How could the sights and sounds of nature drive me to this?

foldform pendant


The piece on the left is a pendant hanging from leather. It started as a rectangular piece of metal and just kept changing. I used a ceramic bead on the leather.


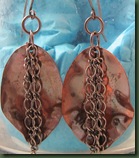
The earrings below were planned as leaves, but that chain just kept getting on them and I finally gave in. They have a nice little swish to them and I’m pleased that they aren’t noisy little fellows.


metal ear


So here’s the question. How can a morning walk end up as heavy metal jewelry? The answer lies in the nature of creative thought which often erupts from experiences. In this case the experiences were sensory. Those sensory experiences can open the artist to possibilities that were previously blocked. The idea/art produced may have no seeming relation to the experience; yet they are connected. I think it’s important to remember that when ideas cease to flow or your muse has gone home, there are many things you can do to find your way back home. The trick is to be open when creativity knocks on your noggin. A closed mind bears no art! 

You see . . . creativity really is a funny thing!

Which Came First. . .

. . . the design or the beads? I’ll bet you thought I was asking about the chicken and the egg.

Something initiates most new ideas, inventions, problem solutions and designs. Artists who say they’ve lost their muse might benefit from the examination of how their art begins. With musicians, the question is often “do you start with words or with melody?” The fiber artist might query whether the fiber drives the design idea or the idea hatches and initiates the search for the right fiber. Does the author select a setting or environment to write about and then create characters or vice versa?

Jewelry designers might well consider the above question “do my better pieces start when I’ve become fascinated by the possibilities for designing with a particular bead OR do I develop a design and then search for what gemstones would compliment it?”

square1 For example, the bracelet on the left started with the square bead. Although you can’t see it in the photo, it is not perfectly flat and I wanted to show off its character. This bead led to the adaptation of my previous dimensional design and required the development of a square, as opposed to oval, face. You may recall the former, shown below, from past blog entries. The tutorial for this one is in my etsy store.

oval


The bead has come before the design several times when customers have brought me rocks or gemstones collected during their travels. It’s often a challenge to make the right design to show off their treasure.

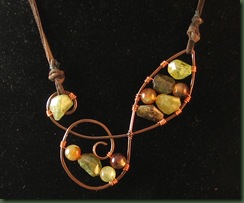
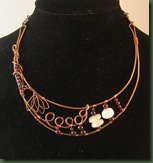
Other times, the design comes first. You’ve previously seen the double wire necklace series. These copper armatures require just the right size and shape beads for elaboration. Since each armature is a bit different, the bead requirements vary from piece to piece. The necklace below, found in my etsy shop, features heishi shaped moonstones and garnet rounds. I played with other beads before finding the right ones for this design.

garnetfront Of course the bead and the design may come together at one time. Is this the perfect marriage? Do your exciting pieces begin this way?

At this point you may be saying “who cares?” Art just happens. If your art flows freely, you don’t need this analysis, but what if it doesn’t. I think we all go through periods, whether long or short, of inactive inspiration. These are times when we wait for a great idea and it doesn’t come. Wouldn’t it be nice to know that a little analysis of previous work could prove helpful? It doesn’t work for everyone, but it might work for some. During those “dead idea” times, I’d try almost anything!

A careful analysis of my own work reveals that the design usually comes first. I spend a good deal of time playing with wire and that’s how most things hatch. The problem often occurs in the search for the perfect complimentary beads. Sometimes my impatience during this search causes me to use the wrong beads and then the design falls flat. I hope to become a little more patient during upcoming searches.

I’d like to believe that the artist’s muse doesn’t really run away, she just needs a little time to rest now and then. Yet, it wouldn’t hurt for us to give her a little nudge through analysis.

Double, Double, Toil and Trouble

No, I’m not practicing a witch chant; I’m just continuing my work on the double wire series. You may recall seeing some of these necklaces in a post several entries back. I continue to be fascinated by the myriad of possibilities that exist with this basic design. That’s the “Double, Double” part.

 double wire turq

Then there is the toil. Each time I pull out a long piece of wire and double it back, I get excited about what may develop; yet, I toil over how to get just the right balance in the wire armature and the beads. The necklace on the right looks a bit off, but I turned it too much in the photo and it is actually OK in person. I would have taken another photo, but this one found a home yesterday. Part of the toil comes as a result of needing to think of both sides at once. I’ve learned I can’t just do whatever I want with one side of the wire and hope I’ll be able to do something appropriately balanced with the other. It just hasn’t worked that way. Yes, I know I should probably draw the design before I start, but I’m a hands-on designer, not a pencil artist.

A significant part of the toil is determining how many beads to use. Originally, I planned to use many more beads on these armatures. I had an unfinished double wire necklace with me one day while visiting a boutique and wanted to get the owner’s take on the armature shape. She liked it, but didn’t want any more beads on it. She appreciated the simplicity. In other words, she helped me see that less can be more.

double wire spiney


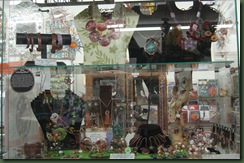
Finally, as the title suggests, there’s the trouble part. This occurs when the boutique client calls to request another double wire necklace “just like” the one I sold her last week. “Sure,” I say while wondering what in the world I sold her last week. I often feel like quite the dim wit as a client carefully describes the pieces she wants replicated and I have no recollection of what she’s talking about. Obviously, I must do a better job of taking photos of EVERYTHING. I just haven’t been that disciplined.paper bear 2 Yesterday, I went to a gift shop that sells my work and took a photo of the display. It should help me remember a number of the pieces that found a home there. By the way, this store, called Paper Bear, is in San Marcos, Texas. Visit this unique place if you have a chance. 

double wire tourm


I apologize for the poor photo on the left, but wanted you to see just how different these double wire pieces can be. This one seems to resemble a cat.

I guess my conclusion from all this “double, double, toil and trouble” is that it will continue for me. In the sports arena, that would probably be stated as “no pain, no gain.” Maybe for designers we could say “no play, no pay.” If we don’t play around with our designs (or toil), they will be the same old thing and may not sell. I, for one, am going to continue to play, take lots of pictures and hope for the best.

It’s a Wrap

An expert friend kindly helped me learn a few variations on the wire wraps I use for cabochons. Below are a few that I’ve completed. The first shows a nice moonstone cabachon purchased from Magpie Gemstones (www.magpiegemstones.com) You might like to know that this great online bead vendor is offering a $200 shopping spree to some lucky person. You can get the details at the following link: http://www.magpiegemstones.com/spree.html  Check it out.

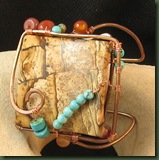
   moonstone Below is what I believe is a jasper cabachon. I’ve had it a long time and am debating what it is. You can see the wrap better in the second photo. This piece is in my etsy shop http://www.etsy.com/listing/74560684/copper-wire-wrapped-cabachon?ref=pr_shop

  jasper4                  green

I also got this great turquoise cab shown below from the aforementioned vendor. I looked at it on the workbench for several months before deciding what to do with it. Then I wrapped it several different times. This piece is currently in my etsy shop. ( http://www.etsy.com/listing/74554455/turquoise-cabachon-necklace)

turq1

The piece below features a titanium plated drusy agate, also from Magpie Gemstones. I wrapped it with sterling silver since it was designed as an anniversary pendant. I’m happy to report that the recipient thought her husband made a good selection.

titanium

I completed numerous other wraps, but they were not fit for viewing. As with any new skill, they require practice, practice, practice. I’ve been doing a wrap or two every day before initiating the day’s design production work. I find that when one of my skills is lacking, I lose a great deal of technique if I don’t work on it a bit each day. My other skills that are more refined don’t require this. Here’s hoping I can get cab wrapping to that stage fairly soon.

I’ve done some design research on wraps by looking at the work of others online. I see many beautiful pieces wrapped intricately with tiny wire. Although I like these, they’re not my style. I want to keep a more organic look. I think we each have to find and stick to our own niche.

I find that it’s a big conundrum to determine what to do with a wrapped cab when it’s finished. Should I put it on a neck wire, handmade chain, leather cord or something else? I’m beginning to wonder if I should plan that final look before starting the wrapping. That bears consideration. Let’s just hope that as my wraps improve, that last decision will become easier to make.