Category Archives: Earrings

Suddenly, It Was Quiet

My husband and I have enjoyed two weeks here with our daughter’s family, including a two year old, and five days with my son and his fiancé plus Daisy Mae, their dog. For those of you with a large family, this probably doesn’t seem like many people, but for us, it was a very pleasant house full. We are fortunate that we all get along so well and enjoy many of the same things. I looked in the den one evening and saw five adults on either computers or IPads and the two year old on an IPad also. I was the lone non-tech person since I was working with wire on a bracelet.

At other times, it wasn’t so quiet with either Daisy Mae, the Blue Tick Beagle, baying at something outdoors or my grandson working on his high pitched scream. Thankfully, it was a happy scream, albeit shrill.

Then, by ten o’clock Saturday morning, it was suddenly quiet again. Today, things are back to normal with the only loud sounds coming from my hammer on the bench block. I’ve completed a good deal of whacking and am hurrying as I prepare for a show tomorrow evening. Here some new earrings that just laterns hatched. These are made from small squares of copper sheet that I annealed and thin rolled, starting at one corner. I used a hole punch on the bottom and now they remind me of faralitoes. These little lanterns are the focus of one of my favorite children’s books, The Farolitoes of Christmas, by Anaya. You might visualize these as little tin lights wherein a candle can shine through the holes.
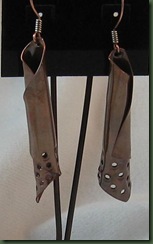
I made a similar pair a couple of weeks ago and they left home before I took a picture. That pair didn’t have the holes, but were wrapped in half round sterling wire.


I was hoping to show you the texture on this second pair of earrings, but it’s difficult to see in the photo below. My friend gave me a new little hammer which I happily used to tap dents all over these discs which I then domed.

discToday, I finished the cascade of beads and mixed metals shown below. I’ve made this necklace before and have always said I wouldn’t make another one. Alas . . . I gave in. It’s quite time consuming with all hand made chain and jump rings. Then, as you can see, each bead is attached with an individual head pin and wrapped loop. I thought I was finished with this twice, but then kept going back and adding more beads. Today, I’ve promised myself that I WILL NOT add any more beads! It’s going in the traveling display case right now!cascade I hope this blog entry finds you relaxed after a quiet (or noisy) Thanksgiving weekend and that when the real world calls you back Monday morning, you’ll be ready for it.

A Touch of Silver

I’m trying to get braver about the wire and metals I’m using. While copper is my mainstay, a few of my artist friends seem to be pulling me more into silver. I’m not easy to pull! In fact, if you asked them, I feel certain the word “stubborn” would be used to describe my lack of action. Lately, however, a few of the boutiques I serve have asked “can you do that in silver?” My quick response to the owners is usually, “I can try.” The silver has turned out to be a reasonably easy alternative for the designs and the pain of what I paid for the wire and sheet metal is eased when the silver jewelry sells relatively quickly.

I’ve tried to approach the use of silver as I learned to do in my Creative Problem Solving workshops by first stating a question. In what ways might I use sterling silver wire and sheet metal to create pleasing designs that are still affordable? There are a number of criteria inherent in that question including using as little material as possible while still producing a good design. The criteria create nice parameters within which to work. If I develop an idea that doesn’t fit the criteria, then I stop and revise it or throw it out. So far things are working reasonably well within this plan.

The pieces in the photos below show several new silver pieces that all required a little soldering. All of these were small enough that the cost was low and they stayed within the parameters for my problem solving. The earrings might have stayed in place without solder, but I wanted the waves in each direction to remain touching. They were bit tricky to solder.

silverear  

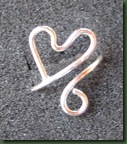
Rings seemed an appropriate project since they don’t require much wire. The original ring with the heart was designed by my friend at Sherry’s Jewels http://Sherrys-Jewels.com. I made a variation that is adjustable and added a little solder to connect the loose end of the heart to the band.

heart


The next ring design, shown with two variations is composed of four wires, each of which I soldered into a circle before placing them together. Each wire is about 1/2 inch shorter in length than the wire outside it. I then fitted each circle of wire inside the other and soldered in appropriate places. This one is adjustable as well. The one on the right is an overlapping version while both ends of the rings are meant to show on the left one.

rings

I used some left over wire to make the wire ring for the leaf necklace. The ring was soldered and then shaped and textured. The leaf is made from the foldforming technique mentioned in a previous post.

leaf


I consider this type necklace a collage since the dangles are an eclectic collection or things. This one also features a copper wire dragonfly and hangs from leather.

I have found that silver wire handles a little differently than copper and due to its lower melting point I have to be more careful with the torch. Yet, I think practice will work these things out and soon I’ll be braver about the size and cost of what I’m making.

Speaking of silver . . . I regret to inform you that I found a tiny bit in my hair the other day. I’m fortunate to not yet have to color away any gray and found that little silver on the side snipped right away with the scissors. If you see me out and about one day and note a small bald spot on my head, you’ll understand what happened.

Loopy Loo

Notice that the title does NOT include any person’s name. I would not want to be accused of calling anyone “loopy” nor would I choose to be called that although those of you who know me might say it occasionally fits my personality.

I finally wrote the tutorial for the Loopy Loo Bracelet design. You see this pictured in sterling silver below and I’ve been making this bracelet a while. At the insistence of a good friend I finally decided to share it and offer the tutorial on my etsy shop as you see in the listings on the right.

clip_image002  While writing the tutorial, I realized that I had not fully explored the potential of this design. I used the SCAMPER creative thinking tool previously mentioned in another entry and tried new things with the loops. I “minified” the design using lighter gauge wire and a smaller cylinder for the loops. This resulted in both a smaller more delicate bracelet plus a new necklace armature. Although the one in the photo is medium sized, I also like the tiny loops I put in an earlier necklace in the second picture. Hmm . . . I seem to be stuck on purple!

loop necklace

necklace loop

Thinking again about SCAMPER induced possibilities, I “modified” the simagehape of the loops a couple of different ways. The first turned out to be a pendant where I flattened the circle of loops to frame a bead.

  I also turned them a bit differently and made earrings.

loop earrings I made these from 20 gauge wire and feel they would be better in a heavier gauge. They aren’t holding their shape as securely as I would like. I do, however, think they are a good design and I’m going to redo them.


Who knows what this Loopy Loo design will bring next? I’m pleased to be working with it again and hope to exhaust its possibilities before moving on. Any ideas????

Heavy Metal

The creative mind is a funny thing (not funny “ha, ha”, but funny “unexpected”). My day started with an early morning walk. Early for this artist is 9 AM when it’s already good and hot in South Texas. The moment I went out the front door, I spied my mother’s cat, Callie, who has lived with us for ten years. She’s a beautiful little calico who was lounging, full body, in the bird bath which was empty due to our drought. Can you picture her beautiful black, white and yellow body against the white concrete of the bath?

As I started down the hill, I was accosted by the loud sound of one of the hawks that is homing here at the ranch this summer. We’re not talking about a sweet little bird chirp here. We’re talking about a loud “caw, caw, caw” in a screeching tone as the hawk circled my head. I wasn’t sure whether I should run back to the house or hide under a tree. Eventually the hawk went on and I proceeded down the hill.

At the bottom of the hill and on down the road between pastures the wind brought a cool mist from the irrigation machine that was watering the land. It had that marvelous clean smell to it and reminded me of fresh rain. It was cooling for a while, but soon thereafter, my own mist was dripping off my brow as I trudged on in the heat.

The sights and sounds of the ranch engulfed me as I continued walking, encountering little birds, startled calves and lizards swishing through the grass. Just as I was thinking how pleasant it all was, I got to the top of the hill and there stood four of the bulls. They really are beauties in this own right, but the final sound I heard on my walk was the splat, splat as the business of those guys hit the ground. What a bummer!

Long ago, Dr. Sidney Parnes, taught me that one of the best ways to get creative ideas is to engage the senses. From him, I learned to bring fragrant tea or other natural aromas into the creative thinking process. I remember a tactile experience I provided for graduate students who, with eyes tightly shut, gently held a large strawberry in the very middle of one palm while touching it with one finger of the other hand. It sounds crazy, but they did some great descriptive writing following this experience.

With this in mind, I sat at the workbench and let the results of the morning walk wash over me. I thought I might produce something organic and natural looking, but I did not! I ended up with heavy metal jewelry. The pieces below started as foldformed metal and ended with chain. Even though I tried to put pretty beads on the pieces, they just didn’t work. How could the sights and sounds of nature drive me to this?

foldform pendant


The piece on the left is a pendant hanging from leather. It started as a rectangular piece of metal and just kept changing. I used a ceramic bead on the leather.


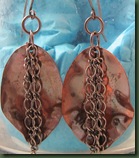
The earrings below were planned as leaves, but that chain just kept getting on them and I finally gave in. They have a nice little swish to them and I’m pleased that they aren’t noisy little fellows.


metal ear


So here’s the question. How can a morning walk end up as heavy metal jewelry? The answer lies in the nature of creative thought which often erupts from experiences. In this case the experiences were sensory. Those sensory experiences can open the artist to possibilities that were previously blocked. The idea/art produced may have no seeming relation to the experience; yet they are connected. I think it’s important to remember that when ideas cease to flow or your muse has gone home, there are many things you can do to find your way back home. The trick is to be open when creativity knocks on your noggin. A closed mind bears no art! 

You see . . . creativity really is a funny thing!

Earrings Galore

When a customer told me this week that she was out of earrings, I realized that I was too. That started my earring frenzy and allowed me to help my customers stock up.

eardiscs 


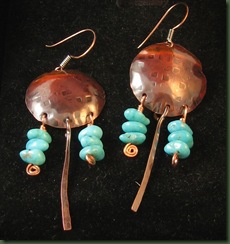
The first photo shows new disc earrings with turquoise and hammered copper wire dangles. I also made this design with coral dangles and think lapis will adorn the next pair.


 leaf earrings

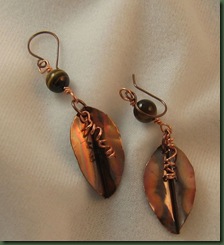
The leaves on the second pair were made using foldforming discussed in a previous blog entry.


I think I’ve shown bottle cap earrings previously, but all of a sudden this week I needed 8 more pair. I’m lucky to have a good supply of bottle caps provided by by son. These came all the way from California.

bottle cap earrings2       

The ‘S” earrings are self explanatory.  I also make a big “S” necklace that hangs from a leather chord.   

s earrings

I think the design for the pair below, made entirely from wire has possibilities for many other designs. I put a three leaf clover in one pair and hung dangles in another. These are made from 18 gauge wire.    

swirl earrings I made several other pairs and found that the assembly line approach worked best in churning them out. I made 10 discs, then 20 bead dangles and 10 wire dangles before assembling the first pair. The same approach worked for making numerous copies of the other styles. Finally, I made about 20 plus sets of ear wires shown on some of the pictured pairs. When I made the ear wires I tried to pick up one tool and use it on all the wires before going on to the next step. For example, I turned a loop on each of the wires before going to the next step. It seemed to expedite things, but I surely did get sick of making ear wires! When I finished those ear wire I wondered why in the world I don’t just buy them at the store.

Now I know what I can sit around and do when I’m bored – make ear wires! I just need to find out how to get bored.

Upcycled Cans


red flower 

Designing with cans, reminds me of my childhood. In my small town neighborhood in Medford, Oklahoma,  there were no fences; so the backyards sprawled from one to the next without interruption. All ages and sizes of children often played “kick the can” at dusk and I remember that it was great fun. Have you ever played? We actually did not use drink cans, but usually had something larger. I learned quickly that you really should pay attention to the condition of the can. Since I played barefoot, if I kicked a rusted can on a rough point, I came home with a bleeding foot. Yet, this did not deter me from playing again and again. I don’t remember the rules of the game, but it had something to do with running and hiding while someone else counted. Then as the person looked for the hiders, one of us could sneak up and kick the can. Then it all started again. canOccasionally, I hid so well that when I finally came out everyone else had gone home. Bummer!

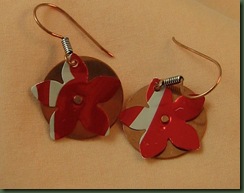
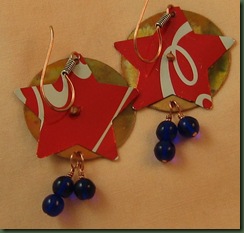
The earrings pictured here are made from Coke, Sprite and V-8 cans.   I appreciate that these are lightweight enough to be cut with paper cutters designed for scrapbooking. I’ve found that it is important to use the flattest parts of the can in order to get cutsthem into the cutter. Thus far, I’ve been riveting the can pieces onto copper discs, but feel there are many other possibilities.


red stars with blue beadsThe earrings on the left seem appropriate for Memorial Day weekend or the Fourth of July. Although the beads appear purple in the photo they are actually blue.

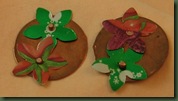
The colors on the V-8 can are more subdued and don’t show up as well on copper discs as shown below.  If I wasn’t so cheap, I would try them on sterling silver. But, I AM SO cheap!


double flowers


I haven’t yet put the earwires in the pair on the right. I think they might also make interesting necklace charms or small pendants.

I’ll continue to play with cans a bit more and especially want to layer several flowers on one disc. I think there are numerous possibilities for some fun summer pieces.

As for any other “play” with these, I’m afraid my days of “kick the can” are over. Now, the freedom I found playing this game is slower paced, but comes from creative expression.

The Wheels on the Bike Go Round and Round. . .

. . .round and round, round and round, the wheels on the b . . . oops, I guess that song was really about a bus! Well, today, it’s about bikes! I’ve been playing with little wire bikes that some friends and I accidentally created while manipulating wire one day. Each bike is made from a single piece of wire.

bikeear2

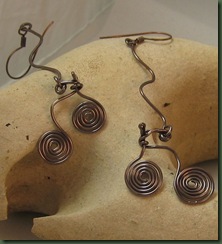
The earrings were easy to do since the three dimensional shape (the handle bars) doesn’t create any problems on them. These are really free swingers and hang pretty long. I’m thinking of doing them in colored artistic wire as a “fun” summer look.

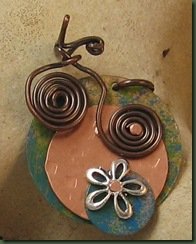
bik ndckThe bike links caused considerable consternation at the design table. You can see that they do not want to lie flat and one of them prefers to be in the “ready to go round and round” position.

bikeetFinally, no bike series would be complete without the bike that E.T. rode. After all, didn’t it help save him and get him home? This little riveted charm above was planned to show his upward flight when the bike left the ground in the movie. This will either be a small pendant or a charm on a chaos necklace. I’ll try to post the finished piece when it is complete.

I’m still playing with the bike shape; so stay tuned for an update and other ways to use the bikes. Please add your own suggestions in the comments section. I’d enjoy hearing your ideas.

The Messy Metal Smith

I wonder who it could be. Do you remember reading the August 11 entry describing how the pickle ate my pants? Well, today, the flux helped turn them white. I was happily spending some uninterrupted time with the torch when my bottle of Aquiflux fell off the table and rolled to some far away place. Oh well, I thought, I can just use the new paste flux sitting right here beside me. I hadn’t used much of it previously, but today seemed like a good day to give it a workout. All was well and I completed a ring with a bezel and two butterfly pendants before I noticed my pants. No, there weren’t any new holes in them, but one leg was practically covered in something white and powdery. Flux! Then I noticed that my hands had a good deal of dry flakes on them. Flux! The paste flux actually worked fine for my projects, but I’m not sure that I like the extra mess. I tried to take a bit more care with it on the rest of my projects, but when I went upstairs to clean up, I noticed I also had white spots on my nose and cheeks. Now you tell me how in the world I managed to get flux on my face. I guess you can just call me the messy metal smith.

By the way, I’m dangerous too. Last week, I managed to reach across the extinguished torch before it cooled. My arm came in contact with the torch and I have quite a nasty burn on my inside arm. It was becoming infected until I started flooding it with hydrogen peroxide. It appears that I’ll live to torch another day. Scars are good . . . right?

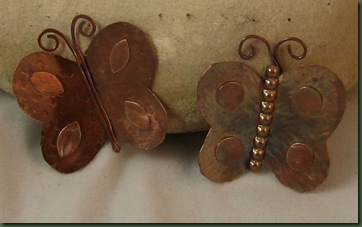
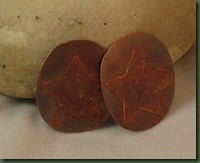
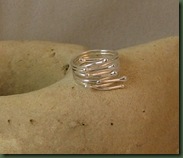
In spite of all the mess and the bandaged arm, this was a fairly productive day. As you can see from the photos below, I ended up with two sterling silver rings, two butterflies and two star earrings.

butterfly

I cut the shapes on the butterfly wings with my disc cutter and then sweat soldered them onto the copper shapes. The center piece on the right flutter by is made from a beaded wire.


The sterling silver ring sports a lapis stone that I put in a premade bezel cup. It has a little sterling silver flower sweat soldered on the side.

ring blue

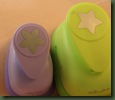
I used some very thin copper sheet for the star part of the earrings (or pendants) below. I’m trying out a paper cutter that cuts a star to see how long it will last with this type abuse. It does a fine job of cutting and I’ll just wait and see regarding its life. I appreciate the friend who shared this technique with me. I’ll let you know if it appears to be worth the relatively small investment in decorative paper punches.

star         ring

The last ring shown is from the new Kim St. Jean book mentioned in another entry.

I hope you aren’t as messy as I am, but I DO hope you’re having as much fun as I am! Does that make it OK to be a messy metal smith?

Bird Brain

It’s Cedar Fever season in my neck of the woods and it tends to make me feel a bit dull. After doing a few things that I felt weren’t too smart the past few days, the term “bird brain” popped into my mind. I don’t actually think that anyone has ever called me that derogatory term, but I have heard it used before. So, I wondered. Is it right that when you aren’t functioning at a real high level could you be experiencing the “bird brain” phenomenon?

As it turns out, being called “bird brain” might be a compliment. While scientists used to believe that most of a bird’s brain was a primitive and instinctual structure, recent discoveries indicate that about 75 percent of the brains of songbirds actually serve as a sophisticated information processing center. Many songbirds actually have a more powerful processing center than mammals. The bird’s brain is pretty small, but it’s also quite mighty.

I made a bird necklace yesterday in honor of those little brains everywhere.

birdetch2                       

                             birdetchear

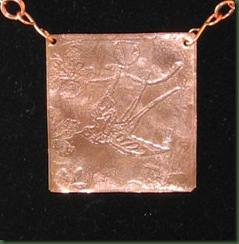
The bird is difficult to spot on the copper pendant. I used a nice stamp pad of a bird scene to apply stop out to the metal and then etched it. A close up photo follows. It is much clearer in reality.

birdetchonly

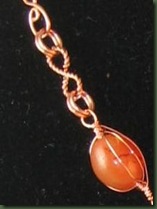
I hung the earrings on the necklace for photo taking purposes and wanted to show you the new twisted wire I’m trying out. Although the ends are difficult to deal with, I like the look of this wire. I also used it for a couple of swirls in the handmade chain on the necklace shown in the next photo.   twist

From now on, when I’m struggling with those high cognitive processes, I will not think about bird brains. I will simply hope that my brain is half as power packed as those little song birds.

Tweet … tweet!

Do You Have a Frienemy?

You’ve probably seen the commercial on television that pertains to losing weight in which a woman calls the bathroom scale her “frienemy”. Evidently and obviously, she is encouraged to lose weight by the reading on the scale while at the same time disgusted by the same number. I CAN relate to the enemy part, but not as well to the friend dimension.

My camera is my frienemy. I’m still trying hard to get my wire technique perfected and lately have been pleased with the way the handmade jump rings close and how the wire looks post hammering. I’ve been pleased, that is, until I’ve viewed them in a close up photograph. Then I can’t believe I’m looking at the same piece of jewelry. Those beautiful closed rings are NOT perfect. That camera is definitely my enemy!

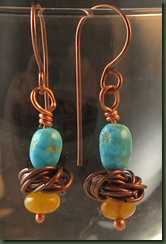
turqear

While it’s not as noticeable in this size picture as it is on my large screen computer, you may be able to see the less than perfect jump ring closures and the dent in the head pin wire. I can’t imagine how they got there between the time I completed the earrings and the time I took this photo.

Yet, as I look back at photos of older pieces, I do see some progress in my technique. For one thing, I now know what to look for whereas I used to just be happy with a sort of roundish ring that held together. I can also see that I’m doing better than I used to do and that makes the camera my friend since it has documented change over time.

turq


The close up photos also help me find all the little wire ends on bracelets that need to be tucked under. Even if I wear my reading glasses, I sometimes miss a few, but the camera doesn’t lie and it finds them all.

bracelet1   So what should a girl do with a camera frienemy? Thinking of the camera as my enemy and admonishing this inanimate object for making me look bad isn’t the answer. Also, it won’t do any good to plead with the camera to take a less upsetting photo. Therefore, I’m going to have to work with the friend dimension of my camera. I’m going to try taking a picture of my work sooner rather than later in the design process. This should provide a golden opportunity to spot and correct any technical flaws before proceeding to the next step. Often after I’m moved on, it’s too late to go back and fix certain things.

OK Camera – I’ve decided to let you be a friend. Now act like one and help me improve!