Category Archives: Metal Work

Fall

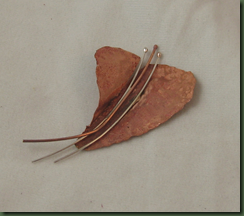
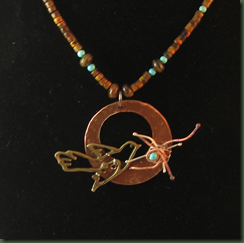
Don’t you just feel that Fall crispness in the air? No . . .? Unfortunately, I don’t either. It’s rapidly approaching 100 degrees here in South Texas and I’m wondering why in the world I am working on Fall design pieces. Could it be because the summer merchandise is rapidly clearing out of the boutiques and the Fall clothing will start arriving in August. If I don’t start thinking Fall right now, I’ll be behind. So, here I sit with the Fall color predictions on one side of me and a boutique’s Nomadic Treasures clothing brochure indicating what she has purchased on the other. I’ve also turned the ceiling fan in the studio on high and am trying to think about cool weather and darker colors. (This is a BIG stretch!) Since I’ve been making the etched cuffs, it was a fairly easy transition to use more Fall-like designs on them. braceletleaf4 I used a Fall leaf stamp to make this copper on copper bracelet. Sticking with the metal, I also finished a copper leaf pendant shown below. I torched the metal until it was black and, following cleaning, the leaf offered a beautiful red color. Then I soldered the little dragonfly on to one side. The challenge came in digging deep into my bead drawers to find the right Fall colors. This was made easier by spending time at a boutique yesterday.leaf4 There, I was able to match the colors to a Fall wool vest that was in stock. I find it much easier to design with a garment in front of me. Both of these pieces are currently available on my etsy shop @ www.dreamcatcherdesigns.etsy.com Fall is definitely here in the studio and I should be ready when the real deal comes along outdoors. Think COOL.

Different by Design

Last month, our wire workers group committed the meeting to Steampunk style jewelry. Steampunk might be described as a combination of technology and romance and in the case of jewelry this could be vintage pieces combined with mechanical parts such as cogs, wheels or watch parts. The bulk of my customers have just looked at me strangely when I asked if they liked Steampunk jewelry and when I described it, they were pretty sure they didn’t want any. Yet, trying to learn from every new opportunity, I tried to make a Steampunk necklace. It wasn’t bad and although I didn’t have any watch parts or cogs to use in it, the vintage parts came together nicely and on its first trip out to the stores, it sold. Unfortunately, I didn’t take a picture of that piece.

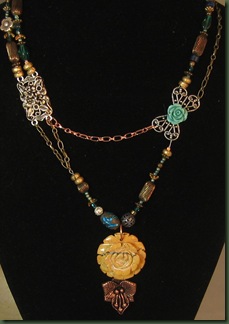
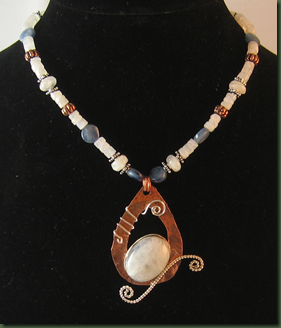
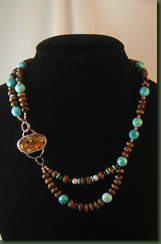
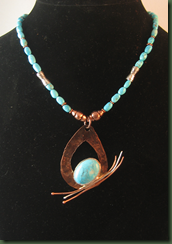
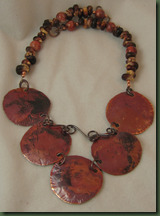
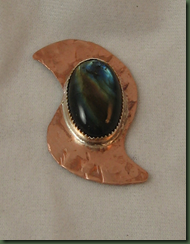
Today, I decided I should give Steampunk another chance. necklace1 The first necklace shown here is based on the theme of flowers and is quite eclectic. The second piece wasn’t planned as Steampunk, but rather influenced by it. I didn’t have any beads that specifically matched the bezeled cab I made, so I let my experience on the first necklace free me to use complimentary beads rather than perfect matches on this second piece.

necklace3  I applied this same “almost anything goes” approach to the meatloaf I fed the men at noon and it turned out pretty good as well. A little of this with a little of that covered with plenty of barbeque sauce and it was fine. Yet, I think I should drop this approach immediately since I preparing to do some etching. Playing with adding just any old chemical to muriatic acid would most likely spell disaster. I think I’d better follow the right recipe for this process.

Itching to Etch

Months ago, two kind souls in our Faux Bead Society showed us how to etch on copper.  I enjoyed the experience, but was involved in learning other things and didn’t do any further etching. Then, last month, a nice friend in the group brought me some mordant, the solution used to eat away the copper in the etching process. I brought it home and couldn’t leave it alone. I was itching to etch.

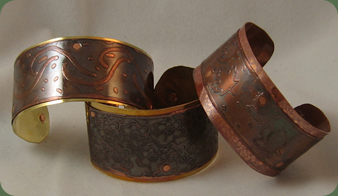
I’d been trying to develop a new cuff bracelet and the etching seemed a good option to try. The first bracelet, not pictures, was done on 20 gauge copper and although it turned out fine, it was extremely difficult to cut that gauge copper sheet by hand. Layering the metals seemed to be the answer. Initially, I tried to solder the two metals together after etching the top, but was not very successful. Therefore, the layers of the three bracelets pictured first are held together with cold connections (rivets).etched bracelets 

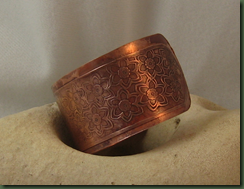
The next day I worked on another set of bracelets and was determined to get them to solder. My stubbornness paid off and these held much better.copper and brass bracelet I also put rivets in each end of these bracelets.   copper on copper bracelet 


Following the soldering and riveting, these bracelets spent about three hours in the tumbler to both clean and work harden them. The soldering process also annealed the metal and the bracelets were very soft prior to being tumbled. Now they retain their shape.

Etching was very messy and I was pleased to finish the bracelets and several other pieces today so I could put away the etching supplies. I guess you could say that the itch has been scratched for now. I shall see what my customers say about these pieces before I decide whether or not to get messy again. What do you think?

Funny

Is it funny “ha, ha” or funny “strange”? Yesterday was both!

I’m not sure what was in the air, but it seemed to me that those I visited yesterday were just happy. When I called on a boutique customer to supply an order and show a few new things, the owner and sales associate were already smiling. This is the great store that will honestly tell me whether my prices are appropriately marked. Yesterday, when I would say “do you think you could sell this piece for $x” both women would say in unison “we can do it!” After about the third chorus of this, it got to be pretty funny, but then you might have had to be there.

Next, I visited the nursing home arriving just as folks were returning to their rooms from lunch. I could see my mother wheeling down the hall wearing one of those flower adorned headbands I made her along with a big smile. We had a great visit and one of her stories was about being funny. At lunch, her tablemate asked her if her daughter was as funny as she is. I guess I never thought of my mother as funny, until she finished her story. She told me that this place, the nursing home, was where they bring people who have gotten “funny” and if you aren’t funny when you get here, you will be FUNNY soon! At that point I wondered if I should leave quickly before I became funny.

Even my design work was funny yesterday (in an ignorant sort of way). While etching copper pieces, I had run out of styrofoam used to float the pieces in the etchant. I was in a big hurry, etching and trying to cook dinner while shepherding the two blue heelers running through my house because they were afraid of the thunder outdoors. Having read that you could hang the copper pieces above the etchant with tape, I grabbed the least expensive tape I found and thought I had solved the problem. Did you know that when aluminum tape touches ferric chloride (the etchant) it gets very hot? Each time I shook the etching container to settle the copper, I could hear a big sizzle. When I finally removed the pieces from the etchant, the tape had either melted or formed little sizzling balls that were very hot to my gloved hands. The funny part is that my pieces turned out the best of any I’ve done previously.

As my final example of a funny day, the photo probably speaks for itself. bird with messy nest Look at the silly mess of a nest for this little bird. Not only is it funny looking, the process of getting the bird and the nest to remain on the copper was pretty funny. First I used E6000 glue to adhere them to the copper. That only lasted about 2 hours. Next, I attempted to cold connect the bird, but that didn’t work at all. Finally, I wired both the bird and the nest to the copper. The more I worked with this process, the messier the bird’s nest became. Then, I took a blurry picture of the whole thing . . . I’m trying to accept that this was just the perfect ending to a funny day.
“. . . I’m Gonna Let it Shine”

Do you remember that song from Sunday School? “This little light of mine. . . I’m gonna let it shine.” I was reminded of it as I polished some etched copper yesterday. A generous friend provided me with two types of polish and the dremel parts to use them. It’s a rare thing when someone brings you everything that you need for a task, but this friend did just that. Was she worried that I would never get to it if I had to go hunting for parts or was she just especially nice. I’m sure NICE is the key adjective here.

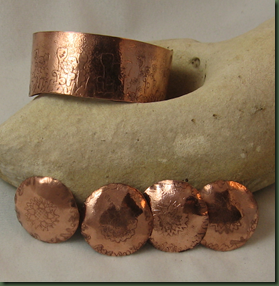
Having everything I needed, I shined and shined! The picture of a bracelet and some copper circles doesn’t really do justice to their shine. The dark shadows hide a bit of the glow, but you can get the idea. It was actually relaxing, listening to the hum of the dremel backed by the whir of the tumbler containing other pieces. Relaxing until . . . the bark of the puppy informed me the noises weren’t all that pleasant for canine ears. shinyI etched the bracelet with a row of flowers at the bottom and a snail and dragonfly amongst them. The circles have a flower in the middle and some decorative markings around the edges. Following a light patina in liver of sulfur, they were tumbled and then polished. I’m not sure yet what the circles will be. (perhaps earrings or a bracelet) I’m incubating on that one. Any suggestions?

Unfortunately, today the only shining I’m doing is on my dirty house. It appears that between my dust producing design work, the dogs (who aren’t really house animals) and the yuk from this week’s cattle work, the house has been the real loser. I think the word for today is “attack” so it can shine, shine, shine.

Perfectionism: Good or Bad?

Perfectionism is a relatively common topic in gifted education literature. Miriam Adderholdt’s book, Perfectionism: What's Bad About Being Too Good, was a must-read on many graduate course lists. Although perfectionism can have both good and bad sides, we often view it through a negative lens. I’ve thought about it lately since I’ve been working hard on learning to make sterling silver bezels and am never totally happy with how they turn out. moonstone silver Am I becoming a perfectionist? The following quotes from Adler and Maslow made me feel better:  “Adler (1956) said, "the striving for perfection is innate in the sense that it is a part of life, a striving, an urge, a something without which life would be unthinkable." And Maslow (1970) described perfectionism as the "full use and exploitation of talents, capabilities, potentialities, etc." Maslow believed that striving for perfection through self-actualization is the absence of neurosis rather than an indication of its presence. Winner (1996) noted that gifted children are well known to be perfectionists, "But being a perfectionist could well be a good thing if it means having high standards, for high standards ultimately lead to high achievement" (Winner, 1996, p. 215).

Even the idea of perfectionism does not fit within my organic design style. I truly enjoy just seeing how something turns out rather than doing a great deal of picturing how I want the design to look. If a color or shape changes as a result of too much torching, I usually just go with it and benefit from happenstance. How does this fit with perfectionism? Hamachek (1978) suggested that perfectionism exists “along a spectrum ranging from normal to neurotic.” He would label a normal perfectionist as someone who gets pleasure from painstaking effort and neurotic perfectionists as "unable to feel satisfaction because in their own eyes they never seem to do things good enough to warrant that feeling."

Even when the design work follows happenstance, I finish each piece to the highest level of perfection my technique allows and then I’m usually happy with the design.lab I believe it is possible, however, to become so absorbed by the idea of perfecting a piece that we lose sight of the art. I remember a friend who made a seed bead bracelet and then continued to add another bead here and there for several months. She never felt the bracelet was finished (perfect). I thought it was beautiful in its beginning.

Working on the bezels each day. I thought my first few were nice, but then I looked at someone else’s work and realized I have more technique to perfect. I believe the trick is to keep striving for the best I can do, gain joy in the process, and continue to grow. Positive perfectionism . . . I hope so!

moonstone swirl

Summer Camp

It’s hard to think about summer without remembering going to summer camps both as a child and later as an instructor. My favorite camp experience was the annual gathering of Creative Scholars in Louisiana. Each year, students who rated high scores on the Torrance Test of Creative Thinking were invited to join together for a two week learning experience. Initially we met in Natchitoches and later in Lake Charles, Louisiana. I was fortunate to be among the small group of instructors working with these students who were sixth graders or older. We wrote and shared our own creative thinking curriculum.

We instructed students in three basic creative thinking strategies, Synectics, Lateral Thinking, and Creative Problem Solving. Students also took electives that included inventioning, book writing, song composing and many others. The students always challenged us as only high creatives can do, but we loved it. I conducted my masters degree research with the first group of students and used a good deal of my learning there to set up my doctoral experiment. Therefore, it’s hard not to think of Creative Scholars in June each year.

While throwing out items from my files, I came across a list by the man who first dreamed of developing the Creative Scholars program, Dr. E. Paul Torrance. Although Dr. Torrance is now deceased, his words still ring true to individuals all around the world who value creative thinking.

How To Grow Up Creatively Gifted

  1. Don’t be afraid to “fall in love with” something and pursue it with intensity. (You will do best what you like to do most.)
  2. Know, understand, take pride in, practice, develop, use, exploit and enjoy your greatest strengths.
  3. Learn to free yourself from the expectations of others and to walk away from the games they try to impose upon you.
  4. Free yourself to “play your own game” in such a way as to make good use of your gifts.
  5. Find a great teacher or mentor who will help you.
  6. Don’t waste a lot of expensive, unproductive energy trying to be well-rounded (Don’t try to do everything; do what you can do well and what you love.)
  7. Learn the skills of interdependence. (Learn to depend upon one another, giving freely of your greatest strengths and most intense loves.)

The above manifest by Dr. Torrance makes more sense to me with each passing year. He certainly made it OK to be creative.

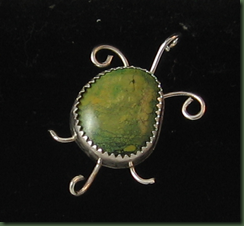
Finally, I would be remiss if I didn’t mention that other side of summer camp – BUGS. If you didn’t get bitten by something or have a rash or get sunburned, it just wasn’t summer camp. There were always lots of varmints around ranging from snakes that the guys used to scare the girls, to turtles. turtle Those varmints are much tamer in today’s jewelry studio as shown by the one I made this morning.

Ah, the good old days of summer camp. Alas, I think I’d rather stay in by the air conditioner for now. I’m not sure I could still handle the exuberance of those sixth graders.

What’s in a Name?

There used to be a television show called “Name That Tune”. People always thought I would be good at it since I was a piano teacher. Yet, I was a total flop when it came to that show’s tunes. I couldn’t name them. Now if you ask, I could hum a few lines, but that was it. Even now, I cannot remember the name of the song I’m searching for in the music store.

Some others appear to be more interested in names than I am. For example, my friends at Wildtype Ranch http://wildtyperanch.com/) who sell pasture raised Angus beef, carefully name their cows. For example, a few years ago, we purchased a cow from them named Lola. Instead of saying that they are moving cow number “xxx” out of the front pasture, they just say they’re going out to get Sally or another gal.

Today, I read about a Texas business (http://www.buttersbrownies.com/) where the owner names her brownies. While one brownie is “Jane” it’s counterpart without nuts is “Sane Jane.” She has even named a brownie after her ballet teacher.

All this naming business made me wonder if I should be naming my individual jewelry pieces. After all, if you look at products on the etsy marketplace (www.etsy.com) most of them have clever names. I have a few designs named such as the wave bracelet and the pot luck bracelet, but each of these has variations and the single pieces have not been named. Is it time for names? Could you offer some ideas?

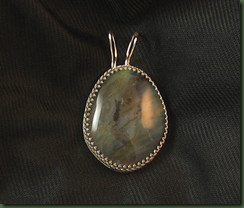
The first two pieces that need clever names are pendants. I haven’t yet made a hole in each, but you can get the idea.  Pendant #1 leaf pendant


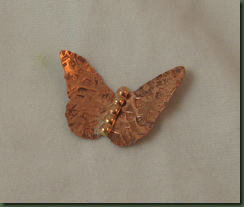
Pendant #2 (this butterfly has a crooked middle!)butterfly


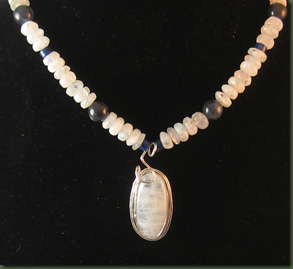
Necklace #1    side bezel Necklace #2

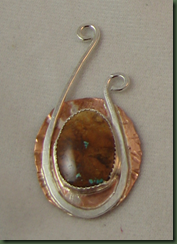
pendant plusAll four of these pieces are up for names. If you think of something clever, please chime in and “Name that Jewel!”

Coloring for Fun

Remember when getting a new box of crayons was exciting? Did you like it when you were old enough to get that big box of 48 colors? I always liked to color, but not necessarily in a coloring book. Just give me a big piece of paper and I was happy. I wasn’t an artist and didn’t try to color anything in particular; I just liked to run the colors back and forth across the paper.

I don’t think I’m the only adult who still likes colors. Working as an educational consultant, I carried large containers of colors and markers that were used for various projects during the workshops. I particularly remember one group of high school teachers who got so excited about getting to color that I thought I would have to put them in “time out” to settle them down. Most of their workshops just required note taking; so coloring while learning was a treat.

I could hardly wait for my grandson to come for this past visit because I knew he was finally old enough to work with color. We chose watercolors instead of crayons and had a great time splashing it on the paper. painting with nanaw We just worked with one color using the Driscoll Lipscomb approach from The Gift of Driscoll Lipscomb by Yamaka. In this children’s picture book, an artist gives his little friend a single color pot of paint each year on her birthday. She spends an entire year exploring it. I think it’s a good approach for little people and am reminded that “less is more”. Don’t ask who had the best time when we painted.

Color again burst forth over the weekend when I was torching some copper sheet for a necklace. I inadvertently left the torch on the piece too long and before I knew it, the piece was solid black. Yuk . . . another mess up. Since the piece was too hot to throw in the trash, I quenched it in water. To my happy surprise, the copper was a nice shade of red and following an hour in the tumbler it was quite useable. Who knew????? I used the red copper for a disc necklace like those described in the January 27, 2010 post. There was enough copper for earrings and I used some dried corn from an old Native American necklace for the chain. I also used Renaissance Wax to help preserve the color of the copper.  I like this kind of coloring. red necklaceStaying with the single color idea, my grandson and I did have one other experience – painting with pudding. This was even more fun than finger painting with shaving cream and with pudding, you get to lick your fingers! Yum!pudding yum  Did you know you can even finger paint your face this way?

It’s really a shame that we have to grow up. I want to go back to childhood and let someone else do the clean up. Unfortunately, I think using the torch to color is about as close as I can get to being a kid again. Yet, I could just go get my own new box of 48 crayons!

The Heat Goes On

This blog entry could easily be about the current Texas weather which is unseasonably hot for early June. It could be about my temper that continues to fire when provoked. The entry might even talk about a sports team that’s currently in their best scoring zone, but it’s not about any of those things. The pictures are a hint.

copper back bezel


               copper back bezel with sire

I’ve been out in the HOT garage using the HOT torch to put the heat on some silver and copper. Learning to make sterling silver bezels for stone cabochons has proven to be a good challenge. While neither example here is perfect, I’m rather pleased with what some good old fashioned sweat can produce. I’m mostly pleased with what I am learning. My friend showed me how to make these several months ago, but it wasn’t until this past weekend that I actually was able to try a bezel. My generous husband, with advise from my son-in-law, got me a new torch for our anniversary. Currently, I much prefer tools over diamonds and I think my guy finds tools easier to pick out.

I won’t comment on the number of bezels that I ruined as the heat goes on, but thus far, I haven’t broken the bank on too much washed silver. Luckily, scrap silver can be returned to the supplier for credit.

I’m also trying to learn to sweat solder. The connotation for this strikes me as funny if I consider how “sweaty” I’m getting in the HOT garage. Tomorrow I’m moving this little operation down into the basement mechanical room where it is much cooler. That room is made completely of concrete and brick so I shouldn’t be torching anything too detrimental. As my husband says, the first rule of using the torch is NOT to set the house on fire. I’m doing the best I can.