Category Archives: Bracelets

Do You Have a Frienemy?

You’ve probably seen the commercial on television that pertains to losing weight in which a woman calls the bathroom scale her “frienemy”. Evidently and obviously, she is encouraged to lose weight by the reading on the scale while at the same time disgusted by the same number. I CAN relate to the enemy part, but not as well to the friend dimension.

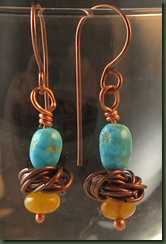
My camera is my frienemy. I’m still trying hard to get my wire technique perfected and lately have been pleased with the way the handmade jump rings close and how the wire looks post hammering. I’ve been pleased, that is, until I’ve viewed them in a close up photograph. Then I can’t believe I’m looking at the same piece of jewelry. Those beautiful closed rings are NOT perfect. That camera is definitely my enemy!

turqear

While it’s not as noticeable in this size picture as it is on my large screen computer, you may be able to see the less than perfect jump ring closures and the dent in the head pin wire. I can’t imagine how they got there between the time I completed the earrings and the time I took this photo.

Yet, as I look back at photos of older pieces, I do see some progress in my technique. For one thing, I now know what to look for whereas I used to just be happy with a sort of roundish ring that held together. I can also see that I’m doing better than I used to do and that makes the camera my friend since it has documented change over time.

turq


The close up photos also help me find all the little wire ends on bracelets that need to be tucked under. Even if I wear my reading glasses, I sometimes miss a few, but the camera doesn’t lie and it finds them all.
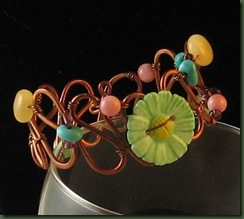
bracelet1   So what should a girl do with a camera frienemy? Thinking of the camera as my enemy and admonishing this inanimate object for making me look bad isn’t the answer. Also, it won’t do any good to plead with the camera to take a less upsetting photo. Therefore, I’m going to have to work with the friend dimension of my camera. I’m going to try taking a picture of my work sooner rather than later in the design process. This should provide a golden opportunity to spot and correct any technical flaws before proceeding to the next step. Often after I’m moved on, it’s too late to go back and fix certain things.

OK Camera – I’ve decided to let you be a friend. Now act like one and help me improve!
Nuts and Bolts

Today is the first day of the new year and it’s time to get back to the real world. For my little jewelry business that means getting back to the nuts and bolts of producing. January, for me, always means “try something new” during the lull when my boutique customers are clearing out rather than stocking up.

This year my initial “new” something comes in the form of Dream Kits. The name was suggested by a friend and it represents a package of metal components that may be purchased as a set. Kits are highly popular in other avenues of bead work. For example, one can easily find seed bead kits that contain all the components needed for a particular design plus the tutorial for making the piece. There are also kits for making chain maille designs that include lots of jump rings in the size required for the included pattern. Yesterday, I listed a couple of handmade chain kits on my etsy site (www.dreamcatcherdesigns.etsy.com) and I’ll be adding more as I produce them.

kit1                kit21

My thought with these kits is that some excellent designers don’t want to do any wire work, yet would enjoy using handmade components in their pieces. I enjoy making these and can offer a good product. We shall see if there are any takers.

The next kits are going to also have sheet metal components. These may be needed since working with metal requires so many tools and not every one wants to make that investment. I would greatly appreciate your thoughts and suggestions about what types of kits are needed. Do you think it would be better to offer the components separately?

I also wrote a new bracelet tutorial yesterday which will soon be ready for consumers. This flower cuff bracelet tutorial is in the proof reading stage and should be on etsy later in the week.

flowertut1 I’m also trying to learn to use a jewelry saw – currently a slow-go process. My first piano teacher told me to always begin with technique. It appears that the technique of sawing will take some time and practice, practice, practice. I guess its like working on scales on the piano every single day. Practice usually does produce. I find that this practice also requires patience. (My teacher forgot to tell me about that!)

All in all, the nuts and bolts of January 2011 are starting to come together and I’m looking forward to the year’s journey. How about you?

Tutorials

tut2 I truly enjoy writing. After I finished my dissertation, I thought I might never like writing another thing, but that didn’t last long. My mind constantly chatters and the words seem to flow more clearly through my fingertips than my mouth. The few books I wrote for teachers were joyful to do because they helped me formulate better teaching procedures for myself. Then, there have been those countless articles I’ve written about parenting, creativity, gifted children, early childhood education, etc. Retiring from my consulting business, I felt all that writing was behind me. Therefore, when my son first suggested several years ago that I begin a blog, I just shook my head; yet, here I am writing a blog! Lately, I’m also truly enjoying writing very short articles for Magpie Gemstones (www.magpiegemstones.com). Now, I’m trying something new. For a couple of months, friends who were unable to attend the little workshop I held on how to make a dimensional bracelet have asked me to write a tutorial for it. If you’re not in the jewelry making arena, you may not realize that tutorials are popular and contain both directions for making something but also provide a large number of pictures showing the process. After telling people that I “would not” write a tutorial because it would be too much like writing an educational handout or course syllabus, Sunday I wrote one! http://www.etsy.com/listing/64285495/dimensional-cuff-bracelet-tutorial The tutorial is for the basic bracelet shown in the picture at the top. It features layers of wire on the top part allowing the designer to create depth with the gemstones. You can see it better in the following pictures of another dimensional bracelet made using the same process. Although I had typed the written instructions on Saturday, I worked on this tutorial all day Sunday in order to take and add the 40 or so photos. Who knew it would take so long? brace3          brace2 My guest “editors” have read the tutorial and other than a couple of mess-ups, it seems to be ready for use. Perhaps someone will enjoy making it after the holidays when life slows a bit. I’m anxious to see what variations other designers develop for this basic process. As for the writing . . . creating a tutorial was not nearly as interesting as the other types of writing I like to do. Will there be more? I don’t know as this depends upon the reception for this one. My questions is “does anyone else benefit from or enjoy the results of this type writing?” If so, perhaps there will be more tutorials from this pen. The real learning I take from this is that I had better quit saying I’m NOT going to do something. Eating my words is not a pleasant meal; I’ve got more interesting things to do!

Dimensional Bracelets

I’ve been making dimensional bracelets for a couple of years and have enjoyed both the uniqueness and comfort of them as well as the fact that customers also like them. Since I will be teaching how to make this arm wear at a November wire workers meeting, I’m using this venue to show pictures of a few of the bracelets.

Blue Di Bracelet

   Grey Di Bracelet


These are called dimensional bracelets because of the option of making layers of stones on the top focal area. These are particularly visible on the grey and orange bracelet. The top can also be made flat as in the purple bracelet shown here.        Purple Di BraceletIt took many mistakes to eventually get to this design and to figure out how to measure the wire in order to come out right. I’m not showing you the pile of too small and too big bracelets that I made before getting it right. I felt a bit like Goldilocks as I tried to figure this out. The back and sides are shown in the pictures that follow.

Back of Di Bracelet 

 Side of Di Bracelet


I’ve also made these in sterling silver, but they get a bit pricey since they require so much heavy gauge wire. Luckily, the copper style is made from recycled wire that has been cleaned, shaped, given a patina and tumbled. Surely it’s good and clean by now. This wire sells around $4 per pound as opposed to sterling silver that is running about $27 an ounce. Hmm . . . don’t you think copper is really better?

When Gold Turns to Silver

I believe this saying has to do with the color of someone’s hair (Knoffler sang something about when the gold of her hair has turned to silver). It might also represent a tact for saving money in the jewelry design business. With today’s spot price for silver at a practically intolerable $22.70/ounce, it’s still more economical to use than gold which lists at $1,330.50 per ounce. You won’t see me using any gold any time soon.

Of course, that’s the same thing I said about silver last year. I was working exclusively with copper, a good deal of which came from the recycling establishment. Lately, however, feeling that my skill has progressed, I’ve delved a bit into silver wire. Today’s photos show the use of fine silver which fuses to itself without solder. Sterling silver requires the use of solder for fusing. One problem that arises with fine silver is just how quickly it melts. My pieces have a few bumps on them where the metal got too hot. Still, I feel it is better to see small flaws that lumpy solder.

The first pair of earrings turned out much bigger than I anticipated, but they do make a statement.silver large I’ve wanted to incorporate seed beads with the wire for some time and enjoyed using needle and fishing line to attach these embellishments to the ovals. They are very lightweight.


The second pair of earrings is, obviously, just a simple set of ovals.

small silver

Also, I fused some fine silver circles and put them on a double strand of sterling silver wire. This piece is very simple and delicate. It was trickier than I expected when I tried to get the circles to hang correctly.

silver neck

What’s a girl to do with earrings, a necklace and no bracelet? I answered that question by getting brave and using some 14 gauge sterling silver wire to make a small simple wave bracelet. I’m still debating as to whether or not to embellish it with beads.   silver brace


These pieces are a very different style than what I usually make, but were fun to do once I got past my panic of cutting the expensive wire.

I suppose the title to this blog entry should really read When the Copper Turns to Silver since that’s the change I made today. I’m just too much of a tight wad to work with gold right now. They don’t ever seem to have any at the recycling place!

Alexander Calder Inspiration

A Facebook friend listed the following video and luckily I clicked to see it. http://www.youtube.com/watch?v=wK8yelalFcI  I have always admired the works of Alexander Calder and this video features an exhibition of his wire jewelry. While speaking at a conference on gifted education in Indianapolis one year, a couple of artsy friends and I snuck out and went to the children's museum where there was a special showing of Calder’s work. Since it was a children’s museum, there were plenty of interactive centers. I recall manipulating vibrant red, yellow and blue colored pieces of vinyl to make a picture on a magnetic wall board. There was also a center for exploring the making of things with wire. Little did I know that I would later be so infatuated with bending wire into jewelry.  I was completely captivated by the exhibit and at one point I simply lay down on the floor to look up at the huge mobiles hanging from the high ceiling. The wonderful part was that no one thought I was weird! I guess I need to visit a children’s museum again!

Whether you are a Calder fan or not, I think it is interesting to note that he did not go to school to become an artist. He received a degree in engineering. We can certainly see how his training in how things work might have influenced his artistic endeavors, particularly his mobiles and large sculptures. There are many days when I wish that I had a better background in physics. As I recall, however, my engineer husband had to help me get through the basic college physics course required of elementary education majors. I got out with an A, but I think he deserves the credit.

Calder’s change from engineering to artistry reminds me of what I know and have mentioned before about so many gifted individuals. They don’t always stay with their initial focus or occupation. In the teacher’s gifted education classes that I held, I often had women come up at break to say they finally understood their own husbands. When these men mastered one occupation and reached the pinnacle of success, they dropped everything to move to a different occupation. It can be quite upsetting for the family, but may be totally necessary for the person. (I certainly cannot complain about anyone when I’ve been a piano teacher, school teacher, studio manager, piano salesperson, professor, consultant, teacher trainer, writer, rancher and jewelry designer. – I wonder what will be next – sure hope it isn’t wheelchair tester.)

In honor of Calder (I guess), I listed two wire bracelets in my etsy shop today. While the designs are not completly new for me, each piece is a bit different from the one before. It’s a good thing I’m not attempting to be a factory since I can never get even the bracelet armatures to turn out just the same. Do you think that is true artistry or just inability? Hmm . . let’s don’t even go there.

turq1


Both these bracelets are listed at $36 in my etsy shop. (www.dreamcatcherdesigns.etsy.com)


wave1

Top Down Day

Doesn’t that sound like a great day? I have visions of riding along the California coastline with the top down in my son’s convertible. The weather would be nearly perfect and the scenery glorious. We actually did this once on a visit to see him and he allowed us to borrow his car for a few days for driving down the coast. Was is the fact that we reminded him of what we shelled out for his Rice education that made him let us take it? I really doubt it. He’s just a nice guy.

Regretfully, it’s not that kind of top down day here at the ranch. Instead it is that dreaded day ever few months when I start at the top (ceiling) of our timberframe house and clean the dust all the way down to the floor. If you haven’t been in our home, that probably doesn’t sound like a big deal. A timberframe home like ours, however, has a good deal of exposed wood and a very high ceiling that catches considerable dust. The following link shows a photo of this type home. this is NOT our house, but you can get the idea. (http://www.timberframe-houseplans.com/gallery/Lindsey.shtml ) By the time I have been on the ladder and worked my way down, I am pretty much covered in dust, but feel good about getting it done. I can only work on top down when the puppy is ousted to his pen with the other dogs outdoors. Bruno likes to take my broom by the head and go raising down the hall with it. Cute - - but annoying! Bruno1 At any rate, I’m finally finished and ready for some design time.

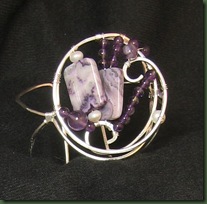
The photos of what I finished last night are more or less top down as well. This picture shows the very first sterling silver free form bracelet that I have made. I finally got the nerve to use this more expensive wire and managed not to mess it up.  This is a dimensional cuff with amethyst, sugalite and pearls. I just put it in my etsy shop for $42 and we’ll see how it goes.  http://www.etsy.com/listing/52292709/sterling-silver-gemstone-bracelet

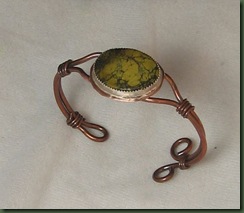
silver1 The second bracelet shown here is copper (I’m stretching to say copper is “down” from silver). I’ve been trying to develop a new bracelet that would incorporate a cabachon in a bezel. I think this might be a winner and will be especially nice when I get up the nerve to make it in sterling silver. This copper one retails at $30.  jasper1If you have been reading this blog, you know that soldering bezels is new for me, but it is getting easier. Perhaps when I try this one out of sterling silver, I’ll really go to the top and also use a turquoise cabachon.

I’m a Little Bit Country

No, I’m not Marie Osmond even though that’s her song.  How do you get to be country? Country speaks to me of time outdoors, gentle wind and farm ponds. When I was young, my father was the soil conservation agent in Medford, Oklahoma. As such, he helped local farms put in and stock their farm ponds. Later, he was allowed to fish in those ponds. I loved it except when the mosquitoes were out in force. My dad even used these country ponds to encourage his then “new” son-in-law to take up fishing. This country ease later gave way to boats with big motors and some small tournament fishing for my husband. At least it started out as country!

Another part of country that I enjoyed as a child was picking sand plums. We used to load up in the pickup and drive somewhere to find sand plum bushes. It seemed like I picked forever before my little bucket would be full enough to stop. The mosquitoes weren’t so much the problem as the bees in the bushes. One country problem with sand plums was that there was often sandy loam to traverse to get to the fruit. We carried a big board in the back of the pickup because my dad had a propensity to get stuck. Luckily, we were usually prepared for the inevitable. We brought sand plums home and Mother made great jelly from them. That’s something else I consider country even though city folks sometimes make jelly and do canning also. I think you could say I WAS a little bit country growing up.

Thinking about being country naturally leads me in to thinking about being western as well. My dad always wore a western hat and boots. I still have his last felt hat in a box in my closet just in case a need to rekindle a memory. It’s interesting to me that after all these years of living in major metropolitan areas while my husband was with Procter and Gamble, I grew up to be both country and western. Our ranch endeavors have certainly helped add a western bent to my life. Although I don’t wear a hat and boots, can’t ride a horse and don’t rope any steers, I can help round up the cows with the jeep, help down at the barn and save the life of a calf with a needle and fluids. Does that count for country-western?

I think a person’s art form takes on the style of who they are. Certainly your life, past and present, influences the things you like and therefore your style. While I continue to be a bit unsure about my own art style, I keep trying various types of designs. This week, I’ after country-western. So here’s the question, what does it take for a piece of jewelry to be that style? Western is somewhat perplexing. I’ve perused the web and been in several “western” stores, but am particularly dissatisfied with the store offerings. While the pieces carry a hefty price tag, they largely appear to be made of plated silver, large stones, magnesite dyed to look like turquoise and flashing beads, crystals or rhinestones. Since I haven’t been to a rodeo in about a 100 (slight exaggeration) years, I don’t know if this is what cowgirls are wearing. I envisioned more authentic turquoise, pure silver and less bling. I have several photos of pieces below that I would call western. See what you think.

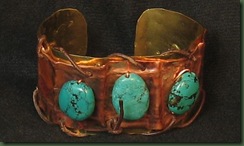
turq1

This cuff has a brass layer on the bottom and the top is fold formed copper. I wired the turquoise stones to the copper and then attempted to rivet the two pieces together. Since that didn’t work, I finally used leather to lace it together and just riveted the ends.


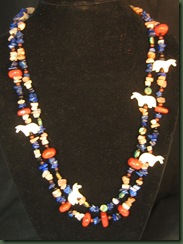
horses

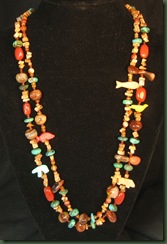
The lapis, coral and carnelian necklace shown here has bone horses strung in it. I’ve done several of these before and have even sold a few  as far away as a store in Maine.


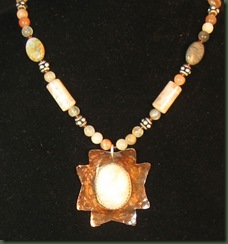
sunstone1


The sunstone necklace is composed of an array of shapes of sunstone beads with a peach sunstone cabachon bezeled on copper for the focal. I hoped the copper shape would look western.

fetish


Finally, this necklace contains Native American fetishes made from various gemstones. They are strung amid picture jasper chips, turquoise and carnelian beads.

These westernish pieces are missing the bling since they don’t display any rhinestones and the turquoise is real. This is my style country-western. A couple of these will probably go in my etsy store and we’ll see what others think about them.

I’m a little bit country and from my roots in Oklahoma to my anchoring here in Texas I hope the care I take with my art will reflect who I am!

Fall

Don’t you just feel that Fall crispness in the air? No . . .? Unfortunately, I don’t either. It’s rapidly approaching 100 degrees here in South Texas and I’m wondering why in the world I am working on Fall design pieces. Could it be because the summer merchandise is rapidly clearing out of the boutiques and the Fall clothing will start arriving in August. If I don’t start thinking Fall right now, I’ll be behind. So, here I sit with the Fall color predictions on one side of me and a boutique’s Nomadic Treasures clothing brochure indicating what she has purchased on the other. I’ve also turned the ceiling fan in the studio on high and am trying to think about cool weather and darker colors. (This is a BIG stretch!) Since I’ve been making the etched cuffs, it was a fairly easy transition to use more Fall-like designs on them. braceletleaf4 I used a Fall leaf stamp to make this copper on copper bracelet. Sticking with the metal, I also finished a copper leaf pendant shown below. I torched the metal until it was black and, following cleaning, the leaf offered a beautiful red color. Then I soldered the little dragonfly on to one side. The challenge came in digging deep into my bead drawers to find the right Fall colors. This was made easier by spending time at a boutique yesterday.leaf4 There, I was able to match the colors to a Fall wool vest that was in stock. I find it much easier to design with a garment in front of me. Both of these pieces are currently available on my etsy shop @ www.dreamcatcherdesigns.etsy.com Fall is definitely here in the studio and I should be ready when the real deal comes along outdoors. Think COOL.

Itching to Etch

Months ago, two kind souls in our Faux Bead Society showed us how to etch on copper.  I enjoyed the experience, but was involved in learning other things and didn’t do any further etching. Then, last month, a nice friend in the group brought me some mordant, the solution used to eat away the copper in the etching process. I brought it home and couldn’t leave it alone. I was itching to etch.

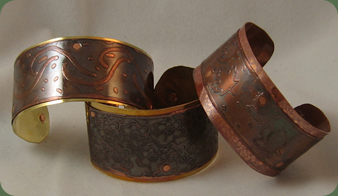
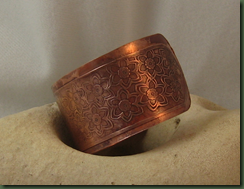
I’d been trying to develop a new cuff bracelet and the etching seemed a good option to try. The first bracelet, not pictures, was done on 20 gauge copper and although it turned out fine, it was extremely difficult to cut that gauge copper sheet by hand. Layering the metals seemed to be the answer. Initially, I tried to solder the two metals together after etching the top, but was not very successful. Therefore, the layers of the three bracelets pictured first are held together with cold connections (rivets).etched bracelets 

The next day I worked on another set of bracelets and was determined to get them to solder. My stubbornness paid off and these held much better.copper and brass bracelet I also put rivets in each end of these bracelets.   copper on copper bracelet 


Following the soldering and riveting, these bracelets spent about three hours in the tumbler to both clean and work harden them. The soldering process also annealed the metal and the bracelets were very soft prior to being tumbled. Now they retain their shape.

Etching was very messy and I was pleased to finish the bracelets and several other pieces today so I could put away the etching supplies. I guess you could say that the itch has been scratched for now. I shall see what my customers say about these pieces before I decide whether or not to get messy again. What do you think?