Category Archives: Techniques

Let’s Wrap

wrap ball

I’ve recently become intrigued with wrap style bracelets and the many variations thereof. They are quick and fairly easy to make and the cost of materials is usually quite nominal. I realize these have been around forever, but the resurgence of them within the broader market causes me to rethink their myriad of possibilities. For example, take a look on the Nordstrom’s website and search wrap bracelets. There you’ll find some rather expensive ones ($128 and up) that don’t look much different than those you see that I’ve made.

There are some good free online tutorials that show the process for wrap bracelets. For example, The following link takes you to the DIY tutorial for the bracelets pictured above: http://www.stumbleupon.com/su/1t8Exa/honestlywtf.com/diy/diy-wrap-bracelet/

These are made with leather, ball chain and waxed linen thread. They’re easy as pie.(not that making a pie from scratch is that easy . . . ) I started making them with the regular silver colored ball chain and then found a package of the colored chain at Hobby Lobby. My customers like the colored chain. I also made, but failed to get a picture before it left home, a bracelet with beads instead of the chain. I simply strung beads, crimping at both ends, and used them in the place of the chain. This is a bit trickier, but provides many color and texture choices. I also made one wherein I used colored cord from the fabric department from . . . you guessed it, Hobby Lobby, . . . in place of the chain.

The second tutorial is slightly more complicated, but still easy. I watched a video on the Auntie’s Beads site http://www.auntiesbeads.com/Wrap-Bracelets-Video_p_9111.html) and then made the turquoise and leather bracelet below. I used 6 lb. test Fireline (from the Walmart fishing department) to make my bracelet. This style provides many options for variation.

turq wrap

I made a bracelet that looks just about like the above, but used a different technique. I hand sewed the seed beads between the leather pieces, again using Fireline. The one below wraps around the wrist four times.

sewn wrap Finally, I “borrowed” the idea for the braided bracelet from the Nordstrom’s website. They show a braided bracelet made with two pieces of leather, using the ball chain as the third braiding element. I didn’t have round leather and used multicolored cord. There’s really nothing novel about the braided version, but I had not thought of using chain it it before. You can just barely see the orange ball chain in the picture below but it’s there. Now I’m wondering about a plethora of other things that could be braided with the leather or cord. Any ideas?
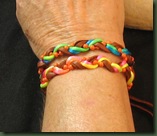
wrap braid This may not be the kind of wrapping some of you were thinking about from the title. But I just can’t do the other RAP. If you can, go right ahead without me, but I’m sticking to this kind of wrapping and that’s a wrap for today.

Saving Time

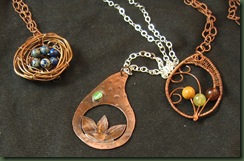
I’m a firm believer in making my own findings for jewelry; but I’m behind on making chain and took advantage of the opportunity to purchase some over the weekend. Yes, the photos below show “store bought” chain.

chainsTonight I feel lucky that I had that chain since these three pieces needed to be completed and time was ticking away. I’m doing a little art show tomorrow and wanted these to be ready since I wanted to take a few pieces with me that weren’t composed mainly of wire armatures.

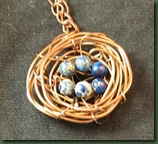
nest

The bird’s nest necklace was so easy and fun to make. You just wrap wire round and round a ROUND object and then weave lighter gauge wire in and out of the rounds securing the eggs (beads) with the ends of this wire. I also made a couple of rings like this. Hmm, I wonder what bird would lay this color eggs.


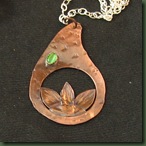
lotus


The metal lotus is similar to something I’ve previously created, but I wanted to try a more open look. This one presented a challenge in getting it to solder in a way that wasn’t super messy on the back. Should I tell you that it took two tries?


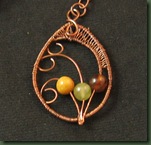
curvesThe third piece probably took the longest to make. It was quite tricky to get the three middle pieces of wire to all ball together in the torch. While you cannot see this very well, I can assure you it doesn’t look very ball-like. Yet, I wasn’t going to do it again! I think the wire weaving took the longest and I really do appreciate those of you who whip out these weaves with the greatest of ease. I’m making myself keep practicing and trying to learn to do this technique without gritting my teeth.
Am I glad that I bought that chain? Yes, today I am because it helped in a crunch. Yet, I realized considerable added cost by making these purchases and that has to go into my pricing. You would think that this should work out about the same as if I had charged for the time it takes to make my own chain. Alas, it’s much easier for me to charge for something I purchased than something I made. I MUST get over that! Is there therapy for pricing anguish?

Earrings Galore

When a customer told me this week that she was out of earrings, I realized that I was too. That started my earring frenzy and allowed me to help my customers stock up.

eardiscs 


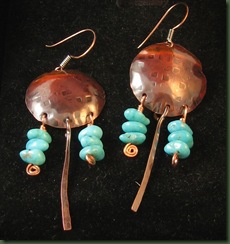
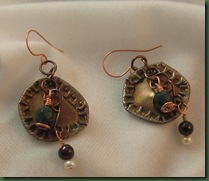
The first photo shows new disc earrings with turquoise and hammered copper wire dangles. I also made this design with coral dangles and think lapis will adorn the next pair.


 leaf earrings

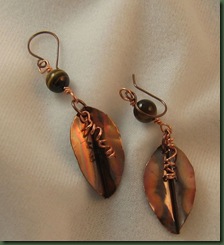
The leaves on the second pair were made using foldforming discussed in a previous blog entry.


I think I’ve shown bottle cap earrings previously, but all of a sudden this week I needed 8 more pair. I’m lucky to have a good supply of bottle caps provided by by son. These came all the way from California.

bottle cap earrings2       

The ‘S” earrings are self explanatory.  I also make a big “S” necklace that hangs from a leather chord.   

s earrings

I think the design for the pair below, made entirely from wire has possibilities for many other designs. I put a three leaf clover in one pair and hung dangles in another. These are made from 18 gauge wire.    

swirl earrings I made several other pairs and found that the assembly line approach worked best in churning them out. I made 10 discs, then 20 bead dangles and 10 wire dangles before assembling the first pair. The same approach worked for making numerous copies of the other styles. Finally, I made about 20 plus sets of ear wires shown on some of the pictured pairs. When I made the ear wires I tried to pick up one tool and use it on all the wires before going on to the next step. For example, I turned a loop on each of the wires before going to the next step. It seemed to expedite things, but I surely did get sick of making ear wires! When I finished those ear wire I wondered why in the world I don’t just buy them at the store.

Now I know what I can sit around and do when I’m bored – make ear wires! I just need to find out how to get bored.

It’s a Wrap

An expert friend kindly helped me learn a few variations on the wire wraps I use for cabochons. Below are a few that I’ve completed. The first shows a nice moonstone cabachon purchased from Magpie Gemstones (www.magpiegemstones.com) You might like to know that this great online bead vendor is offering a $200 shopping spree to some lucky person. You can get the details at the following link: http://www.magpiegemstones.com/spree.html  Check it out.

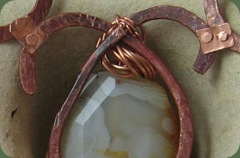
   moonstone Below is what I believe is a jasper cabachon. I’ve had it a long time and am debating what it is. You can see the wrap better in the second photo. This piece is in my etsy shop http://www.etsy.com/listing/74560684/copper-wire-wrapped-cabachon?ref=pr_shop

  jasper4                  green

I also got this great turquoise cab shown below from the aforementioned vendor. I looked at it on the workbench for several months before deciding what to do with it. Then I wrapped it several different times. This piece is currently in my etsy shop. ( http://www.etsy.com/listing/74554455/turquoise-cabachon-necklace)

turq1

The piece below features a titanium plated drusy agate, also from Magpie Gemstones. I wrapped it with sterling silver since it was designed as an anniversary pendant. I’m happy to report that the recipient thought her husband made a good selection.

titanium

I completed numerous other wraps, but they were not fit for viewing. As with any new skill, they require practice, practice, practice. I’ve been doing a wrap or two every day before initiating the day’s design production work. I find that when one of my skills is lacking, I lose a great deal of technique if I don’t work on it a bit each day. My other skills that are more refined don’t require this. Here’s hoping I can get cab wrapping to that stage fairly soon.

I’ve done some design research on wraps by looking at the work of others online. I see many beautiful pieces wrapped intricately with tiny wire. Although I like these, they’re not my style. I want to keep a more organic look. I think we each have to find and stick to our own niche.

I find that it’s a big conundrum to determine what to do with a wrapped cab when it’s finished. Should I put it on a neck wire, handmade chain, leather cord or something else? I’m beginning to wonder if I should plan that final look before starting the wrapping. That bears consideration. Let’s just hope that as my wraps improve, that last decision will become easier to make.

Foldforming

The term in today’s title may not be familiar to you. As I think about possible meanings, I realize there could be several connotations if we consider a literal interpretation of foldforming. Here are a few of the definitions taken from Karen’s dictionary of unknown terms:

1. the folds formed by a garment from being pressed into a suitcase;

2. folds that appear on a face mainly in the later years of life (more commonly known as lines);

3. the formed folding of the human body resulting from an imbalance between calories consumed and calories burned;  .  .  .

We could keep going with those incorrect definitions, but the truth is that foldforming refers to procedures used on metal to create a variety of forms. I’ve been interested in this for several years and finally purchased Charles Lewton-Brain’s book Foldforming. I appreciate the author’s commentary regarding how foldforming can help a practitioner better understand the manner in which metal adapts to folding, hammering, annealing, etc. I’m attempting to work through the book slowly and learn technique as opposed to rushing ahead to just make something new. This particular book is good for my exercise since the author’s goal is teaching technique and I don’t feel that his emphasis is on how to make specific pieces of jewelry. Perhaps due to this, the book hasn’t always gotten the best practitioner reviews.

foldform1The procedures in foldforming largely involve folding the metal, hammering the fold and then annealing it with a torch. Then the fold is usually opened creating a line or ridge in the metal. You can see three different line folds in the above pendant.

The second pendant sports a line fold in the center, but I positioned the ridge of the fold in the back. Hammering the edges of the metal produced its expansion and the rippled effect shown in the photo.

lilypad2Several people have commented that this one looks like a lily pad. I guess I need to go out and search for a little frog bead for the center.

Thus far my foldforming pieces have not received rave reviews. Rather than becoming discouraged, I have admonished myself to remember that I’m learning technique at this point. I believe that it may take a while to make this my own, but don’t dismay – I’ll get there!

By the way, if you are doing any foldforming, here’s hoping it’s all in metal!

Cold Connections

If you are not a jewelry designer you may not recognize the term in the title. Thinking outside of the design realm, I can think of a few “cold” connections I’ve had with people. You know, those encounters that leave you feeling unwelcomed and flat. These are the opposite of those warm welcomes you get from real friends.

Cold connections in jewelry making refer to the way we put things together, often in layers without using heat. I’ve been experimenting with the type of cold connections called riveting. Yes, my spouse is calling me Karen the Riveter, but luckily, I doubt you will be seeing my picture on any soon-to-be famous posters like Rosy the Riveter.

I would call a plain wire rivet the foundation for this technique. Constructing this requires creating holes in the pieces to be layered and inserting a piece of wire through the holes. You then flatten each end of the wire creating a small head that holds things together. This is done on both the top and bottom of your piece. This is easier said than done and it has taken considerable practice to make this type rivet work. Below is a photo of a necklace using a plain wire rivet. The rivets connect the large S’s to the focal.

rivet hingeI riveted a small piece of sheet metal to each wire component  It’s easier to see from the back of this piece.

rivet hinge back

The pendants/charms below show more riveting I just finished.

rivet charms

I used the same plain wire method for E.T.’s bicycle and flower. The other two pieces are riveted with wire on which I balled the ends with my torch. I know that I said “no heat”, but I was just making a big head pin, not connecting!


I really like using the balled wire since this means you only have to flare the backside of the rivet. It’s much easier. The problem that I’ve experienced is in balling the 14 gauge wire required to go in my 1/16 inch holes. This gauge of wire does not melt and ball balled wirevery quickly and I’ve ended up creating a little oven type structure to aid the process. This structure, composed of old charcoal blocks and solderite has two walls and a bottom. Using the tweezers, I hold the wire in this little structure while I torch and this helps reflect the heat back toward the wire instead of out into space. It still takes a good length of time, but I think it’s worth it.

blue beads


The last photo shows my first attempt at riveting ceramic beads . . . without breaking them. If you look closely, you can see that each part has 4 layers. From the top down, these are a brass daisy spacer, the bead, a dark copper disc and a teal colored copper disc to which I applied alcohol ink. This will become a necklace, but I’m still playing with how to connect or hang the pieces. They will have a propensity to flip and I’m trying to preplan and avoid that problem in the finished necklace. At the moment, I’m just feeling good about the riveting and not ready for the next challenge. You may notice that some of the wire balls became a bit flat as I worked on the bottom of the rivet. I’ve got to go back and fix that.

There are all sorts of other types of rivets including nail heads, tubes and decorative manufactured rivets. I have tried to nail down the basic technique before doing much with the others.

I hope rivets won’t leave you feeling cold. They really are a great connection!

Flow

Yesterday was a day of flow. After several nonproductive days filled with the emotions of life, I was finally able to put things aside and get into what Csikszentmihalyi calls flow. A description follows.

Flow is the mental state of operation in which a person in an activity is fully immersed in a feeling of energized focus, full involvement, and success in the process of the activity. . . .According to Csíkszentmihályi, flow is completely focused motivation. It is a single-minded immersion and represents perhaps the ultimate in harnessing the emotions in the service of performing and learning. In flow, the emotions are not just contained and channeled, but positive, energized, and aligned with the task at hand. http://en.wikipedia.org/wiki/Flow_(psychology) 

I’ve long appreciated the work of this theorist, yet often find his material difficult reading. His contributions to the field of psychology include a plethora of books and articles. I used to draw one of his charts in my workshops showing how flow balances between anxiety and boredom. It seems to me that if we are too relaxed or bored we don’t achieve flow; yet we don’t get there when we are too pressured or anxious. I feel that the need for one or the other (boredom or anxiety) probably depends on the individual. For example, do you work better with or without some degree of pressure? Learning what helps us reach that state of flow can help us achieve productive energy and creativity. If you have interest in this idea, you might enjoy reading some of the work on this topic.

Over the weekend my state of mind had been too far toward the anxious side and I wasn’t able to create anything that I thought was pleasing. By yesterday, however, I managed to relax enough to find my flow and the designs began to move ahead faster than I could work. While some of the photos below show rather plain pieces, they do represent a work that contributed to a feeling of accomplishment. For me, accomplishment leads to increased productivity and flow.

lapis and silver

          pearl and jasper


yellow

               silver and blue


pendant

                  IMG_2378


The top row of pieces needs a bit of explanation. The lapis necklace on the left is different enough that it may need to grow on you. The sterling silver form is soldered and wears a small cabachon and tiny silver cup flowers on one side. Balancing produced quite a conundrum, but I eventually made the bead links on silver wire and added the sterling silver rounds and spacers on another piece of wire below them.

I do believe that I must have strung the jasper piece on the top right at least five times while attempting to get it lay just so. Now it sits very nicely on the neck. The photo doesn’t allow you to see the tiny bit of orange in these beads.

The last two photos may end up as one piece. I may replace the pendant on the bottom right necklace which seems pretty bright with the cab pendant on the left. I’m going to wait and see what the customer wants done with this one.

Since flow is not  always easy for me to achieve, I’m thankful when it comes. My problem is waiting for it to get here!

The Messy Metal Smith

I wonder who it could be. Do you remember reading the August 11 entry describing how the pickle ate my pants? Well, today, the flux helped turn them white. I was happily spending some uninterrupted time with the torch when my bottle of Aquiflux fell off the table and rolled to some far away place. Oh well, I thought, I can just use the new paste flux sitting right here beside me. I hadn’t used much of it previously, but today seemed like a good day to give it a workout. All was well and I completed a ring with a bezel and two butterfly pendants before I noticed my pants. No, there weren’t any new holes in them, but one leg was practically covered in something white and powdery. Flux! Then I noticed that my hands had a good deal of dry flakes on them. Flux! The paste flux actually worked fine for my projects, but I’m not sure that I like the extra mess. I tried to take a bit more care with it on the rest of my projects, but when I went upstairs to clean up, I noticed I also had white spots on my nose and cheeks. Now you tell me how in the world I managed to get flux on my face. I guess you can just call me the messy metal smith.

By the way, I’m dangerous too. Last week, I managed to reach across the extinguished torch before it cooled. My arm came in contact with the torch and I have quite a nasty burn on my inside arm. It was becoming infected until I started flooding it with hydrogen peroxide. It appears that I’ll live to torch another day. Scars are good . . . right?

In spite of all the mess and the bandaged arm, this was a fairly productive day. As you can see from the photos below, I ended up with two sterling silver rings, two butterflies and two star earrings.

butterfly

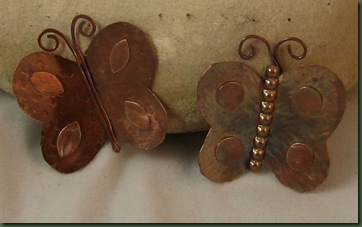
I cut the shapes on the butterfly wings with my disc cutter and then sweat soldered them onto the copper shapes. The center piece on the right flutter by is made from a beaded wire.


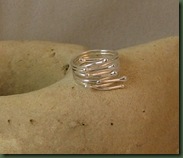
The sterling silver ring sports a lapis stone that I put in a premade bezel cup. It has a little sterling silver flower sweat soldered on the side.

ring blue

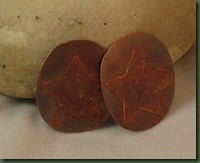
I used some very thin copper sheet for the star part of the earrings (or pendants) below. I’m trying out a paper cutter that cuts a star to see how long it will last with this type abuse. It does a fine job of cutting and I’ll just wait and see regarding its life. I appreciate the friend who shared this technique with me. I’ll let you know if it appears to be worth the relatively small investment in decorative paper punches.

star         ring

The last ring shown is from the new Kim St. Jean book mentioned in another entry.

I hope you aren’t as messy as I am, but I DO hope you’re having as much fun as I am! Does that make it OK to be a messy metal smith?

Adventures in Chaos

It’s OK to read today’s entry. The title could indicate that this will be a discourse on something like the cultural or religious battles that take up much of today’s news casts or a diatribe on our current economy while I sing my own rendition of “it sure isn’t like the old days”. Yet, (thankfully, you say) it pertains to none of the above. This actually is about jewelry design.

Scholars and wordsmiths would likely frown upon my use of the term; yet, the pieces shown today and the manner in which I made them best depict my own definition of chaos. Wikipedia tells us that this term chaos “in Greek mythology and cosmology referred to a gap or abyss at the beginning of the world, or more generally the initial, formless state of the universe”. The term is used in mathematics and science in reference to a specific kind of unpredictability. The latter definition is probably closer to the way I use the word today.

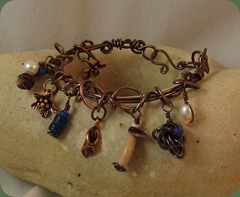
chaos bracelet

The bracelet shown on the left reminds me of chaos. The wire wrappings are very unpredictable as are the placements of the charms and beads. This is not my original design. It came from a bead magazine I picked up and I certainly regret that I cannot provide the source and the originator. (My apologies to the artist) The magazine has been misplaced.


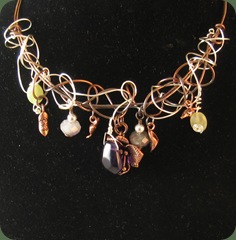
I used the original bracelet form to create a necklace shown here. chaos necklace I think this piece turned out to be even more interesting than the bracelet. I included silver wire in with the copper which had been given a liver of sulphur bath. Then I hung the beads and charms as chaotically as I could manage. It reminds me a bit of a bird’s nest made by an inept sparrow.

The pieces have the appearance of chaos, but I most enjoyed the freedom of this unpredictable process used to make the pieces. Once you have the basic armature, you begin doing the loose wire wraps that go back and forth, in and out and in between. During the process I just kept shaking my head and thinking this is NOT going to work, but I stuck with it. Then I found it difficult to go ahead and hang the dangles on the loose wrappings. The final venture was wearing the pieces out in public. When the first person stopped to look at and compliment my necklace, I had to feel of it to be sure they meant the chaos necklace. Yet, by the third or fourth compliment, I was prepared to go back home and make another one.

Since, however, I am somewhat of a business minded woman, I think I’ll wait and see if this necklace actually sells before I decide it is a winner. Compliments and money exchange don’t necessarily go hand in hand.

I am intrigued with other ways to use the idea of chaos within design work. Of course it can extend to earrings, rings and pendants in similar form to the pieces shown here. How else might chaos be shown through the designs? That requires some incubation and I’ll let you know if anything hatches. Until then, I hope your life is NOT chaotic, but if it is maybe it will turn out alright like my jewelry pieces.

Tutorials

tut2 I truly enjoy writing. After I finished my dissertation, I thought I might never like writing another thing, but that didn’t last long. My mind constantly chatters and the words seem to flow more clearly through my fingertips than my mouth. The few books I wrote for teachers were joyful to do because they helped me formulate better teaching procedures for myself. Then, there have been those countless articles I’ve written about parenting, creativity, gifted children, early childhood education, etc. Retiring from my consulting business, I felt all that writing was behind me. Therefore, when my son first suggested several years ago that I begin a blog, I just shook my head; yet, here I am writing a blog! Lately, I’m also truly enjoying writing very short articles for Magpie Gemstones (www.magpiegemstones.com). Now, I’m trying something new. For a couple of months, friends who were unable to attend the little workshop I held on how to make a dimensional bracelet have asked me to write a tutorial for it. If you’re not in the jewelry making arena, you may not realize that tutorials are popular and contain both directions for making something but also provide a large number of pictures showing the process. After telling people that I “would not” write a tutorial because it would be too much like writing an educational handout or course syllabus, Sunday I wrote one! http://www.etsy.com/listing/64285495/dimensional-cuff-bracelet-tutorial The tutorial is for the basic bracelet shown in the picture at the top. It features layers of wire on the top part allowing the designer to create depth with the gemstones. You can see it better in the following pictures of another dimensional bracelet made using the same process. Although I had typed the written instructions on Saturday, I worked on this tutorial all day Sunday in order to take and add the 40 or so photos. Who knew it would take so long? brace3          brace2 My guest “editors” have read the tutorial and other than a couple of mess-ups, it seems to be ready for use. Perhaps someone will enjoy making it after the holidays when life slows a bit. I’m anxious to see what variations other designers develop for this basic process. As for the writing . . . creating a tutorial was not nearly as interesting as the other types of writing I like to do. Will there be more? I don’t know as this depends upon the reception for this one. My questions is “does anyone else benefit from or enjoy the results of this type writing?” If so, perhaps there will be more tutorials from this pen. The real learning I take from this is that I had better quit saying I’m NOT going to do something. Eating my words is not a pleasant meal; I’ve got more interesting things to do!