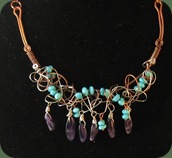
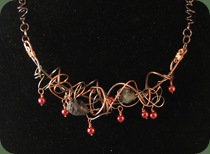
Category Archives: Necklaces

Foldforming

The term in today’s title may not be familiar to you. As I think about possible meanings, I realize there could be several connotations if we consider a literal interpretation of foldforming. Here are a few of the definitions taken from Karen’s dictionary of unknown terms:

1. the folds formed by a garment from being pressed into a suitcase;

2. folds that appear on a face mainly in the later years of life (more commonly known as lines);

3. the formed folding of the human body resulting from an imbalance between calories consumed and calories burned;  .  .  .

We could keep going with those incorrect definitions, but the truth is that foldforming refers to procedures used on metal to create a variety of forms. I’ve been interested in this for several years and finally purchased Charles Lewton-Brain’s book Foldforming. I appreciate the author’s commentary regarding how foldforming can help a practitioner better understand the manner in which metal adapts to folding, hammering, annealing, etc. I’m attempting to work through the book slowly and learn technique as opposed to rushing ahead to just make something new. This particular book is good for my exercise since the author’s goal is teaching technique and I don’t feel that his emphasis is on how to make specific pieces of jewelry. Perhaps due to this, the book hasn’t always gotten the best practitioner reviews.

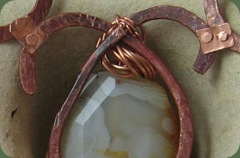
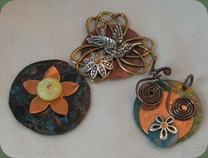
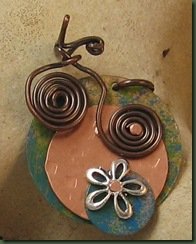
foldform1The procedures in foldforming largely involve folding the metal, hammering the fold and then annealing it with a torch. Then the fold is usually opened creating a line or ridge in the metal. You can see three different line folds in the above pendant.

The second pendant sports a line fold in the center, but I positioned the ridge of the fold in the back. Hammering the edges of the metal produced its expansion and the rippled effect shown in the photo.

lilypad2Several people have commented that this one looks like a lily pad. I guess I need to go out and search for a little frog bead for the center.

Thus far my foldforming pieces have not received rave reviews. Rather than becoming discouraged, I have admonished myself to remember that I’m learning technique at this point. I believe that it may take a while to make this my own, but don’t dismay – I’ll get there!

By the way, if you are doing any foldforming, here’s hoping it’s all in metal!

Double Wire Series

Have you ever noticed how some design ideas are addictive? Working with double wire necklaces has become that way for me lately. The chaos necklaces let to other double wire designs and one piece seems to lead to the next. Double wire refers to the manner in which these designs initiate. I use one long piece of wire and double it over at each end to form the portion that either goes around as a neck wire or attaches to a chain. You can observe this at the top right and left of the piece below. bird The joyous part of the design comes in deciding what to do with the extra wire. Should it curve up or down? Where should it cross? I’m trying to do something different on each one. Once the armature is complete, it has been challenging to figure out where the beads should be placed. I wore the piece in the first picture to a bead show yesterday and asked several other artists what they would change on the piece. A synthesis of their comments with my own opinion yielded several changes to the piece last night. One of the reasons I enjoy working with wire is that you can make changes to a piece without having to completely start over. Another challenge is that since the armature starts the same way each time, I have to be diligent enough to take the wire in a different direction and create something new. You wouldn’t want me to get in a rut, would you? butterfly The piece above initiated a giggle when I turned it upside down and a bow legged something or other appeared. Dr. Torrance, educational creativity giant, encouraged us to look at things from different perspectives before deciding on a problem solution. I also try  to remember and turn my wire designs various directions before making a final design selection. My other challenge remains the need to look at these armatures and NOT see something other than a design. The second piece does, of course, bear some resemblance to a flying creature, but I was determined to resist turning it into a butterfly. Although replicas of nature can be quite nice, they can also be limiting. I’ll continue with this double wire series and need to see what might hatch with it in terms of earrings. Now that could be a real conundrum! By the way, I just finished another article for Magpie Gemstones. This one pertains to ways to add a patina to copper. If you have interest, you can find it at www.magpiegemstones.com/copper_patina.html
More Chaos and Cattle

If you read the blog entry for March 29th, you will recall that we experienced considerable consternation here at the ranch when another person’s bull was hit by a car in the middle of the night. You may remember that I wrote about how we always get the call and it’s never our animals. Last night, it happened again. Luckily, this time there wasn’t an accident, but some cattle were out so the Sherriff’s department called us at 12:30 AM. We always go to check and see if the culprits belong to us, but anyone can see that our cows live in a fortress and it would be hard for these inmates to escape. Of course last night when we went out to check, by the time we arrived, no cows or deputies were in sight. The dispatcher phoned the deputy who reported that the animals went back to where they came from; so he went on. Now why that warranted a call to wake us up, I do not know, but UP I was. It was just another chaotic night at Dreamcatcher.

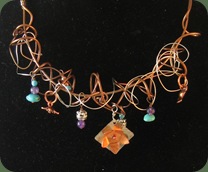
Since I’ve experienced these calls so often and know that I can’t normally get back to sleep, I started in on several unfinished pieces of jewelry. It seemed fitting to finish the “chaos” necklaces that I had on the workbench. I wrote about this style on February 24 and have since made several other chaos necklaces. The first one shown has a riveted charm.

chaos4


A second chaos necklace is a bit larger and the middle charm has a soldered flower on it. This one has sponge coral and jasper beads.

chaos1


One of my customers called and ordered a couple of these the other day. I had previously told her I could make them with “less chaos” if she wanted. She called and ordered two  confusion necklaces and one with less confusion. Hmmm – I had to think about what she meant for a bit. The “less confusion” pieces are pictured below.

chaos2                  chaos3


An article with chaos in the title caught my eye today and a read enough to learn that in time of chaos, we are supposed to rely on our creativity  in order to be innovative and work our way through a tough period.  It looks to me like I’ve certainly found the chaos and it’s time to be creative. Taking this to heart, I’m playing with new designs based on the double wire structure of these chaos necklaces. I hope the new pieces hatch and pull me forward. Yet . . . I rather like this decorative chaos – what do you think?

Royalties

Do you turn the television off these days when you hear a segment about the “royal” couple? Are you tired of seeing hats with big brims and feathers that blow in the wind? Will this all end after the young British couple is finally wed? At the very least, surely the stories will slow down. . . but I may be hoping for too much.

Even though I’ve avoided the opportunity to wonder about the bride’s dressmaker or whether she will wear flowers in her hair, I have conjured greatest if I could just design a few of the jewelry pieces for the wedding. Hmm . . . I wonder how the queen would look in a funky metal piece like the one below?

new copper

Alas, I guess we’ll never know. (I think a little metal something would be quite charming on one of those hats!)

I did think of that royal couple this week when I opened the mail and found a royalty check from one of my books on creativity. I’m still amazed that people buy something I wrote in 1994 that was published in 1996. It just goes to show that I’d better watch what I say that is published since those words hang on and on.

After receiving that check, I wondered how to perpetuate a jewelry design such that it paid off for as many years as that book. The closest I could think of would be the payoff from tutorials. As you probably know, I have two bracelet cuff tutorials in my etsy shop and, like the books, they bring me some cash from time to time.

tut2             flowertut2

I considered whether a design that lives several seasons or even years is a type of royalty. A boutique customer requested a freeform peyote cuff last week. This is something I haven’t made in years, but it still has life. PICT0166

Now, if I can just remember how I gave it that life!

I can’t say this example is a good analogy to the book royalties since I do have to do the work again. The books and tutorials don’t require anything further.

There is, of course, that option of writing a book about designing jewelry. Yet, I remember how long it takes to put a book together, the pain of dealing with a grouchy editor, the long wait before it goes to press and the tiny percentage an author receives from each book sale. It seems to me that the next time I think I want “royalty”, I’ll just put a floppy hat on my head and go out for a stroll.

Cold Connections

If you are not a jewelry designer you may not recognize the term in the title. Thinking outside of the design realm, I can think of a few “cold” connections I’ve had with people. You know, those encounters that leave you feeling unwelcomed and flat. These are the opposite of those warm welcomes you get from real friends.

Cold connections in jewelry making refer to the way we put things together, often in layers without using heat. I’ve been experimenting with the type of cold connections called riveting. Yes, my spouse is calling me Karen the Riveter, but luckily, I doubt you will be seeing my picture on any soon-to-be famous posters like Rosy the Riveter.

I would call a plain wire rivet the foundation for this technique. Constructing this requires creating holes in the pieces to be layered and inserting a piece of wire through the holes. You then flatten each end of the wire creating a small head that holds things together. This is done on both the top and bottom of your piece. This is easier said than done and it has taken considerable practice to make this type rivet work. Below is a photo of a necklace using a plain wire rivet. The rivets connect the large S’s to the focal.

rivet hingeI riveted a small piece of sheet metal to each wire component  It’s easier to see from the back of this piece.

rivet hinge back

The pendants/charms below show more riveting I just finished.

rivet charms

I used the same plain wire method for E.T.’s bicycle and flower. The other two pieces are riveted with wire on which I balled the ends with my torch. I know that I said “no heat”, but I was just making a big head pin, not connecting!


I really like using the balled wire since this means you only have to flare the backside of the rivet. It’s much easier. The problem that I’ve experienced is in balling the 14 gauge wire required to go in my 1/16 inch holes. This gauge of wire does not melt and ball balled wirevery quickly and I’ve ended up creating a little oven type structure to aid the process. This structure, composed of old charcoal blocks and solderite has two walls and a bottom. Using the tweezers, I hold the wire in this little structure while I torch and this helps reflect the heat back toward the wire instead of out into space. It still takes a good length of time, but I think it’s worth it.

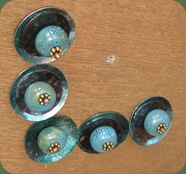
blue beads


The last photo shows my first attempt at riveting ceramic beads . . . without breaking them. If you look closely, you can see that each part has 4 layers. From the top down, these are a brass daisy spacer, the bead, a dark copper disc and a teal colored copper disc to which I applied alcohol ink. This will become a necklace, but I’m still playing with how to connect or hang the pieces. They will have a propensity to flip and I’m trying to preplan and avoid that problem in the finished necklace. At the moment, I’m just feeling good about the riveting and not ready for the next challenge. You may notice that some of the wire balls became a bit flat as I worked on the bottom of the rivet. I’ve got to go back and fix that.

There are all sorts of other types of rivets including nail heads, tubes and decorative manufactured rivets. I have tried to nail down the basic technique before doing much with the others.

I hope rivets won’t leave you feeling cold. They really are a great connection!

The Wheels on the Bike Go Round and Round. . .

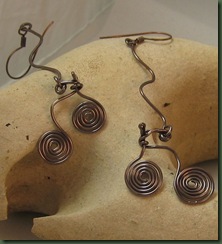
. . .round and round, round and round, the wheels on the b . . . oops, I guess that song was really about a bus! Well, today, it’s about bikes! I’ve been playing with little wire bikes that some friends and I accidentally created while manipulating wire one day. Each bike is made from a single piece of wire.

bikeear2

The earrings were easy to do since the three dimensional shape (the handle bars) doesn’t create any problems on them. These are really free swingers and hang pretty long. I’m thinking of doing them in colored artistic wire as a “fun” summer look.

bik ndckThe bike links caused considerable consternation at the design table. You can see that they do not want to lie flat and one of them prefers to be in the “ready to go round and round” position.

bikeetFinally, no bike series would be complete without the bike that E.T. rode. After all, didn’t it help save him and get him home? This little riveted charm above was planned to show his upward flight when the bike left the ground in the movie. This will either be a small pendant or a charm on a chaos necklace. I’ll try to post the finished piece when it is complete.

I’m still playing with the bike shape; so stay tuned for an update and other ways to use the bikes. Please add your own suggestions in the comments section. I’d enjoy hearing your ideas.

The Pearls Have It

I don’t normally spend a lot of time ogling pearls at stores and beads shows. After all, I’m a metalsmith. I’m trying to be a metalsmith. Someday, I’ll be a metalsmith. At any rate, one of my customers wants pearls and I try to oblige my customers. They (the customers) are pretty valuable! I was getting ready to send a pick box out of state and called the customer to see what she needed. She told me that she always does well in the summer with pearls and gemstones. “But what about something copper?” I asked. Again, she said, “I really like pearls and gemstones.” Finally, I got it. The woman wants pearls and gemstones; so who am I to disagree?She knows what she can sell at her boutique and I don’t live in her shoes. So . . . I went to Magpie Gemstones (www.magpiegemstones.com) and I bought pearls!

I do have to admit that I’ve been more interested in pearls lately. I recently finished a research article on pearls (http://www.magpiegemstones.com/about_pearls.html) and learned about how they come from an uncomfortable mollusk. I guess it just goes to show that good things can come from irritants.

I was completely astounded to see what I’d been missing in the pearl department. There were the traditional white and ecru pearls in a beautiful array of sizes and hues, but there were also pink, purple, blue, teal and green pearls. Who knew? This would-be metalsmith had not clue! I bought pearls!

I started stringing these night before last and learned that I really like pearls. They work up very fast, look good with almost anything and make a good statement in designs. I felt like an ostrich with it head . . . well you know. Below are just a few of the pieces I strung with the newly purchased pearls. They obviously are very simple, but I’m hoping my customer will like them.

shells and silver

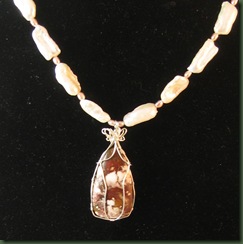
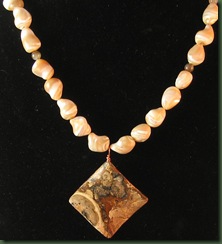
The first rather fuzzy photo, displays white stick pearls with peach oval pearls. The stone is a white turquoise cabachon that I wrapped with sterling silver. It has earrings in the same style.

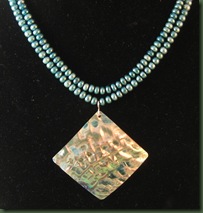
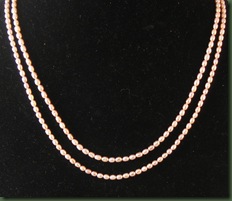
pearlsteal      pearlsplain

The two pictures above display very plain necklaces. The first has a lovely mother of pearl pendant and the second is a double strand of tiny peachy pearls. My customer often purchases gemstone pendants that could hang on these pearls.

The piece below sports a picture jasper pendant hanging from shell beads. I was fascinated by the shape of the latter and wish you could see the swirls in them. Rather than being flat, the jasper bead has a nice wave to it. I have an entire strand of these to play with.

shells and jasper

I was so excited about my pearl purchases that I strung them all and will need to go back for more. (What a shame! – ha!) Until I get more pearls, I guess I will have to back to trying to be metalsmith; but you know, it’s good to get out once in a while!

It Just Takes One

Have you ever had a grand idea during a meeting and no one applauded? Perhaps you created something new and no one thought it was wonderful.This seems to happen occasionally with my jewelry designs. I create something new and the first few customers hardly look at it. I may have thought it would jump right up and grab them, but it didn’t. After a few showings wherein the new design hasn’t gotten attention, I begin to fear that I was wrong. I think that it really isn’t so cool after all and I move on. Later, there is that one person who likes the piece and buys it. My friend from Magpie Gemstones says there’s a person for every piece. I guess I should believe her.

The interesting thing about having one person really like your new design is that it can give you confidence. That’s what it does for me. I finally sold one of my chaos necklaces, shown in an earlier blog, to a boutique owner and she sold it the next day. Now she has ordered three more and another boutique customer also wants to see it. Go figure! I think it the old “if she can sell it so can I” attitude.

The same thing happened with my handmade chain necklaces. Nothing much happened with them until one store owner tried one and now she has ordered more. Although I’ve shown pictures of this design previous I’m included one of the newer models in this blog.

chain neck small Another boutique customer purchased a cuff bracelet with a square face. I’d had this for a couple of months and no one had been interested in it. She sold it and ordered two more. Now I think I should be more positive about this design.

braceletsquare I’m beginning to think that the new designs are sometimes ahead of the season in which they will sell. Another possibility is that the colors I’ve used in the piece are just not those that the current customer needs. That shouldn’t mean that no one will want them. I guess its all about confidence and patience. I should be confident in a design that I think is good and patient enough to wait for the right customer. It just takes one!

When Life Hands You Junk

It was a  l o n g     dark      night.

Most of you know that I live on a cattle ranch here in Texas. A well traversed road runs by the front of our property and you can usually see a nice part of the herd from that road. Our cows are black. Our fences act like a fortress. Our cows don’t get out on the road. Yet, when any cow is on or near the road in front of Dreamcatcher, we receive calls. We receive many, many calls.

There is always a very slim possibility that the caller has spotted one of our animals where is should not be and we, therefore, always get up, get dressed and drive to the road to check it out. In the last eight years, none of the animals have belonged to us.

When the phone rings, we always ask callers the same litany of questions: what color are the animals? Do they have Dreamcatcher brands? Do they have ear tags? We use these questions so often that we could easily program our phone to respond with them with them when we receive late night calls.

It started a little after midnight this time. We could see the red lights flashing out on the road and the deputy on the phone said some of our cows were out. This time there was an auto vs. bull accident in front of our property. The bull was not ours (no brand, no ear tags . . . ) and it had been severely injured by its battle with a car. We asked the deputies to put it down. They would not. We asked if we could put it down. They would not let us. So they tied the poor animal up and left it there beside the road.

Since our phone number is on the ranch sign, each time a car went by and saw the poor beast,  they phoned us to get something done. One of the strangest calls came at 2:30 AM from a person who was riding his bike along the road. I answered no less that seven calls from drivers informing us about the animal. Obviously, this was not conducive to restful sleep. By morning the bull had passed and animal control is now trying to figure out how to move it. I didn’t volunteer to help them.

Lest this saga continue it’s downward spiral, something good did come from the lost night of sleep. First, I learned that people are compassionate. I didn’t know any of the roadside callers; yet they were concerned about both our loss and the poor animal. Secondly, rather than spending the night up and down answering the phone, I remained up and started stringing jewelry about 2:45 AM. There’s little else you can do but string since hammering while your spouse is asleep is not permitted in this establishment and I was afraid to light my torch while I was so tired. By this morning, I had completed a nice little pile of jewelry and even though I’m sleep deprived, I think most of the pieces look OK. See what you think.

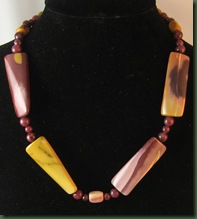
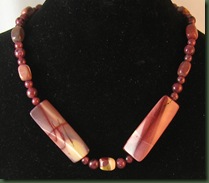
The first two necklaces are made from mookite and kiwi rubies.

mookite1  mookite2    


The next photo shows a piece made from faceted apricot moonstone and pearls.


apricotThe red necklace below is made of pretty, faceted, rectangular stones. I regret I can’t remember what they are. The final photo shows a piece of agate dangling from blue sponge coral. It will probably require a bit more attention. I also made earrings for all of these necklaces.

red

 blue


Now that you probably wish you hadn’t read this post, let me leave you with sleepy words of wisdom. You know what you are supposed to do when life hands you lemons . . . I’m going to rephrase it to say that when life hands you junk, make jewelry!   (yes, I AM very tired!)

By the way, we’re removing our phone number from the ranch sign on the road!

An Idle Mind

Today was the day. I tried to get someone else to do it; but no one would. I’d put it off for weeks feigning back problems and all sorts of other problems; but today I simply had to wash the windows. I do NOT like to wash windows. It seems to me to be a truly mindless household chore, but the winter muck, particularly on my studio window, was marring the view of any harbinger of Spring. Therefore, with ladder, newspaper and bucket in hand I marched dutifully out the door to do the deed. (Just in case you don’t wash my way, the newspaper was for wiping, not reading.)

After finishing one small part of the job, I decided it might be more pleasant if I exercised my idle mind with something meaningful. Alas, I couldn’t think of anything . . . but then . . . the words started coming. Idioms and common sayings started creeping in waves across the hills and valleys of my brain until I almost wished I could go back to those idle thoughts. When I thought I couldn’t stand climbing up that ladder to the high windows one more time I realized that only the strong will survive and knew that where there’s a will there’s a way. Telling myself that I surely wasn’t too old to cut the mustard, I just drop(ped my rag) in the bucket and kept working. I climbed that ladder as high as a kite and got down to brass tacks. Unfortunately, I tried to rush the task and my bucket fell off the ladder, dousing my shoes and scaring the poor porch cat. That’s when I remembered that haste makes waste. I was more careful thereafter and glad I didn’t have to hire someone to wash my windows since a penny saved is a penny earned.

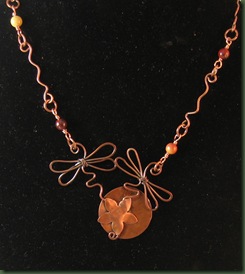
After the window episode, I was glad to get back to the workbench and hoped no more sayings would pop into my mind. I was able to complete a dragonfly necklace that I started last night. I appreciate the friend who kindly showed me how to make wire dragonflies. Take a look at her beautiful dichroic glass work at www.wendyhardingdesigns.com. I wanted to use the two dragonflies together, but felt they needed to be stabilized and soldered them onto a copper disc. dragonfly Then there was that little issue of how to keep any solder from showing and the small copper flower soldered over the dragonfly tails provided the solution. I used mookite beads in this piece. Although I realize the dragonflies are not birds, I just kept thinking how birds of a feather flock together. If I don’t quit thinking this way, I may have to scream. Please don’t tell me if there is a saying about that!