Category Archives: Torch Work

From Big to Small

I’ve always thought that when trying to learn something new you should work from big to small. Remember those first prereaders in Kindergarten? The one or two words on each page were quite large compared to the first grade readers and then chapter books and novels. The print got smaller and smaller as readers progressed in ability. (Of course, as we grow older, that print has to grow larger and larger due to failing eyesight issues. Of course, I can’t personally speak to that! Ha!)

In teaching piano, I found the big to small postulate to be the same. We started with a few large notes in songs and went on to hundreds of small notes and intricate passages. When my friend and I were trying to help little four year olds learn more efficiently, we developed musical notation with relatively large circles and ellipses that most little ones found easy to read. My engineer husband provided us with the appropriate drafting tools to write Keyboard Kapers, a book of original songs we used with the little ones. I wonder how many little pianists played songs about “my dog Blazer” when they were learning from us and the teachers with whom we worked. As the young pianists grew more proficient this notation gradually became the more common smaller notes we see in traditional music.

Having found success with big to large in the aforementioned reading formats, it seemed natural for me to apply this idea to learning to make jewelry. For example, when learning to make soldered bezels, I made large ones first and found they were easier than the tiny ones I’m trying to create now. I currently still have trouble and sometimes melt those little pieces of silver while encouraging my solder to hurry up and flow. Big IS easier!

Fortunately, a couple of my friends recently showed me how to use small premade bezels and snap sets for the tiny stones I wanted to work with. I purchased these from Rio Grande Jewelry Supply. I have always made large pendants, but decided I was ready to grow up to smaller pendants using this new bezel setting technique. My bravery extended as I also used more sterling silver that I usually do.

ruby2

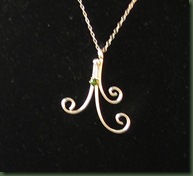
These pendants were not intended to look like anything in particular. I just wanted a pleasing shape that would house a little jewel. The first and second pictures show pieces that have rubies set in snap sets.

ruby1


The next couple of pieces show peridot in snap sets. The first one IS NOT a bug!

periodot1


     periodit2


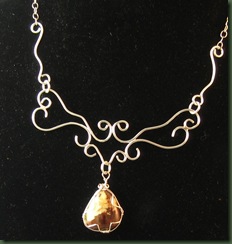
Finally, I became brave enough to try a larger piece composed of more components. It’s still relatively small compared to most of the copper work that I do. Someone already told me it doesn’t look like my style since it is more formal. See what you think.

scroll

The photo on the left was taken from an angle and makes the piece look somewhat “off” Yet, it is symmetrical – my picture taking just isn’t! I wrapped a stone to hang from the basic silver armature and can change this out to other stones with the jump ring attachment.

Big to small is still working for me with one exception. I quickly realized early in learning about wire working that manipulating heavy gauge “big” wire is more difficult for me than working with a lighter gauge “small” wire. When you’re working with wire and have to sound like a tennis player who makes a noise every time she serves, it’s probably time to get a light gauge wire!

Foldforming

The term in today’s title may not be familiar to you. As I think about possible meanings, I realize there could be several connotations if we consider a literal interpretation of foldforming. Here are a few of the definitions taken from Karen’s dictionary of unknown terms:

1. the folds formed by a garment from being pressed into a suitcase;

2. folds that appear on a face mainly in the later years of life (more commonly known as lines);

3. the formed folding of the human body resulting from an imbalance between calories consumed and calories burned;  .  .  .

We could keep going with those incorrect definitions, but the truth is that foldforming refers to procedures used on metal to create a variety of forms. I’ve been interested in this for several years and finally purchased Charles Lewton-Brain’s book Foldforming. I appreciate the author’s commentary regarding how foldforming can help a practitioner better understand the manner in which metal adapts to folding, hammering, annealing, etc. I’m attempting to work through the book slowly and learn technique as opposed to rushing ahead to just make something new. This particular book is good for my exercise since the author’s goal is teaching technique and I don’t feel that his emphasis is on how to make specific pieces of jewelry. Perhaps due to this, the book hasn’t always gotten the best practitioner reviews.

foldform1The procedures in foldforming largely involve folding the metal, hammering the fold and then annealing it with a torch. Then the fold is usually opened creating a line or ridge in the metal. You can see three different line folds in the above pendant.

The second pendant sports a line fold in the center, but I positioned the ridge of the fold in the back. Hammering the edges of the metal produced its expansion and the rippled effect shown in the photo.

lilypad2Several people have commented that this one looks like a lily pad. I guess I need to go out and search for a little frog bead for the center.

Thus far my foldforming pieces have not received rave reviews. Rather than becoming discouraged, I have admonished myself to remember that I’m learning technique at this point. I believe that it may take a while to make this my own, but don’t dismay – I’ll get there!
By the way, if you are doing any foldforming, here’s hoping it’s all in metal!

Cold Connections

If you are not a jewelry designer you may not recognize the term in the title. Thinking outside of the design realm, I can think of a few “cold” connections I’ve had with people. You know, those encounters that leave you feeling unwelcomed and flat. These are the opposite of those warm welcomes you get from real friends.

Cold connections in jewelry making refer to the way we put things together, often in layers without using heat. I’ve been experimenting with the type of cold connections called riveting. Yes, my spouse is calling me Karen the Riveter, but luckily, I doubt you will be seeing my picture on any soon-to-be famous posters like Rosy the Riveter.

I would call a plain wire rivet the foundation for this technique. Constructing this requires creating holes in the pieces to be layered and inserting a piece of wire through the holes. You then flatten each end of the wire creating a small head that holds things together. This is done on both the top and bottom of your piece. This is easier said than done and it has taken considerable practice to make this type rivet work. Below is a photo of a necklace using a plain wire rivet. The rivets connect the large S’s to the focal.

rivet hingeI riveted a small piece of sheet metal to each wire component  It’s easier to see from the back of this piece.

rivet hinge back

The pendants/charms below show more riveting I just finished.

rivet charms

I used the same plain wire method for E.T.’s bicycle and flower. The other two pieces are riveted with wire on which I balled the ends with my torch. I know that I said “no heat”, but I was just making a big head pin, not connecting!


I really like using the balled wire since this means you only have to flare the backside of the rivet. It’s much easier. The problem that I’ve experienced is in balling the 14 gauge wire required to go in my 1/16 inch holes. This gauge of wire does not melt and ball balled wirevery quickly and I’ve ended up creating a little oven type structure to aid the process. This structure, composed of old charcoal blocks and solderite has two walls and a bottom. Using the tweezers, I hold the wire in this little structure while I torch and this helps reflect the heat back toward the wire instead of out into space. It still takes a good length of time, but I think it’s worth it.

blue beads


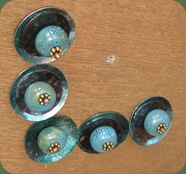
The last photo shows my first attempt at riveting ceramic beads . . . without breaking them. If you look closely, you can see that each part has 4 layers. From the top down, these are a brass daisy spacer, the bead, a dark copper disc and a teal colored copper disc to which I applied alcohol ink. This will become a necklace, but I’m still playing with how to connect or hang the pieces. They will have a propensity to flip and I’m trying to preplan and avoid that problem in the finished necklace. At the moment, I’m just feeling good about the riveting and not ready for the next challenge. You may notice that some of the wire balls became a bit flat as I worked on the bottom of the rivet. I’ve got to go back and fix that.

There are all sorts of other types of rivets including nail heads, tubes and decorative manufactured rivets. I have tried to nail down the basic technique before doing much with the others.

I hope rivets won’t leave you feeling cold. They really are a great connection!

Mamaw’s Hands

Hands tell a story. We all know people who talk with their hands. There are those dramatic soles who use their hands to accentuate their words with grand gestures. There are others who snap their fingers or clap their hands while speaking to emphasize words or secure your attention. I think some preachers do this to keep us awake in church. Yet, hands also help tell a story when they are perfectly still.

I remember my Daddy’s hands. His fingers were short and stubby and his nails were broken and brittle. As a woodworker and gardener in his retirement years, those hands met with sand paper, dirt, varnish and all manner of stress. His left thumb was shorter than his right having met with the table saw several years before he died. I used to hold his hands and worry about the nicks and cuts, but they didn’t bother Papaw who would just say “oh well, it can’t be helped.“ This man’s hands showed that he was a worker.

My Mother’s hands tell another story. She, too, was a worker. I remember those hands that not only cooked and cleaned in our home, but also stayed busy with knitting, needlework and constant sewing. Hers depict the pain of arthritis that she has endured for so many years. Now they are gnarled and the enlarged knuckles keep Mamaw from her preferred activities. We have tried numerous things to solve the problem, but alas her days of creating are past. It is as though her body is saying that it’s time to rest. The picture below shows a snapshot of my Mother’s hands with my daughter’s hands taken on the latter’s wedding day.

mamawkimMamaw’s hands also depict the pride she takes in her looks. I cannot ever remember her wearing much nail polish, but she is still taking care of her own nails and stays well manicured.

For several years she has wanted to wear more rings. A wonderful group of bridge-playing ladies volunteer at the nursing home each week and Mother plays cards with them. Evidently several of them wear beautiful wings and Mother wants to do the same. I cannot, however, get her old rings over those substantial knuckles and have tried to make her something she would wear. Unfortunately, I haven’t been able to create anything to suit her. She won’t wear bling and she won’t wear anything plain. I made her a sterling silver S ring that was adjustable, but it didn’t make a hit. This week, I may have finally found the answer. First I had to convince Mamaw that I could NOT work with diamonds and I could not work in gold! Thank goodness she likes lapis. You can see the one I created for her on her finger below. I finally made something both adjustable to go over her large knuckles and acceptable to her.

mamwfront                        mamwringback

It’s a bit difficult to see in the second photo that the ring is open in the back. I was able to open it up and slide it past her knuckles and then squeeze it back shut when it reached the base of her finger. She was pleased since lapis is one of her favorite stones. You can see the configuration of the ring better in the photos that follow. The back was not yet cleaned in one of them.

ringback                       


ringfront


Mother was pleased with her new ring and I hope it will help her hands tell her story. This ring says “I’m still beautiful at 90 years of age and I still take great pride in the way I look.” It also says that someone cares enough about her to try and make her happy.

Today, I’m looking at my own hands and realizing the story they tell. My hands show broken, liver of sulphur colored nails and short stubby fingers that are scraped and marred. My fingers do, however, wear multiple rings when I go out in public. My hands are a combination of both my Mother’s and my Father’s hands. They, too, are hands that work. These hands will create until nature says I must stop. I’m hoping that’s a long time from now.

What do your hands say?

An Idle Mind

Today was the day. I tried to get someone else to do it; but no one would. I’d put it off for weeks feigning back problems and all sorts of other problems; but today I simply had to wash the windows. I do NOT like to wash windows. It seems to me to be a truly mindless household chore, but the winter muck, particularly on my studio window, was marring the view of any harbinger of Spring. Therefore, with ladder, newspaper and bucket in hand I marched dutifully out the door to do the deed. (Just in case you don’t wash my way, the newspaper was for wiping, not reading.)

After finishing one small part of the job, I decided it might be more pleasant if I exercised my idle mind with something meaningful. Alas, I couldn’t think of anything . . . but then . . . the words started coming. Idioms and common sayings started creeping in waves across the hills and valleys of my brain until I almost wished I could go back to those idle thoughts. When I thought I couldn’t stand climbing up that ladder to the high windows one more time I realized that only the strong will survive and knew that where there’s a will there’s a way. Telling myself that I surely wasn’t too old to cut the mustard, I just drop(ped my rag) in the bucket and kept working. I climbed that ladder as high as a kite and got down to brass tacks. Unfortunately, I tried to rush the task and my bucket fell off the ladder, dousing my shoes and scaring the poor porch cat. That’s when I remembered that haste makes waste. I was more careful thereafter and glad I didn’t have to hire someone to wash my windows since a penny saved is a penny earned.

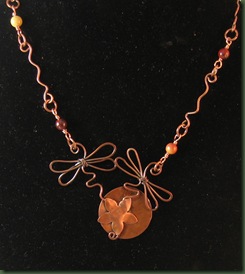
After the window episode, I was glad to get back to the workbench and hoped no more sayings would pop into my mind. I was able to complete a dragonfly necklace that I started last night. I appreciate the friend who kindly showed me how to make wire dragonflies. Take a look at her beautiful dichroic glass work at www.wendyhardingdesigns.com. I wanted to use the two dragonflies together, but felt they needed to be stabilized and soldered them onto a copper disc. dragonfly Then there was that little issue of how to keep any solder from showing and the small copper flower soldered over the dragonfly tails provided the solution. I used mookite beads in this piece. Although I realize the dragonflies are not birds, I just kept thinking how birds of a feather flock together. If I don’t quit thinking this way, I may have to scream. Please don’t tell me if there is a saying about that!

Green Time

I usually try to stay home on St. Patrick’s Day. This was surely brought on by some childhood trauma involving pinching, but I’m not sure of the exact incident. I don’t remember wearing any green garments when I was a child and even today, you can look in my closet and find it basically void of this color. This creates a problem on St. Patrick’s Day. I seem to always encounter someone who believes it’s OK to pinch a person who doesn’t wear green in celebration.

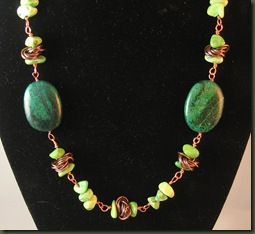
This year, I’ve outsmarted any would-be pincher! I’ve got green jewelry to wear. Actually, I’ve got lots of green jewelry to wear!

butter

              green


While you probably can’t see the wire work on the second piece, it sports hand made copper spacers made from jump rings. They were interesting to make as you hook one ring into the others until they create a beady form.

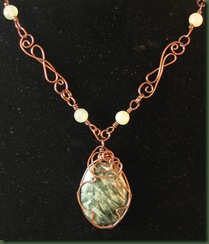
green3


This cabachon on the left is a very subtle, but beautiful green and white seraphinite that I wired and hung on a handmade chain. The gemstone comes from Magpie Gemstones. (www.magpiegemstones.com)

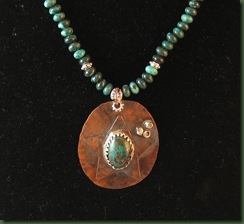
star


I layered the pendant on the right, using a simple textured oval with a copper star soldered to it as the base for the bezel. I’ve been cutting a few shapes from very thin copper with scrapbooking punches. I don’t know how long the punches will hold up, but this is certainly easier and neater than when I was trying to cut the more detailed shapes by hand. I have this star and a flower.

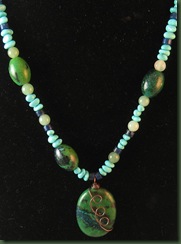
greenblue

Finally, the last necklace wears both greens and blues including turquoise and lapis. I like this combination and think it will be nice with denim as well as other things.

Now there’s a brand new problem for St. Patrick’s Day. Which green necklace am I going to wear? Oh well, this is better than getting pinched! I think I like this problem.

Flow

Yesterday was a day of flow. After several nonproductive days filled with the emotions of life, I was finally able to put things aside and get into what Csikszentmihalyi calls flow. A description follows.

Flow is the mental state of operation in which a person in an activity is fully immersed in a feeling of energized focus, full involvement, and success in the process of the activity. . . .According to Csíkszentmihályi, flow is completely focused motivation. It is a single-minded immersion and represents perhaps the ultimate in harnessing the emotions in the service of performing and learning. In flow, the emotions are not just contained and channeled, but positive, energized, and aligned with the task at hand. http://en.wikipedia.org/wiki/Flow_(psychology) 

I’ve long appreciated the work of this theorist, yet often find his material difficult reading. His contributions to the field of psychology include a plethora of books and articles. I used to draw one of his charts in my workshops showing how flow balances between anxiety and boredom. It seems to me that if we are too relaxed or bored we don’t achieve flow; yet we don’t get there when we are too pressured or anxious. I feel that the need for one or the other (boredom or anxiety) probably depends on the individual. For example, do you work better with or without some degree of pressure? Learning what helps us reach that state of flow can help us achieve productive energy and creativity. If you have interest in this idea, you might enjoy reading some of the work on this topic.

Over the weekend my state of mind had been too far toward the anxious side and I wasn’t able to create anything that I thought was pleasing. By yesterday, however, I managed to relax enough to find my flow and the designs began to move ahead faster than I could work. While some of the photos below show rather plain pieces, they do represent a work that contributed to a feeling of accomplishment. For me, accomplishment leads to increased productivity and flow.

lapis and silver

          pearl and jasper


yellow

               silver and blue


pendant

                  IMG_2378


The top row of pieces needs a bit of explanation. The lapis necklace on the left is different enough that it may need to grow on you. The sterling silver form is soldered and wears a small cabachon and tiny silver cup flowers on one side. Balancing produced quite a conundrum, but I eventually made the bead links on silver wire and added the sterling silver rounds and spacers on another piece of wire below them.

I do believe that I must have strung the jasper piece on the top right at least five times while attempting to get it lay just so. Now it sits very nicely on the neck. The photo doesn’t allow you to see the tiny bit of orange in these beads.

The last two photos may end up as one piece. I may replace the pendant on the bottom right necklace which seems pretty bright with the cab pendant on the left. I’m going to wait and see what the customer wants done with this one.

Since flow is not  always easy for me to achieve, I’m thankful when it comes. My problem is waiting for it to get here!

The Messy Metal Smith

I wonder who it could be. Do you remember reading the August 11 entry describing how the pickle ate my pants? Well, today, the flux helped turn them white. I was happily spending some uninterrupted time with the torch when my bottle of Aquiflux fell off the table and rolled to some far away place. Oh well, I thought, I can just use the new paste flux sitting right here beside me. I hadn’t used much of it previously, but today seemed like a good day to give it a workout. All was well and I completed a ring with a bezel and two butterfly pendants before I noticed my pants. No, there weren’t any new holes in them, but one leg was practically covered in something white and powdery. Flux! Then I noticed that my hands had a good deal of dry flakes on them. Flux! The paste flux actually worked fine for my projects, but I’m not sure that I like the extra mess. I tried to take a bit more care with it on the rest of my projects, but when I went upstairs to clean up, I noticed I also had white spots on my nose and cheeks. Now you tell me how in the world I managed to get flux on my face. I guess you can just call me the messy metal smith.

By the way, I’m dangerous too. Last week, I managed to reach across the extinguished torch before it cooled. My arm came in contact with the torch and I have quite a nasty burn on my inside arm. It was becoming infected until I started flooding it with hydrogen peroxide. It appears that I’ll live to torch another day. Scars are good . . . right?

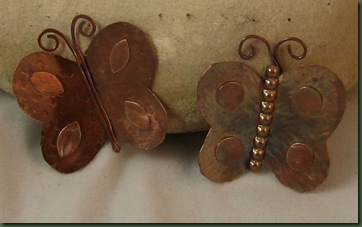
In spite of all the mess and the bandaged arm, this was a fairly productive day. As you can see from the photos below, I ended up with two sterling silver rings, two butterflies and two star earrings.

butterfly

I cut the shapes on the butterfly wings with my disc cutter and then sweat soldered them onto the copper shapes. The center piece on the right flutter by is made from a beaded wire.


The sterling silver ring sports a lapis stone that I put in a premade bezel cup. It has a little sterling silver flower sweat soldered on the side.

ring blue

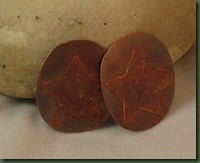
I used some very thin copper sheet for the star part of the earrings (or pendants) below. I’m trying out a paper cutter that cuts a star to see how long it will last with this type abuse. It does a fine job of cutting and I’ll just wait and see regarding its life. I appreciate the friend who shared this technique with me. I’ll let you know if it appears to be worth the relatively small investment in decorative paper punches.

star         ring

The last ring shown is from the new Kim St. Jean book mentioned in another entry.

I hope you aren’t as messy as I am, but I DO hope you’re having as much fun as I am! Does that make it OK to be a messy metal smith?

Layering

The cold snap that has fallen upon my warm climate location has resulted in considerable layering of clothing. Since we are not used to frigid temperatures, I don’t have wool sweaters and warm leggings. Yet, I learned last week that if you just put on enough layers of what you do have, warm cometh! There is, obviously a concomitant issue: how many layers can one person don and still be able to move around?

Having successfully layered my clothing, I felt the need to explore the layering of metal. Most of my metal pendants are pretty large and I was attempting to created something a bit smaller.

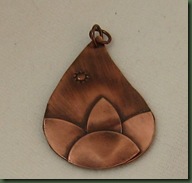
lotus The first pendant shown, all in copper, happened accidentally when a small piece of copper I had cut from the middle of a circle fell upon a larger piece. This is a really good reason (or excuse) for not keeping the workbench too neat and tidy. The layers of the pendant are soldered together. I like this pendant, but kept hearing a little voice in my ear saying “where’s the gemstone?” For the next pendant, I added another parameter. I wanted something small, layered and with a gemstone.

silver pendant

Finally, I wanted one more addition to the pendant factory process. . . sawing. I was gifted a saw for Christmas and have had minor success with it. Sunday it was time for real saw action. Sawing is not easy and I can see that it will take considerable time to refine this technique. Yet, the organic look in the next pendant is a start. the problem statement for it was “in what ways might I combine sawing, layering and a gemstone in a metal pendant?”

copper pendant

This one, too, is interesting, but I didn’t achieve smaller . . . I left that term out of my problem statement and it didn’t happen. Actually, I do not think I’m ready to saw “smaller” at this time.

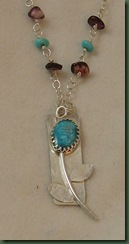
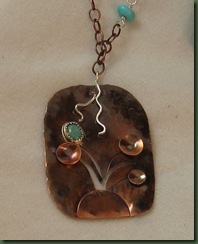
I found the most difficult part of the process for the pendant with gemstones pertains to the order of events. On the silver pendant, I soldered the bezel to the sheet metal first and then attached the wire stem and finally the leaves. I tried to change this order on the last pendant. I soldered the small copper pieces on first and then when I heated the metal during the bezel soldering process, the copper pieces fell off. That, of course, makes sense to me now, but I guess you learn by doing.

Today, I’m interested in trying some mixed sheet metal in the pendants. I’ll let you know if that process is worth sharing. The next time you put on all the layers of clothing just pretend you’re a gorgeous pendant!

Ring a ding ding . . .


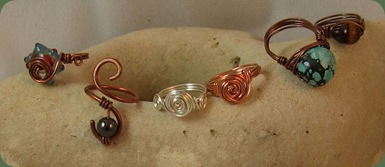
rings1

I think it’s interesting to discover what others believe about gemstones and/or specific shapes that may be used in jewelry design. I’ve enjoyed writing for Magpie Gemstones and researching information pertaining to the properties of various stones (http://www.magpiegemstones.com/properties.html); but today I became interested in whether there might be symbolism behind the rings many of us wear. Of course, I understood the symbolism surrounding wedding rings, having worn the same one for over 42 years; yet, I didn’t realize that some believe this ring is on the third finger of the left hand because this is closest connection to the heart (flutter, flutter . . . and a collective “ahhh”).

Some people, married or not, however, wear rings on other fingers and I wondered if these also have symbolism. While researching, I began to wonder if the ring I wear on the third finger of my right hand was symbolizing something to others that I had not intended. Therefore, I had to dig deeper.

I’m a pretty stubborn researcher and always try to verify the information in one source by finding the same information in at least one or two other places. Based on that requirement, here’s what I learned. Some cultures do believe that the finger on which a ring is worn is indicative of something about the wearer. This may vary by culture, but the following seems predominant:

Thumb: A person who wears a ring on their thumb can be telling the world that he/she has strong willpower, is self assertive and insists on freedom and independence.

Index: If a person wears a ring on the index finger, the wearer can be emphasizing personal assertiveness and ambition. Supposedly, that person makes up his/her own mind.

Middle: Wearing a ring on the middle finger is purported to symbolize strength and balance.

Third Finger: A ring on this finger tells the world that the wearer is creative, optimistic and has a sense of well being. As previously mentioned, this finger on the left hand commonly holds the wedding ring. 

Pinkie: Wearing a ring on the pinkie may be telling folks that the wearer considers himself/herself appealing and easily expresses things to others. This finger wears the relationship ring. 

. . . and here I thought people just wore a ring on which ever finger it fit! That’s what I’ve always done; if it fit and felt comfortable, I wore it. Now I’m going to have to pay attention to which finger I have a ring on. But wait, there’s still hope. Is it possible that other people, like me, do NOT know the symbolism just described? If so, then I may as well wear those rings on any finger I choose. But, just in case I want to SAY SOMETHING by wearing the ring on a particular finger, I’m well prepared with the rings I have made this week.

I learned to make the rings in the picture at the top at a wire workers meetup where my friend was kind enough to share her expertise. You can check out Sherry’s Jewels on her Artifire site (http://www.artfire.com/users/sherrysjewels) Directions for the rings at the bottom come from Kim St. Jean’s new book, Mixed Metal Mania. She calls these “old bones” rings, but I just call them “earth” rings.

 earthy rings

The final photo shows a turquoise ring that I am just finishing. It still needs a bit of work. This ring just happens to fit my index finger; so when you see me, be sure to realize that I’m ambitious! In the mean time, maybe you should go try on your rings and figure out if they display any symbolism.

ringturq

By the way, if you need any rings, I think I know where you can get some!