All posts by Karen

Everything’s Comin’ Up . . .

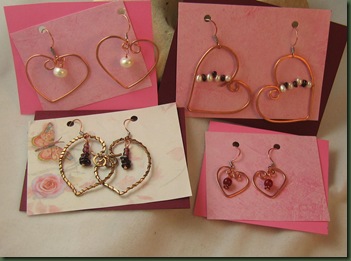
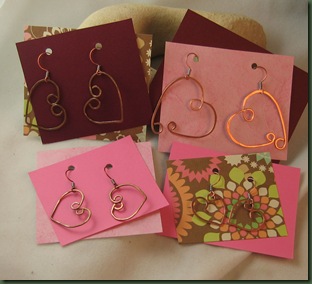
. . . hearts! Many of us have struggled this week to get back in to some semblance of a routine post holiday. While pondering this difficulty, I realized that the stores are beginning to thinking Valentine’s Day. This always sneaks up on me because January is so full of family birthdays. Well, not this year! I’m going to be ready for Valentine’s Day.

I’ve spent some time the last several days making heart earrings. heartplain First they were quite plain, although I tried to give them slightly different shapes.

heartsplus Next, I fancied a few pair by adding beads. Pearls, garnet chips and something red helped these get dressed up.

heartsplotch1Finally, last night I got a bit carried away with the alcohol inks. (No! I wasn’t drinking them.) They adhere nicely to the copper and polka dots seemed to add a little twist here. I also did a pair with double hearts soldered to each other, but that photo refused to work.  Now I’m thinking of all the shapes that could handle these polka dots in various colors. Let’s see there are butterflies and balls and . . .

Several of these could easily be turned into pendants or minified to become charms. I can see a necklace in particular out of the pair in the first picture that has pearl and garnet chips wired across the middle.

I enjoyed working these out in copper and am now considering going for it in sterling silver. We’ll just have to wait and see if anything hatches with that wire. Perhaps there’s more to come.

Why Craft?

Many years have ebbed by since I last researched the value of arts education. It used to be of particular interest to me when I taught piano to very young children, four years old and up. At that time I consumed the research that justified how this training can affect healthy brain development. This week, however, during a reading raid on the magazine section of the local book store, I again became intrigued with some research. This time my interest peaked when examining a copy of Craft, a magazine produced in the UK. Thumbing through this publication, I landed on an article in the Archive section written in 1997 by Mike Penn. This is a reprint of “A New Vision in the Making” which has been retitled “What Has Craft Given Us?

The article discussed and commented upon information gained when the Crafts Council in the UK sponsored a project that explored and defined craft learning. (http://mikepress.wordpress.com/2007/03/16/craft-research-2/) While there was a pedagogical bent to this article that seemed to question how institutes of higher learning approach craft education, I felt it could engage thought among those of us interested in craft as a hobby and/or vocation.

One quote in this article grasped part of my belief in the value of craft for all of us. While I probably would not agree with much of what Harry Braverman, who was an American Socialist, wrote, I do appreciate the following quote:

“We think of craftsmanship ordinarily as the ability to manipulate skillfully tools and materials of a craft or trade. But true craftsmanship is much more than this. The really essential element in it is not manual skills and dexterity but something stored in the mind of the worker . . . it is the knowledge which enables him to understand and to overcome the constantly arising difficulties that grow out of variations not only in the tools and materials, but in the condition under which the work must be done.”

I certainly enjoy my craft, but other than a source of joy and a small income, what does it do for me? That can largely be summarized by the term “problem-solving”. Craft makes me solve problems and inherit in problem-solving is creative thinking. Ok, you are thinking. How can solving the problem of something like how to solder a little metal angel so that the solder doesn’t spill onto her copper body possibly be of any value other than the singular product? How does solving a jewelry design problem help in the grand scheme of my life?

It’s a matter of brain exercise. We all would most likely acknowledge that in elementary school we became faster at learning to add through repeated practice of the addition facts. Remember those wonderful flashcards? Did you try to be the fastest in your class? Problem solving is the same. We’ve got to practice it to become proficient. I choose to practice problem solving through craft. At times the problem is as simple as “what am I going to do with this expensive piece of sterling silver sheet metal I purchased?” Yet, each time I creatively solve a problem, I become a little better and a little faster at the process.

The issue is not whether problem solving in craft is valuable, but rather whether it is transferable. Does the type thinking involved in solving the problem of what to do about the solder on the metal angel transfer to problems in other areas of life? For some the transfer is automatic while it may not be so for others.

I believe that those who succeed at transfer are either encouraged and taught to transfer this learning or consciously work at it. Craft pedagogy, including local jewelry classes or workshops at bead festivals, could easily encourage problem solving transfer. Many of these already do encourage creative thinking and problem solving is usually inherent. As students, we can look for these experiences and appreciate those instructors who value craft for something beyond the product.

Don’t get me wrong; the product it usually why we craft. Yet, I believe we should also value the process and the brain stimulation it offers us. In a phrase: KEEP ON CRAFTING!

Nuts and Bolts

Today is the first day of the new year and it’s time to get back to the real world. For my little jewelry business that means getting back to the nuts and bolts of producing. January, for me, always means “try something new” during the lull when my boutique customers are clearing out rather than stocking up.

This year my initial “new” something comes in the form of Dream Kits. The name was suggested by a friend and it represents a package of metal components that may be purchased as a set. Kits are highly popular in other avenues of bead work. For example, one can easily find seed bead kits that contain all the components needed for a particular design plus the tutorial for making the piece. There are also kits for making chain maille designs that include lots of jump rings in the size required for the included pattern. Yesterday, I listed a couple of handmade chain kits on my etsy site (www.dreamcatcherdesigns.etsy.com) and I’ll be adding more as I produce them.

kit1                kit21

My thought with these kits is that some excellent designers don’t want to do any wire work, yet would enjoy using handmade components in their pieces. I enjoy making these and can offer a good product. We shall see if there are any takers.

The next kits are going to also have sheet metal components. These may be needed since working with metal requires so many tools and not every one wants to make that investment. I would greatly appreciate your thoughts and suggestions about what types of kits are needed. Do you think it would be better to offer the components separately?

I also wrote a new bracelet tutorial yesterday which will soon be ready for consumers. This flower cuff bracelet tutorial is in the proof reading stage and should be on etsy later in the week.

flowertut1 I’m also trying to learn to use a jewelry saw – currently a slow-go process. My first piano teacher told me to always begin with technique. It appears that the technique of sawing will take some time and practice, practice, practice. I guess its like working on scales on the piano every single day. Practice usually does produce. I find that this practice also requires patience. (My teacher forgot to tell me about that!)

All in all, the nuts and bolts of January 2011 are starting to come together and I’m looking forward to the year’s journey. How about you?

The Little Blue Pony: A Christmas Tale

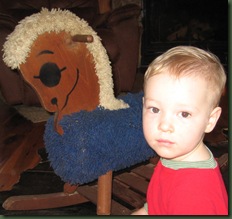
We were a very young couple just starting our lives together when we first saw the little blue pony. He sat in the store window just waiting for someone to take him home. We had already purchased Christmas toys for our little boy who was about three years old, but the pony just kept calling to us. Finally, one day we went in the store to look more closed and see if we could afford the little fellow. He had even more personality when we examined him closely, but his price tag made us turn away. He just cost too much money and we had recently purchased our first little three bedroom home. The toys we had hidden away would just have to be enough.

As Christmas approached we both tried to forget about the little blue pony. Yet, his store home was right near our grocery store and we had to pass by his window often. Finally, on Christmas Eve day, my husband suggested we take one last look and see if someone had purchased the little blue pony or if he had been marked down. But, there he sat waiting, waiting, waiting for some child to take him for a ride. That year there were no last minute Christmas specials at the store where the pony lived, but we bought him anyway. We just couldn’t leave him alone to watch as other lessor toys found their way under children’s Christmas trees.

image

Brad, Garland, TX, 1973

So, on Christmas morning about 1973, the little blue pony found his home under our Christmas tree in Garland, Texas. As the years ticked by, he was well ridden by our little boy and then his sister who was born much later.

image

Kim, Centerville, Ohio, 1977

It seemed, however, that my husband and I loved that pony even more than our children did.

One year, when we lived in Alexandria, Louisiana, I was trying to hurry along with my Spring cleaning and put the little blue pony in the stack of belongings that went to the New to You thrift store. When my husband found out I had donated that pony, he went right down to the store and got him back. What was I thinking? Since that time, the little blue pony has moved with us four times, but remained safely stored without worry of going again to any thrift store.

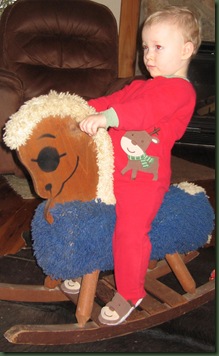
This week, the little blue pony was pulled out of storage and cleaned. It’s amazing just how good he still looks. Except for the teeth marks on his rockers where one of our puppies chewed the wood, he might pass for just a few years old. No one would guess that he is 37 years old. His revival marks the passage of time as a new little boy takes hold of his reins. The daughter, not yet born when we got the blue pony, has brought us a grandboy to pet and rock the little blue pony. It appears that after all these years, the pony we couldn’t afford can still find his way into our hearts.

Ghorse1                 Ghorse2

Charming: Another Word for Sharing

I have previously mentioned a group with which I meet once a month. We get together and share ideas about working with wire and other materials for jewelry design. Although I’m not a “joiner”, I really enjoy this group and we’ve met together for over a year without any big arguments. That’s probably because we are a “faux” society. We have no rules, no officers, no dues and no big events to plan. This is probably why we get along so well.

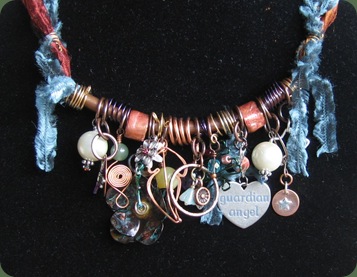
We decided to exchange charms for Christmas. Rather than the usual exchange by designers where participants bring one thing and leave with someone else’s piece, we brought a charm for each person. I walked away with 12 different charms. Some were wired while others were soldered creating an array of very different looking objects. It was fun to see how each person approached the task of making charms in her own unique way.

I used the charms on the necklace shown here. They hang from copper tubing purchased at the hardware store. The charms are separated in a few places by larger copper tubing cut into small links. Without these pieces and the extra wire wrappings all the charms sat right on top of one another and refused to show their personality.

charm from Faux The tubing hangs from several types of fibers including yarn, silk cord and ribbon. I also attached a small copper chain. These hang down in the back where the closure is a handmade hook and oval. You may have seen something similar to this piece (minus the wonderful charms) in a recent beading magazine.

It’s fun to wear this piece and look down at the charms. I know who made each one and the piece reminds me that we are all so unique; yet, we can come together and make a beautiful whole.

After the experience of sharing with this group and creating this piece, I read about a group where each person contributed to necklaces that traveled around the world. The latest Belle Armoire Jewelry, Winter 2011 shares Around the World: A Necklace Round-Robin starting on page 24. I gleaned from the article that each participant started a necklace, creating several inches, and then mailed it to the next person. Individuals added specified lengths to each necklace when it arrived. The gals also kept a blog or journal about what they were adding and how it was created. In the end, each person received a necklace that had been “around the world” having traveled to several different countries. Pictures of these necklace show them to be as eclectic as mine above.

There are so many ways to share this time of year. Christmas, hopefully, brings out the best in all of us. The simple sharing of your talent is priceless. Whether you share a visual art form, the gift of gab, the sound of your music or a simple glow that makes others feel good, we all seem to feel better when we give and share.

Yesterday, as I left the nursing home where my mother resides, one of the aides waved at me and said he hoped I got everything I wanted for Christmas. You know, I couldn’t think of a thing I really wanted except healthy and happy friends and family. When I told him that, he knowingly smiled and understood. I wish the same for all of you.

Merry Christmas!

Tutorials

tut2 I truly enjoy writing. After I finished my dissertation, I thought I might never like writing another thing, but that didn’t last long. My mind constantly chatters and the words seem to flow more clearly through my fingertips than my mouth. The few books I wrote for teachers were joyful to do because they helped me formulate better teaching procedures for myself. Then, there have been those countless articles I’ve written about parenting, creativity, gifted children, early childhood education, etc. Retiring from my consulting business, I felt all that writing was behind me. Therefore, when my son first suggested several years ago that I begin a blog, I just shook my head; yet, here I am writing a blog! Lately, I’m also truly enjoying writing very short articles for Magpie Gemstones (www.magpiegemstones.com). Now, I’m trying something new. For a couple of months, friends who were unable to attend the little workshop I held on how to make a dimensional bracelet have asked me to write a tutorial for it. If you’re not in the jewelry making arena, you may not realize that tutorials are popular and contain both directions for making something but also provide a large number of pictures showing the process. After telling people that I “would not” write a tutorial because it would be too much like writing an educational handout or course syllabus, Sunday I wrote one! http://www.etsy.com/listing/64285495/dimensional-cuff-bracelet-tutorial The tutorial is for the basic bracelet shown in the picture at the top. It features layers of wire on the top part allowing the designer to create depth with the gemstones. You can see it better in the following pictures of another dimensional bracelet made using the same process. Although I had typed the written instructions on Saturday, I worked on this tutorial all day Sunday in order to take and add the 40 or so photos. Who knew it would take so long? brace3          brace2 My guest “editors” have read the tutorial and other than a couple of mess-ups, it seems to be ready for use. Perhaps someone will enjoy making it after the holidays when life slows a bit. I’m anxious to see what variations other designers develop for this basic process. As for the writing . . . creating a tutorial was not nearly as interesting as the other types of writing I like to do. Will there be more? I don’t know as this depends upon the reception for this one. My questions is “does anyone else benefit from or enjoy the results of this type writing?” If so, perhaps there will be more tutorials from this pen. The real learning I take from this is that I had better quit saying I’m NOT going to do something. Eating my words is not a pleasant meal; I’ve got more interesting things to do!

Collaborative Learning

The title of this post easily rolls off my tongue and down to my fingers as I type. It is not new to me or other educators and has been predominant at the forefront of teaching since before the push for cooperative learning in the late 1980’s and 1990’s. Personally, I’m very much a loner and hadn’t thought much about the need for collaborative learning until yesterday when a news feature about Hole-in-the-Wall Education Ltd. brought it to mind. Information from the website for this group http://www.hole-in-the-wall.com/index.html  follows:

“Hole-in-the-Wall Education Ltd. (HiWEL) is a joint venture between NIIT Ltd. and the International Finance Corporation (a part of The World Bank Group). Established in 2001, HiWEL was set up to research and propagate the idea of Hole-in-the-Wall, a path-breaking learning methodology created by Dr. Sugata Mitra, Chief Scientist of NIIT. . . . [it} was first tested in a slum in Kalkaji, New Delhi, in 1999. The experiment was replicated in two other rural sites in the same year. The first adopter of the idea was the Government of NCT of Delhi. In 2000, the Government of Delhi set up 30 Learning Stations in a resettlement colony. . . . “

At first I scoffed and said to myself, “this is nothing new.” Yet, I still listened. Finally, I gleaned from the news story that Hole-In-the-Wall revolves around the idea of four or five students gathered around one computer trying to learn something or answer a specified question. This minimalist approach to computer learning gets much of its punch from the fact that there is only one computer. The students must communicate and share ideas rather than working independently. This certainly isn’t a new idea, but many of our learning arenas have gotten to the point where it seems each and every student sits at his or her own computer terminal and communication, if it exists regarding the learning, flows through cyberspace.

Incubating about the above information, I wondered why I’m not applying it to my current fascination with design work. Where is my think tank? Where is my hole in the wall setting? Consider the value of designers from various facets of work coming together to answer a question, solve a problem and/or brainstorm new uses for materials. We often do these things independently, but do we spent enough time engaged in collaborative learning? I, for one, do not.

I do see collaboration through various chat groups, but find this usually amounts to a question followed by responses from others about what they have used in a given situation. This is not collaborative learning. This is one person telling another what has previously worked. In a think tank, ideas come together to create something new to everyone. From intensive creativity training, I know that an ultimate idea can be garnered from simply watching the body language, eye movement or vocal inflection of another person, something we can’t get from computer chat. Often, we don’t even connect the thought with that person, yet it comes to us just the same.

Many designers are expertly engaged in social networking via the computer. It is an essential part of our business. What might happen if we stole two or three hours from this once or twice a month for collaborative design work wherein we were not trying to learn or make something, but simply trying to develop new ideas or techniques? This collaboration would be process based rather than outcome based. It would be a designers think tank. It could be an acrylic artist, a sculptor, a wire worker and a metalsmith. It might be a seed beader, a polymer clay artist, a fiber artist and a scrapbooker. It could be any combination of people interested in collaborative learning.

At a minimum, a designer think tank would provide a thinking challenge and brain stimulation. Perhaps a few dendrites would strain to branch and some of us would be removed from our comfort zones. I know that to stretch and grow in my work, I much be a bit uncomfortable and experience a little mental pain. I need to get into a situation where I don’t readily know the answer. Perhaps some hole-in-the-wall design collaboration might just do the trick. What do you think?
Swirling

I thought the wind would take all of our Fall leaves this week, but a few hardy souls remain. We’re not especially used to the blustering breezes nature just sent us, but the movement of the trees outside my studio window seemed to symbolize the rushing of people as they ready for the holidays. Of course the people are gathering as the trees are shedding. I hope the gathering brings good fortune to our local merchants.

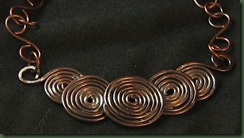
I’ve been doing a bit of swirling myself this week – round and round and round. I saw a pendant made of three wire swirls in a catalogue my friend brought me. The swirls graduated from large to small in a straight line as they layered at the edge of one another. Of course, I couldn’t just make that one, mine would need to be different. Eventually, my pendant became a necklace composed of five circle swirls. swirl1

These swirls are soldered together and finished with a dark patina and a tumble. I liked this look and decided to enlarge it. Then I learned that often “less is more”. The larger necklace has the same number of swirls, but they have bigger diameters.

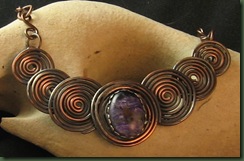
Before starting this piece, I didn’t realize how much more difficult it would be to keep the rounds held together. swirlchar2 I kept adding solder to these circle hoping to connect the parts of each round. This, of course, led to solder showing on the front. Hmm . . . now what? The dark patina on the first piece did a nice job of covered the solder, but didn’t do as well on the larger piece. Also, the swirls continued to want to pull apart. Finally, I soldered a wire to the back of the necklace alleviating this problem.

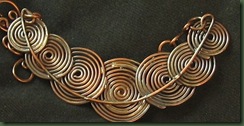
swirlcharback


You can see the solder still showing in this photo. Since it was also showing on the front of the main circle, I soldered a bezel and placed a charoite cab (from magpiegemstones.com) on the front.

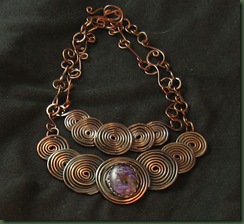
Hurray! Following one last patina that required extra Q-tip applied liver of sulphur in spots to cover that stubborn solder, the piece went for a tumble and was complete.  The last picture shows the different in size between the two necklaces. Both of these are fairly heavy and used a good deal of wire. This was fine in copper, but I think I will curtail my plans for making this in sterling silver until prices for this wire go down. Do you think that will ever happen? It’s possible that the only way I’ll see this in silver made from my studio is to let that solder flow on the top!

swirls for twoThe wind blows gently today, but bodes of cooler South Texas weather. I wonder what ideas it will bring me this week.

Obsessive . . .

. . . chaining. An obsession is an idea that cannot be gotten rid of by reasoning. I’ve created so many designs with chain in the last week that I’m wondering if this is an obsession. Most of us largely consider an obsession to be negative, but I’m pretty pleased with the new necklace designs. Do you think an obsession could be positive?

The chaining phase I’m in initiated with a piece that has already found a home, but it led to two necklaces that have the same designs, but different stones.

cascade1

 pearl1


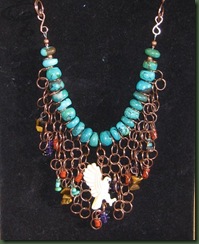
Next, I made a couple of variations on this style. The first one featured faceted black onyx beads and it went quickly to its new owner. This second piece is done in turquoise with a bone eagle and other stones. You can see that all the wire components of these pieces are handmade including the headpins. I had not intended to make the latter, but on the evening that I wanted to attached the gemstones, I was completely out of headpins. So, I made a date with torch and balled them myself. I’m still facinated with how you can hold a piece of wire in the flame and a little ball forms and crawls up the wire. I lost a few of these balls as I was watching them climb the wire. They got too big and fell right off! I think I finally gave in on the turquoise piece and went to the store for “boughtin” pins.

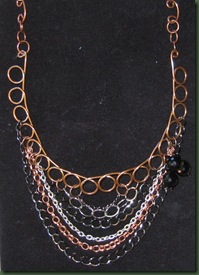
chain2Eventually, I grew weary of making jump rings and tried a different design with purchased chain. Also, I wanted a mixed metal look.  I was attempting to achieve a “no droop” effect with this piece and made a looped half neck ring to stabilize the design. I attached a handmade chain to finish it off and give it more motion. There is a cluster of faceted black onyx beads on one side of the necklace. I don’t know if this will be as popular as the pieces with gemstones, but I think it has lots of potential. Gemstones or pearls could easily find their way on to this piece.

multi1

So do you think I’m being obsessive with the chaining? Probably! But, I choose to think I’m just putting in a lot of good practice to improve my skill in making chains. I don’t think I need to go to the doctor yet!

By the way a couple of these pieces are in my etsy shop if you want to check them out.   http://www.etsy.com/listing/63457769/turquoise-and-copper-chain-necklace

Crisscrossed

The internet’s free dictionary says that crisscrossed means  “. . . To move back and forth through or over. . . “  It makes me think of a snake swimming across our pond in a serpentine pattern or Dixie, our blue heeler (cattle dog) crisscrossing behind a bunch of cows as she tries to get them to move in the right direction. She just gets one side of the bunch going and then has to cross behind them to the other side to get those stranglers moving. By going back and forth, the cows eventually go the right way.

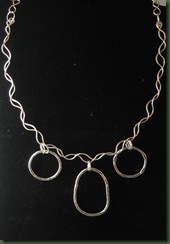
There certainly are some beautiful jewelry designs that feature crisscrossing strands or wires. I worked with this idea and hope to be on the right track. I wanted the waves of these crisscrosses to be consistent, but found that especially difficult to construct. Although I measured carefully and worked with care, when I put the two separate pieces of wire together and curved them for the neck pieces, they became a bit whoppy jawed.  (Is that an Oklahoma term?) Alas, I finally just went with that look and once again called the work “organic”. I never actually thought of sterling silver as organic, but today it is!                              silver

You can grasp the idea of the crisscrosses more easily by observing the following pictures. The close up of the silver shows that the main piece is attached to my hand made chain.  silver2

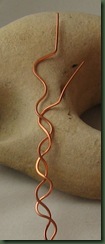
The copper wire in the other photo shows a better view of how the two pieces of molded wire crisscross together to form the neck wire.

copper wire

I made the silver dangles from heavy gauge fine silver wire using the torch to fuse each ring. I then hammered and textured the pieces. I tried putting on more dangles, but three turned out to look the best.

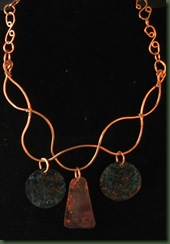
The second necklace shown here displays larger crisscrosses. It wasn’t what I envisioned, but I do like the shape. The dangles on this piece have either blue or red copper patinas made with household products. I’m still debating whether to leave them on or take them off as the piece looks fine without them. What do you think?

copper

Crisscrosses have many possibilities for use in designs and they present me with a nice new challenge not only for necklaces, but also earrings, bracelets and pendant wrappings. Look for more of this design in another entry. If you don’t see any in a few weeks, you’ll know they just didn’t work out. I believe it’s OK to take a challenge and fail. You just have to try!