Category Archives: Techniques

“. . . I’m Gonna Let it Shine”

Do you remember that song from Sunday School? “This little light of mine. . . I’m gonna let it shine.” I was reminded of it as I polished some etched copper yesterday. A generous friend provided me with two types of polish and the dremel parts to use them. It’s a rare thing when someone brings you everything that you need for a task, but this friend did just that. Was she worried that I would never get to it if I had to go hunting for parts or was she just especially nice. I’m sure NICE is the key adjective here.

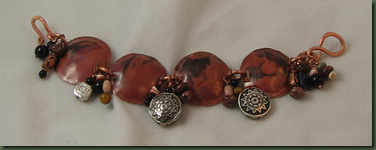
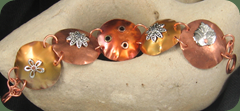
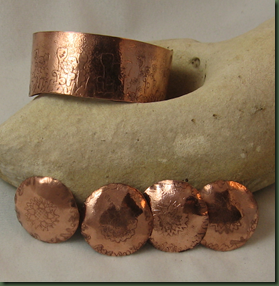
Having everything I needed, I shined and shined! The picture of a bracelet and some copper circles doesn’t really do justice to their shine. The dark shadows hide a bit of the glow, but you can get the idea. It was actually relaxing, listening to the hum of the dremel backed by the whir of the tumbler containing other pieces. Relaxing until . . . the bark of the puppy informed me the noises weren’t all that pleasant for canine ears. shinyI etched the bracelet with a row of flowers at the bottom and a snail and dragonfly amongst them. The circles have a flower in the middle and some decorative markings around the edges. Following a light patina in liver of sulfur, they were tumbled and then polished. I’m not sure yet what the circles will be. (perhaps earrings or a bracelet) I’m incubating on that one. Any suggestions?

Unfortunately, today the only shining I’m doing is on my dirty house. It appears that between my dust producing design work, the dogs (who aren’t really house animals) and the yuk from this week’s cattle work, the house has been the real loser. I think the word for today is “attack” so it can shine, shine, shine.

Jewelry Vacation

Since I wrote about summer camp in the last entry, why not vacations today? Summer also reminds me of past vacations when the children lived at home and the break from school was “our time”. I can’t help but wonder if some families are doing as we occasionally did by taking their vacation at home. When we did a home vacation, no one worked and I didn’t cook. (Was that the best part?) Since we moved reasonably often, home vacations gave us the opportunity to really explore the area in which we were living. One week while living in the Dallas area, we visited the Children’s Museum, Museum of Natural History and the Aquarium among other things. These were short relaxing jaunts and we had the time to enjoy each one without hurrying off to the next big adventure as was often the case on an out of town trip.

Yesterday, I thought about a jewelry vacation. It sounds like this could mean relaxing and taking a break from designing jewelry, but that wasn’t the case. I took a couple of pieces of jewelry on their little vacation. That term could be a misnomer since it was more like a road trip, but the pieces did go somewhere! As I’ve mentioned before, I like to wear my new designs to see if they will hang correctly, feel good and also to see if they get noticed. red bracelet The bracelet shown here is made of copper that was torched and then polished. I added dangles on the jump rings linking each circle. Although I spent what seemed like an enormous amount of time filing and sanding this piece, it still developed a problem on its vacation. (This is not unlike some children – excluding mine, of course.) I noted a couple of spots that were still a bit rough when I used my wrist. It was good to locate these and fix them before marketing the piece.

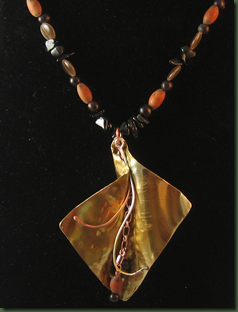
brass necklace The necklace in the photo also got a vacation yesterday. It is made of brass with copper and silver wire and copper chain. This one did well and only required a slight turning of the jump ring to be fit for human wearing.

I think these vacation-road trips work well even if the trip just takes the design piece around the house as I work. The trips can reveal any design or technique flaws and give me a chance to make things right.

Hmm . . is that what vacations do . . . reveal your need for relaxation and give you a chance to make things right with the family? I guess I’d better think about that and practice the latter a little even before our vacation. My husband might really appreciate that and It certainly couldn’t hurt!

Coloring for Fun

Remember when getting a new box of crayons was exciting? Did you like it when you were old enough to get that big box of 48 colors? I always liked to color, but not necessarily in a coloring book. Just give me a big piece of paper and I was happy. I wasn’t an artist and didn’t try to color anything in particular; I just liked to run the colors back and forth across the paper.

I don’t think I’m the only adult who still likes colors. Working as an educational consultant, I carried large containers of colors and markers that were used for various projects during the workshops. I particularly remember one group of high school teachers who got so excited about getting to color that I thought I would have to put them in “time out” to settle them down. Most of their workshops just required note taking; so coloring while learning was a treat.

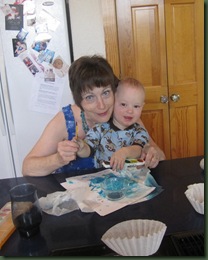
I could hardly wait for my grandson to come for this past visit because I knew he was finally old enough to work with color. We chose watercolors instead of crayons and had a great time splashing it on the paper. painting with nanaw We just worked with one color using the Driscoll Lipscomb approach from The Gift of Driscoll Lipscomb by Yamaka. In this children’s picture book, an artist gives his little friend a single color pot of paint each year on her birthday. She spends an entire year exploring it. I think it’s a good approach for little people and am reminded that “less is more”. Don’t ask who had the best time when we painted.

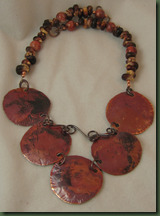
Color again burst forth over the weekend when I was torching some copper sheet for a necklace. I inadvertently left the torch on the piece too long and before I knew it, the piece was solid black. Yuk . . . another mess up. Since the piece was too hot to throw in the trash, I quenched it in water. To my happy surprise, the copper was a nice shade of red and following an hour in the tumbler it was quite useable. Who knew????? I used the red copper for a disc necklace like those described in the January 27, 2010 post. There was enough copper for earrings and I used some dried corn from an old Native American necklace for the chain. I also used Renaissance Wax to help preserve the color of the copper.  I like this kind of coloring. red necklaceStaying with the single color idea, my grandson and I did have one other experience – painting with pudding. This was even more fun than finger painting with shaving cream and with pudding, you get to lick your fingers! Yum!pudding yum  Did you know you can even finger paint your face this way?

It’s really a shame that we have to grow up. I want to go back to childhood and let someone else do the clean up. Unfortunately, I think using the torch to color is about as close as I can get to being a kid again. Yet, I could just go get my own new box of 48 crayons!

The Heat Goes On

This blog entry could easily be about the current Texas weather which is unseasonably hot for early June. It could be about my temper that continues to fire when provoked. The entry might even talk about a sports team that’s currently in their best scoring zone, but it’s not about any of those things. The pictures are a hint.

copper back bezel


               copper back bezel with sire

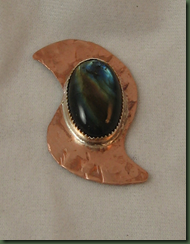
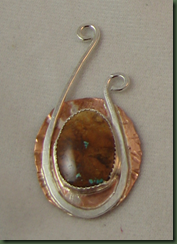
I’ve been out in the HOT garage using the HOT torch to put the heat on some silver and copper. Learning to make sterling silver bezels for stone cabochons has proven to be a good challenge. While neither example here is perfect, I’m rather pleased with what some good old fashioned sweat can produce. I’m mostly pleased with what I am learning. My friend showed me how to make these several months ago, but it wasn’t until this past weekend that I actually was able to try a bezel. My generous husband, with advise from my son-in-law, got me a new torch for our anniversary. Currently, I much prefer tools over diamonds and I think my guy finds tools easier to pick out.

I won’t comment on the number of bezels that I ruined as the heat goes on, but thus far, I haven’t broken the bank on too much washed silver. Luckily, scrap silver can be returned to the supplier for credit.

I’m also trying to learn to sweat solder. The connotation for this strikes me as funny if I consider how “sweaty” I’m getting in the HOT garage. Tomorrow I’m moving this little operation down into the basement mechanical room where it is much cooler. That room is made completely of concrete and brick so I shouldn’t be torching anything too detrimental. As my husband says, the first rule of using the torch is NOT to set the house on fire. I’m doing the best I can.

Swirling

Summer makes me think of home in Medford, Oklahoma, where my two best friends and I spent much of our time twirling. I don’t know if we really thought one of us would be the next great drum major, but twirling those batons was great fun. Unfortunately, I was clumsy and sometimes when I threw my baton too high and I didn’t catch it properly, it would smack me on the head. (I can hear my immediate family saying “now we know what’s wrong with Mom.”) I had a similar whacking problem when I tried to twirl two batons at once. Luckily, I survived those head bumps and lived to tell about them.

The best I can do now is swirling rather than twirling. I’ve been working with this basic swirl basic swirlfor a series of short articles on creative thinking for Magpie Gemstones (www.magpiegemstones.com). If you don’t already subscribe to the newsletter from this site, I think you would enjoy it. I’ve made all manner of different swirling shapes for the upcoming articles and tried to find new ways to use them creatively by applying fluent, flexible, original and elaborative thinking. I’m enjoying wearing a couple of bracelets that I made with swirls. These are quite plain and layer nicely with other bracelets.

bracelets two

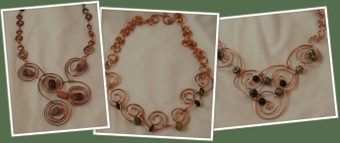
Additionally, playing with how to use these swirls in necklaces has been more of a challenge.  These pieces fit nicely and mold well to the neckline. It is, however, somewhat difficult to display them. I’ve worn a couple of these and people seem to like the way they look.

I guess I’ll stick with swirling in lieu of twirling as one of this summer’s activity. Alas, with age, we should put away childish things and I do still remember a bad bump I got across the bridge of my nose,. (But isn’t it good to stay young at heart? I wonder where that baton went.)

Two Peas in a Pod

This is a phrase most of us have heard to describe things that are very similar. When I searched the origin of the simile, I realized that most of the time we don’t hear the complete phrase, “as alike as two peas in a pod,” meaning two identical items or people. Following is information about the origin of the phrase which dates back to the 16th century.

(Source: http://www.phrases.org.uk/meanings/as-alike-as-two-peas-in-a-pod.html)

     . . . This simile, of course, derives from the fact that two peas from the same pod are virtually indistinguishable. The phrase, which is sometimes given as 'like as two peas', is quite old and versions of it date from the the 16th century. . . [the]use of 'pease' as the singular form was the norm in Tudor England. The word 'pea' came into use as the singular in the 17th century, with 'peas' as the plural. This avoided 'peases', which would have been somewhat of a mouthful. . . .

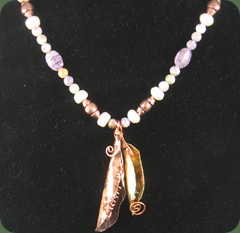
For over a year, I’ve been making a version of peas in a pod which should probably be referred to as pearls in a pod. pearl pod necklace on wire I’ve made these in various sizes from “baby peas” to the regular size shown here.

Several weeks ago, another designer who doesn’t do metal work requested that I make her a simpler and more realistic version of a plain pea pod. As I played with her order, I began creating various sizes of the newer pod using different metals including copper and brass both torched and not torched. Then I played with filling these pods with mixed metals or pearls. I also made baby pods in this newer shape and created earrings. Finally with too many pods on the work bench, I needed to do something with them. Having hung them on pearl strands, leather and neck wires, I kept thinking I should be more original. Yesterday, thinking again about the phrase and the number two, I tried mixing the pods. two pods I used one larger copper pod filled only with wire tendrils and one brass pod filled with pearls and silver. We might call this the ANTI peas in a pod since the pods are not at all alike. I will continue to play with this idea of “anti” and see what develops. I believe there are many other possibilities if I continue to work with this idea.

I wonder if there are there other phrases that might spawn ideas. Would the ANTI of them provide further inspiration? It’s food for thought? . . . yet I don’t even like peas!

Rivet . . . Rivet . . .

metal bracelet

I’ve been riveting all weekend and I’m still not very good at it. Intrigued by the look of my new bracelet design, I felt that surely if I made several of them I would get faster at riveting. Alas, this has not yet been the case. I guess this would be a good time to also work on patience. Each piece of ornamentation on these bracelets is attached with wire rivets and I do like the way they look.

square metal

The metal for the top and the bottom bracelets was “touched by fire” to give it color variation while the middle bracelet’s rectangular shapes were not treated with the torch.

Some of the difficulty in riveting occurs when the circular pieces are domed. I’m still not sure whether to dome and then rivet or vice versa. Either way is a little tricky. round metal

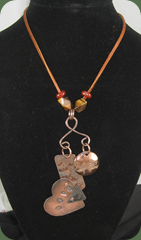
I’m also trying some pendants using the same technique. Although it’s difficult to see in the photo below, the pieces of the necklace pendant say faith, hope and love. I was trying to capture the look of a mobile when I selected the double hanger for this pendant.

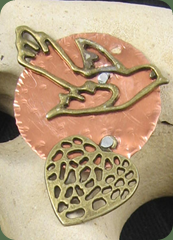
I was working on the bird pendant at our wire workers meet up and exclaimed out loud “I can’t get this bird to rivet!” The clever lady next to me said, “it’s not supposed to. It isn’t a frog.” Eventually, the bird DID rivet.

I plan to keep practicing. Keep your fingers crossed that my riveting skills improve. I think it would be pretty tacky to have to resort to glue!

hope faith


bird

New Pieces

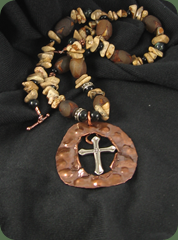
cross I’m short on time and short on words today, but wanted to put up some pictures of completed necklaces. The copper pendant with the sterling silver cross was born of my efforts to put more movement into pieces. The cross hangs from a hammered figure 8 piece of wire that allows it to swing inside the copper piece. The bumps on the outer edge of the copper were made with my doming set.

butterfly


The butterfly pendant is atop a domed and stamped piece of copper. I used the torch on the butterfly to give it a bit of color.


This piece is made of ruby zoisite (large chips) and kiwi. I used plated silver beads and added some blue rounds to the necklace. ruby I regret the color doesn’t show very well in the photo


neckwire

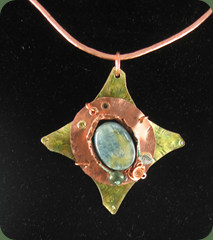
This piece took several days because I didn’t know what I was doing. I wanted to do a layered pendant and use rivets, but in the end I just have layers and fake rivets. The oval is copper and the diamond shape is brass that I stamped with Ranger brand alcohol ink to add a bit of color.


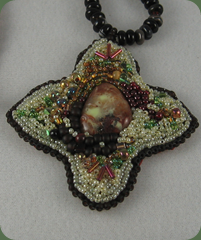
The seed bead pendant has been close to completion for quite a while. Now I can check it off the list of UFOs (unfinished objects. . . check . . . Hurray!)

seed

Using the Right Tools

I started beading ten years ago and remember spending considerable time searching for an appropriate way to store, yet have available, the many beads in my stash. At that time I had no idea that my hobby would eventually require so many different tools. While stringing beads requires several tools, working with wire and metal in jewelry design takes many more. Today, I spent most of the day rearranging my studio and realized just how many great tools I’ve acquired. Most of these came my way as a result of generous gifts from my family and friends. (Thanks!)

I’m not a big tool buyer. I try to make do with what I have, but have learned several lessons lately about how having the correct tools can make things easier. This, of course, doesn’t just apply to making jewelry, but to many other things.

For example, yesterday I visited my mother at the nursing home., I meant to take my good scissors because she has been considering having me cut her hair since before Christmas. I put it off by saying, “Let’s wait and ask your granddaughter.” This seemed to be a good idea and it worked well until after the holidays and everyone, including her granddaughter, went home. I had my nerve up to cut her hair this week, but forgot to take the needed tool – my sharp scissors. When I told Mamaw, she announced that SHE had scissors. “But Mother,” I said, “ those are for paper”. “Well, I don’t want to be butchered up,” she replied. To show her that they wouldn’t work, I took her scissors and whacked through the nearest thing I could find - a Kleenex. Unfortunately, the scissors worked great and we took on the task of cutting her hair with the old pair of scissors meant for paper. Now grey hair is not the same texture as a Kleenex, but by the time I thought of that, I was worn down and resigned to my task. mamaw
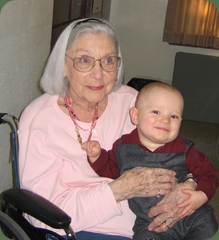
We started with a towel around her shoulders to catch the falling hair. She couldn’t see how much the towel was catching, but she could see the tiny pieces of hair that kept falling on her sweatshirt and so she kept wiggling as she flicked them off. Eventually, we removed the sweatshirt, but that didn’t help much. I hooked up her hairdryer and used it to blow the hair off of her, but she insisted that it was “too hot.” She hollered once when I got the comb hung in her earring and we had to stop to remove them. We stopped again to remove her hearing aids since she was sure I was going to cut them and another time to move her glasses (I thought this might help if I got the hair a little crooked, but it didn’t help at all. That woman has great eyes for spotting uneven hair whether or not she’s wearing her glasses.)

A couple of times I thought I was finished, but when she looked in the mirror, she found places that needed more whacking. She was sure one side was longer than the other and I was unable to convince her that her head was just leaning. When I thought I was finished, she still complained about her fly away hair, full of electricity due to the full-blast heating of the room. Thinking I could cure it, I used hair spray and announced her complete. Then she took the comb and, of course, when she ran it through her hair, it flew away again. Eventually, we agreed that we would stop for the day realizing we could always cut a bit more since she had her own scissors. I donned my coat to leave only to see her looking in the mirror and pointing to her neck. Yes, I had left a little long hair that was now showing. I whacked it off and exited quickly.

With the right “tool”, I’m sure I could have done a better job cutting my mother’s hair, but we might not have had such an interesting time. Part of the problem was not the tool, but rather my lack of expertise in cutting hair. I guess you can have the best tools in the world, but without technique and practice, you can’t be an expert.

While I don’t plan to become an expert at cutting hair, this Mamaw episode does bring light upon my wire work. I have good tools, and creative designs, yet much of my work still looks quite amateur. Those great Lindstrom tools that I bought just can’t do it all by themselves. So I guess I’ll keep asking questions of my expert friends and keep practicing. I used to try to teach my highly creative students that they couldn’t get by on just great ideas. They had to learn how to bring them to fruition and that takes practice. Now I need to practice what I used to preach.

As for my wire and metal work, I believe there is hope.  Besides, now if I need to really find out how my designs look or whether the wires are even, I’m just going to ask Mamaw, with or without her glasses.
Warm

The word for today in Central Texas is warm . . . as in try to stay that way. With temperatures lower than we have seen them in over 10 years, the men here at the ranch have raced to stay ahead of the freeze and provide water for all the animals. We’ve worried about how our cattle would get water if any pipes burst since our animals largely get their water from above-ground containers. Trying to keep the pipes warm, every water outlet has been covered and/or insulated along with other precautions. Getting ahead of any potential pipe problems, many of the animals have been moved to different pastures where natural tanks are located. In other words, warmth for the pipes has been a big deal.

The dogs and cat get to stay warm in the garage at night (in separate rooms, of course) and the pregnant dog gets to come indoors. The people at Dreamcatcher are on their own.

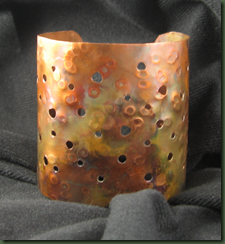
Before the coldest snap hit, I was happily warming copper with a torch outdoors. Yesterday, that activity took place in the garage, but today it’s even too cold for that. I like the colors produced by the torch on copper as shown in the cuff below. cuf fire

I also torched a flat piece of copper and then cut out earrings in the places where the colors were most vibrant. I think this may be a good process as opposed to cutting out the object and then hoping to achieve good colors. “Warming” the metal is intriguing and I’m anxious to get going with other designs. Check back for more pictures.

Of course there is another connotation for warm. What warms your heart? A couple of pictures from Christmas morning tell most of the story for Nanaw and Sir (the name my husband said the grandchildren should call him).new toys rock1

   presents at the ranch Here’s hoping you can stay warm one way or another.